Hardware Configuration - Manual Configuration - Snom
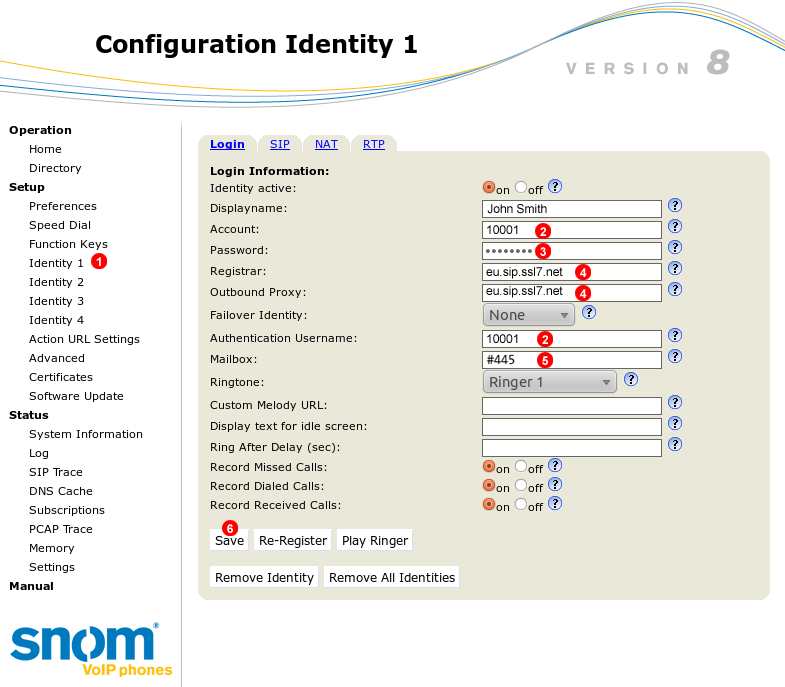
Figure 59.1 Snom manual configuration
To configure Snom phone to work with VoIPstudio service login into web interface of the device and follow steps below:
- Click
Identity 1link in the left menu. - Enter your SIP user name into fields
(2). - Enter your SIP password into field
(3). - Enter your SIP domain into fields
(4). - Enter Voicemail number into field
(5). - Click
Savebutton.
After a short while Snom phone will connect to VoIPstudio servers and you will be able to start making and receiving calls.
Snom BLF (Busy Lamp Field)

Figure 59.2 Snom manual BLF
- Select Function Keys.
- Select BLF from drop down list.
- Enter 6 Digit SIP user name of Extension to Monitor the phone will auto complete the rest of the string once applied.
- Click Apply to save settings.
Snom SIP adjustments
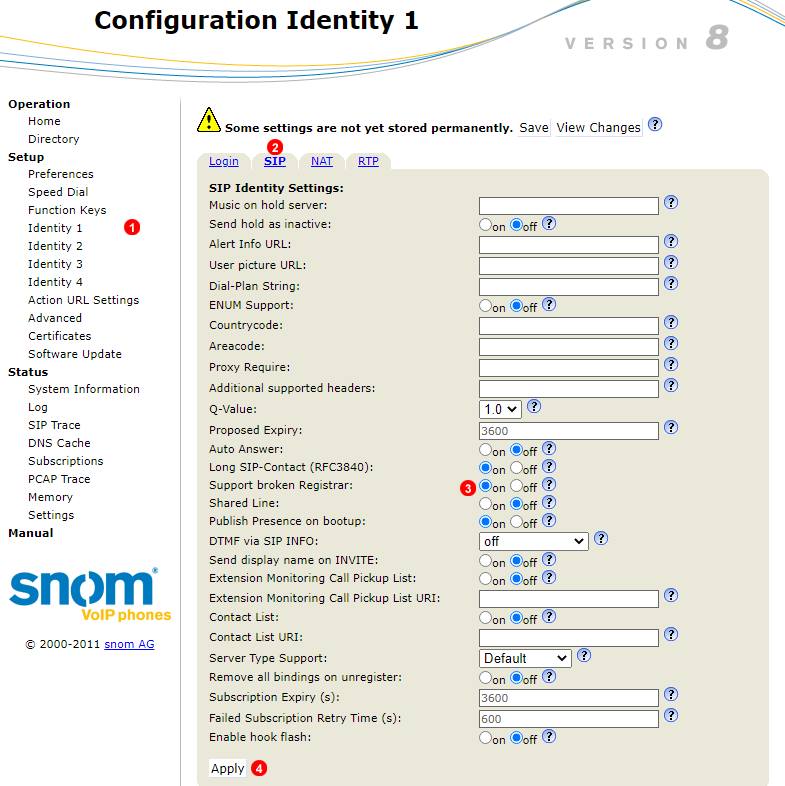
Figure 59.3 Snom SIP adjustments
It is recommended to check SIP settings under your Snom user Identity.
- Navigate to corresponding user identity.
- Select SIP tab.
- Make sure
Support broken Registraris set to On - Click Apply to save settings.
Snom RTP adjustments
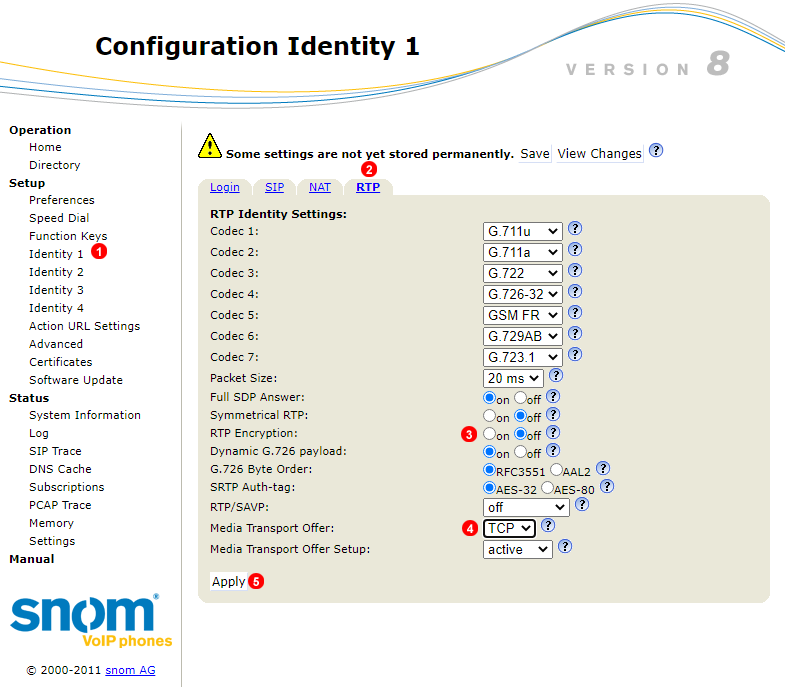
Figure 59.4 Snom RTP adjustments
It is also recommended to check RTP settings under your Snom user Identity.
- Navigate to corresponding user identity.
- Select RTP tab.
- Make sure
RTP encriptationis disabled. - (Optional) Adjust
Media transport offerto TCP. - Click Apply to save settings.
Snom Clock synchronization

Figure 59.5 Snom Time Set UP
To enable time synchronization and set proper Time zone please follow steps bellow:
- Select
Advanced - Select Network settings tab.
- Set
NTP Time serversto0.uk.pool.ntp.org - Set corresponding
Timezonedepending on phone location.