Integrations - HubSpot
In this chapter you will learn how to integrate HubSpot CRM with VoIPstudio.
Additional details about integrating third-party calling provider with HubSpot can be found in HubSpot Knowledge Base.
Configuration
If you do not have an account with HubSpot CRM, first create one here
Note: VoIP integration is available with a Sales Hub Starter, Sales Hub Professional, Sales Hub Enterprise, Service Hub Starter, Service Hub Professional, or Service Hub Enterprise paid seat.
Next log into your VoIPstudio account and from the Administration Dashboard and follow steps below:
- Navigate to Integrations (see point 1 in Figure 63.1 below)
-
Click the Enable HubSpot Integration button as per point 2 of picture 63.1 below.
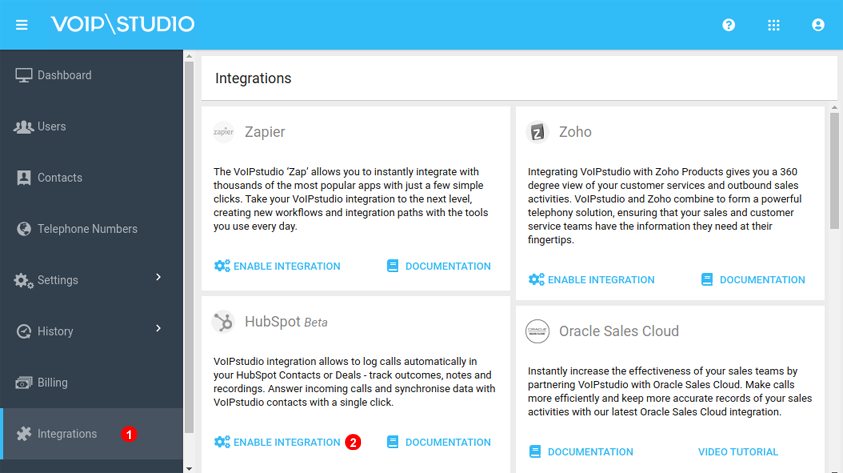 Figure 63.1 Enabling HubSpot integration.
 -
You can choose what kind of activities will be logged in the HubSpot CRM:
- activities for inbound, outbound and missed calls;
- activities for call recordings;
- activities for voicemessages;
-
Select the users you want to invite to connect HubSpot as per point 4 in Figure 63.2 below.
-
Next click
Send Invitationbutton - you will also see the current status of the invitation in the HubSpot invitations grid.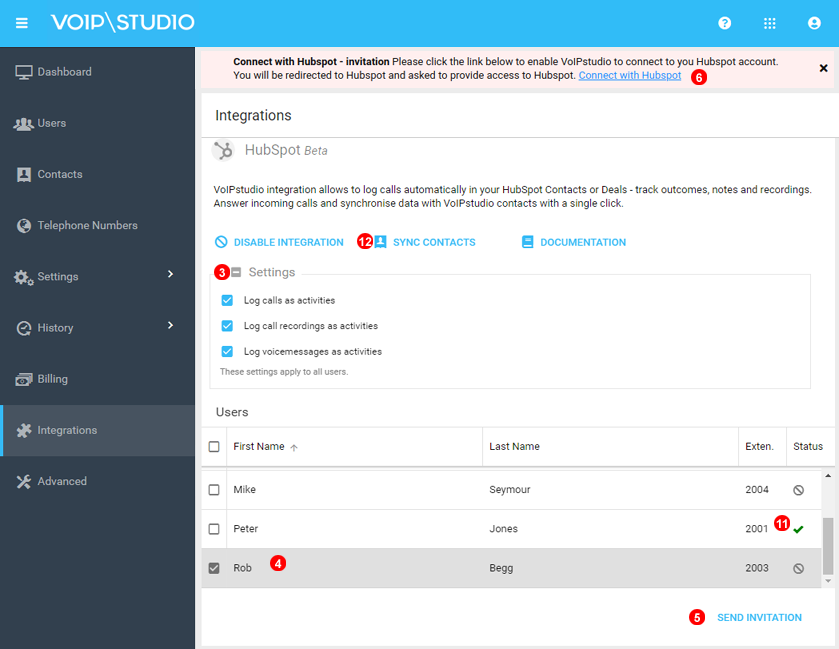 Figure 63.2 Sending invitation to selected users.
 -
You should receive an email with an invitation link. Alternatively, click Connect with HubSpot from the Notifications Bar on the top of VoIPstudio as per point 6 of picture above.
- When you click the link from the email or from Notifications Bar you will be redirected to the HubSpot login page.
- Log in to HubSpot with your credentials.
-
Click "Connect app" to enable VoIPstudio integration as in the picture below.
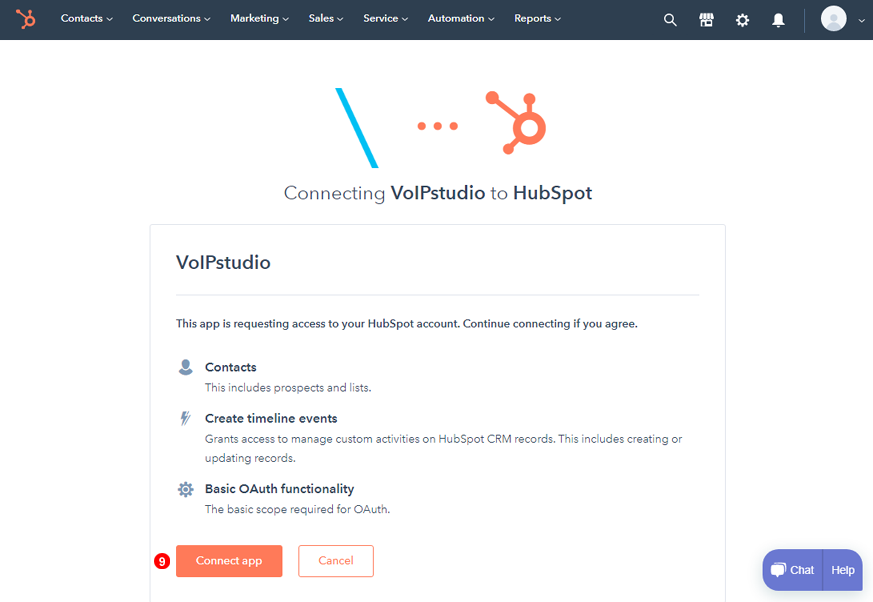 Figure 63.3 Enabling VoIPstudio integration.
 -
You will be redirected to your VoIPstudio account and after successful authorization you should see the pop up as below.
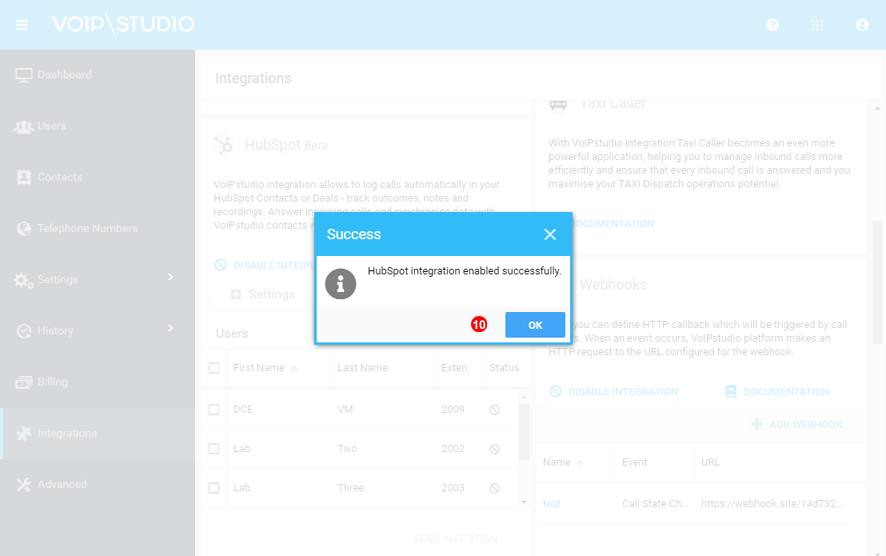 Figure 63.4 Successful authorization.
 -
The Authorization Status for the user should change to confirmed as per point 11 in Figure 63.2 above.
- When atleast one User is Authorized the Contacts Sync Option will apear and allow for the Push and Pull of Contact data.
Softphone Login
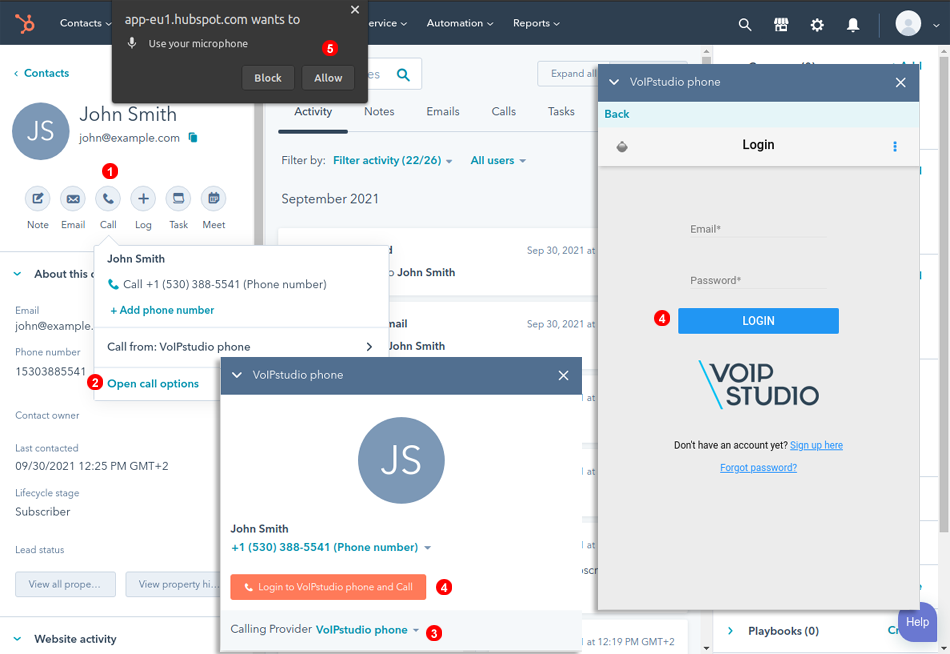
Once VoIPstudio integration is configured you will need to login into the Softphone widget. This needs to be done only once.
- From any Contact panel click "Call" button.
- Click "Open call options" link.
- Select "VoIPstudio phone" as "Calling Provider"
- Login into softphone widget using VoIPstudio email and password
- Click "Allow" to "Use your microphone" at the top of web browser window.
Supported features
Click to Call
- For Click to call to work properly you need to choose VoIPstudio phone as Calling Provider from: Call from -> Other Providers drop down.
-
To make a call just click the number as shown in point 2 of the screenshot below and VoIPstudio softphone will make a call.
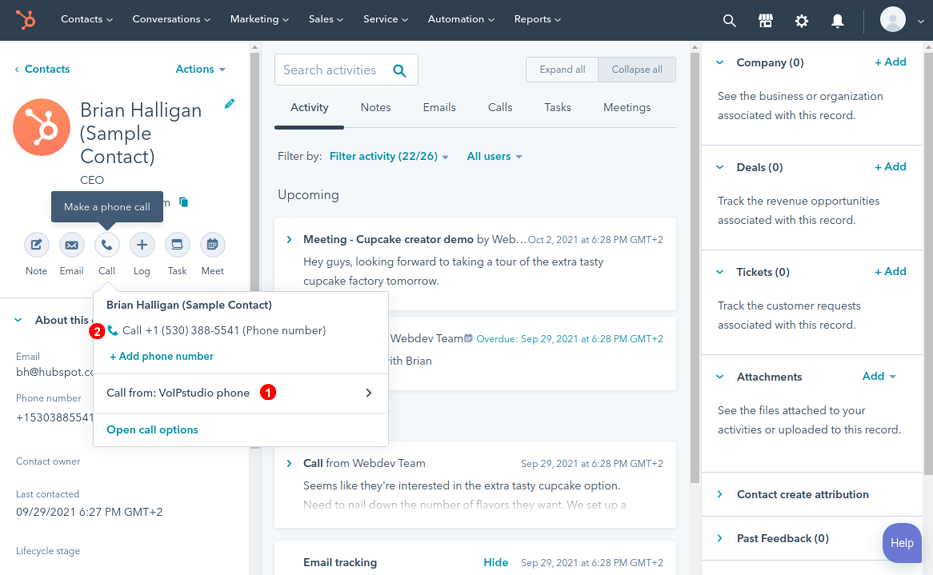 Figure 63.6 Click to call.
 -
Full call control is supported within the HubSpot interface:
- Calls can be terminated
- DTMF tones (for IVR menus etc.) can be sent
- Calls can be placed on-hold
- Call can be muted
- Call can be transferred (e)
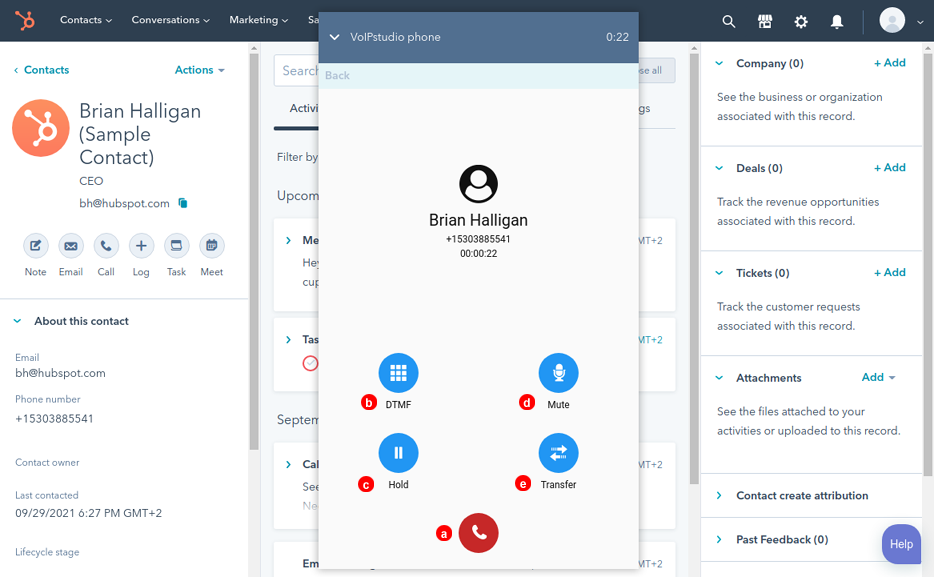 Figure 63.7 Call handling.
Call Logs
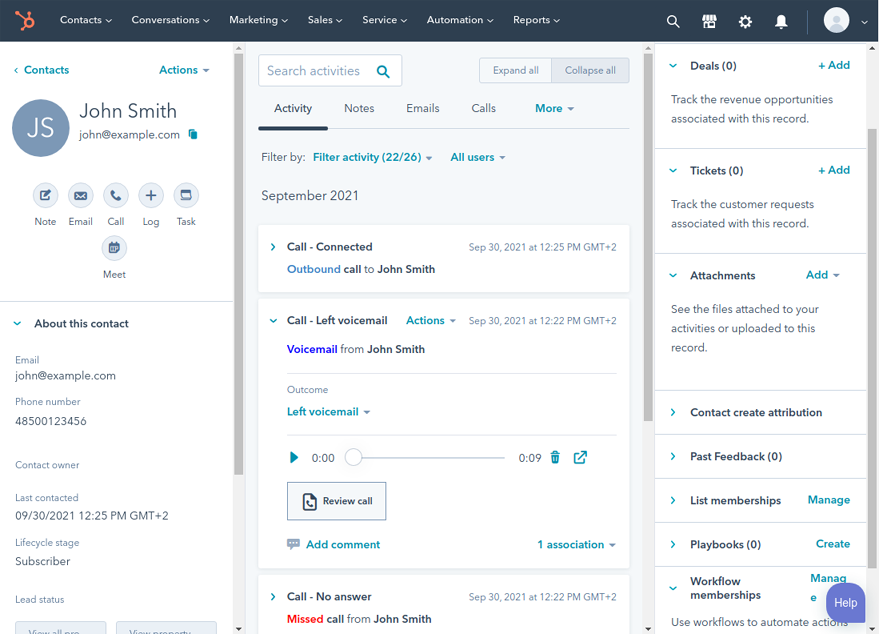
Depending on HubSpot integration settings, VoIPstudio can create contact activities with call details for each inbound, outbound and missed call. Those activities are displayed in contact timeline.
Note: to log calls as activities VoIPstudio integration needs HubSpot or VoIPstudio contact with given telephone number to exists (saved in E164 format).
Call Recordings
Depending on HubSpot integration settings, VoIPstudio can create contact activities for inbound and outbound call recordings. Each call recording activity can be played and reviewed from HubSpot CRM.
Note: to log call recordings as activities, VoIPstudio needs call recording enabled for given user account.
Log Voicemail
Depending on HubSpot integration settings, VoIPstudio can create contact activities for received voicemail. Each voicemail activity can be played and reviewed from HubSpot CRM.