Integrations - Microsoft Dynamics CRM
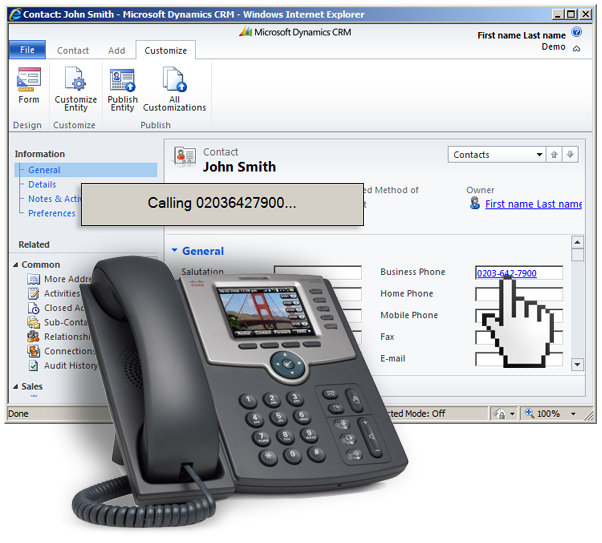
Figure 64.1 Microsoft Dynamics CRM
Integration Process of Microsoft Dynamics CRM
Note: instructions below apply only to self hosted Microsoft Dynamics CRM 2011 / 2013. Office 365 version is not supported.
Click2Call link handler
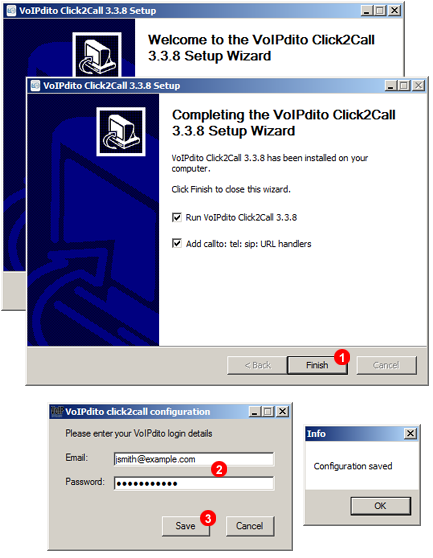
Figure 64.2 Click2call link handler
First step in the integration process is to install Click2Call link handler:
- Download and install Click2Call link handler https://repo.ssl7.net/Other/VoIPstudio-Click2Call-setup.exe
- Enter your VoIPstudio email and password
- Click Save button
Customization
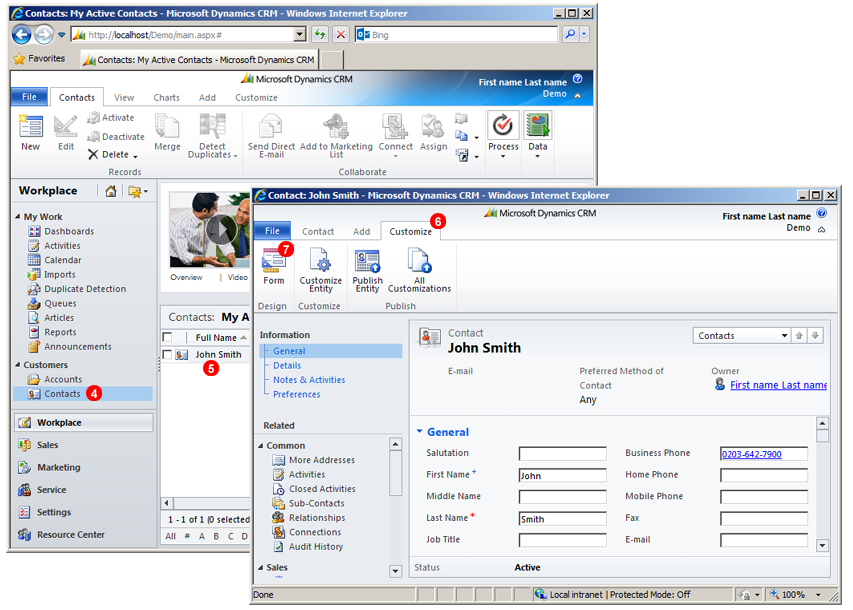
Figure 64.3 MS Dynamics click to call customization
- Open Microsoft Dynamics CRM in your web browser and go to
Contactstab - Open any of your contacts
- Go to
Customizetab - Click
Formicon
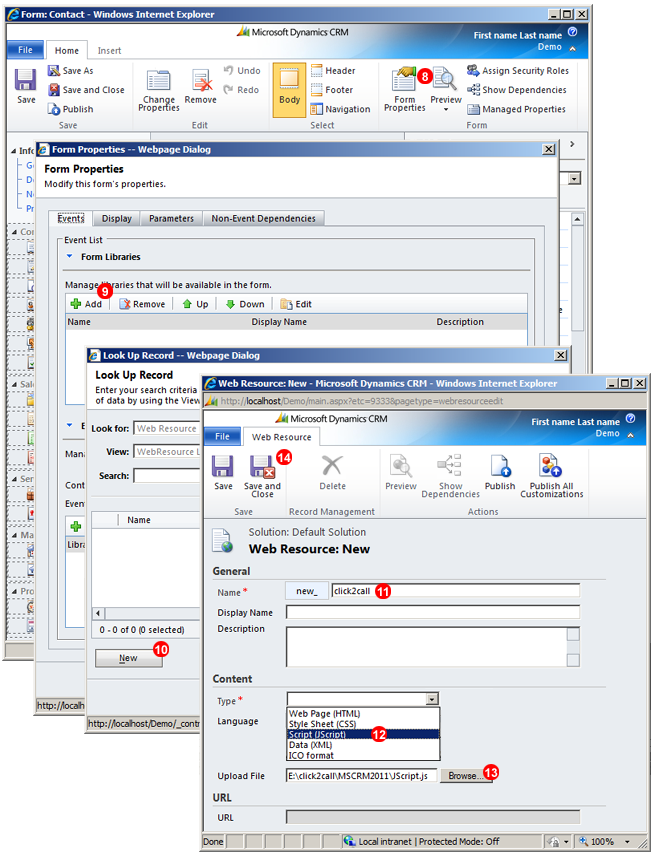
Figure 64.4 MS Dynamics upload JS file
- Click
From Propertiesicon - Click
Addbutton inForm Librariespanel - Click
Newbutton inLook Up Recordwindow - Enter
click2callintoNamefield - Select
Script (JScript)in Language drop down list - Download https://repo.ssl7.net/Other/MSCRM2011-click2call.zip web resource file, decompress it and upload into Web Resource form.
- Click
Save and Closebutton
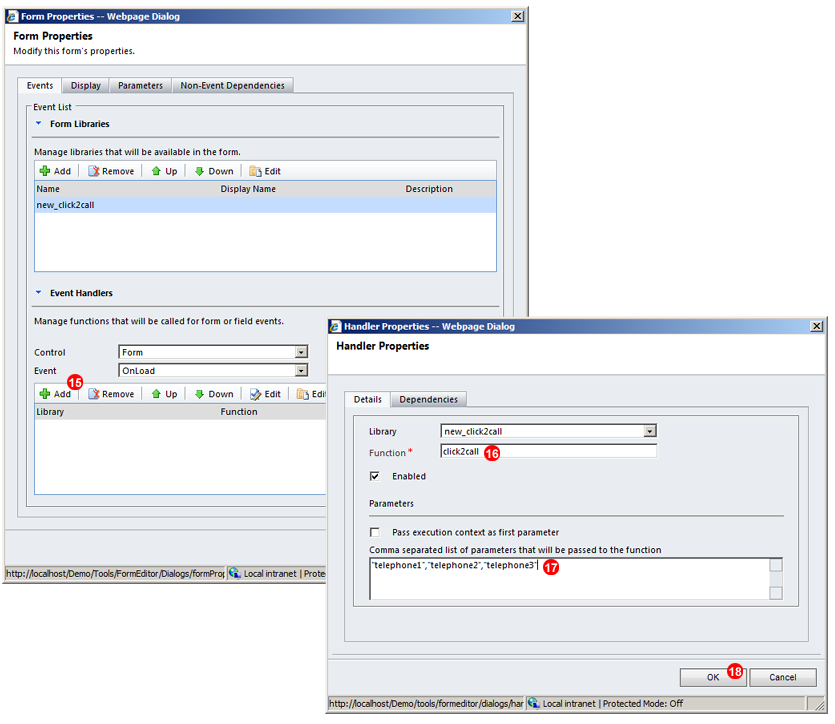
Figure 64.5 MS Dynamics telephone handler
- Click
Addbutton inEvent Handers form - Enter
click2callintoFunctionfield - Enter
"telephone1","telephone2","telephone3"intoParametersfield - Click
OKbutton.
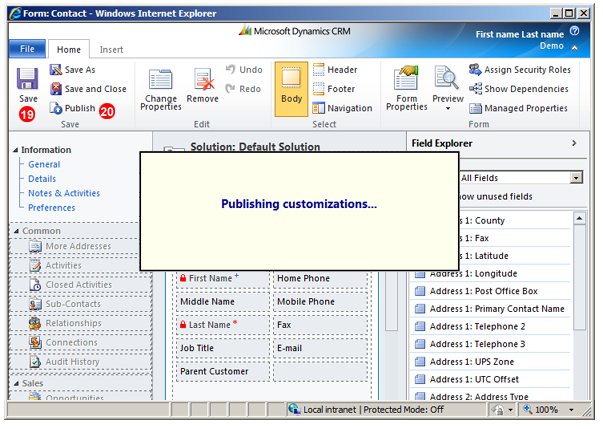
Figure 64.6 MS Dynamics publish customization
- Click
Savebutton - Click
Publishbutton
Test Call
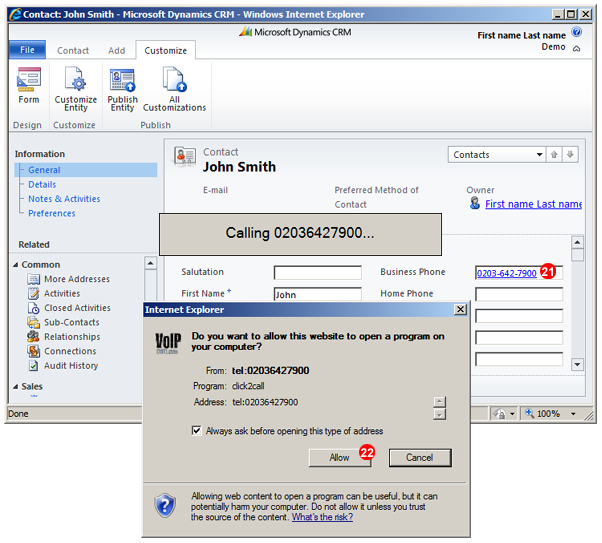
Figure 64.7 MS Dynamics test call
- Double click telephone number in contact form
- Click
Allowin external application confirmation dialog (you will only need to do this once). Your VoIPstudio phone will start ringing. Once you pickup it will connect to a number from your Microsoft Dynamics CRM contact form.