Integrations - Odoo
In this chapter you will learn how to integrate Odoo CRM - with VoIPstudio.
Configuration
- If you do not have an account with Odoo, first create one at
https://www.odoo.com/trial
-
Login into your Odoo account and follow steps below to install VoIP Module.
-
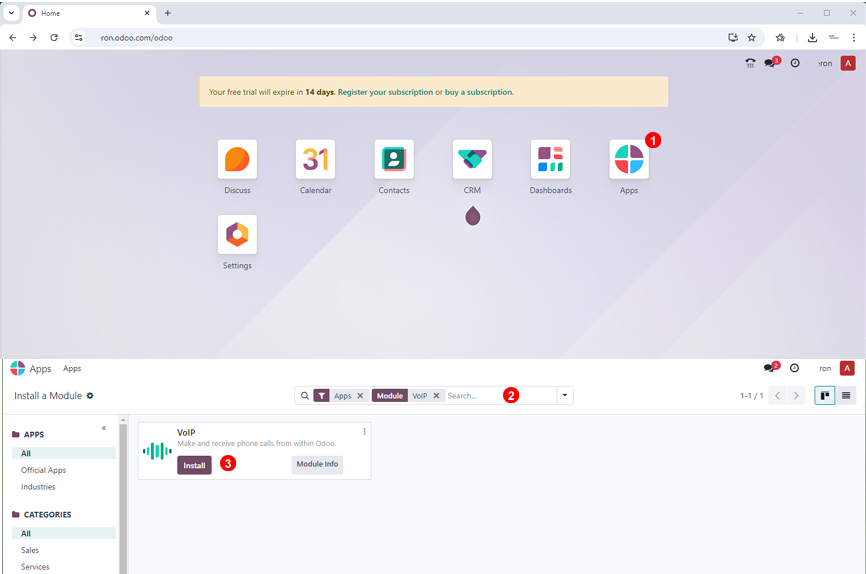
(1) Click "Apps" icon from dashboard
- (2) Under search area look for "VoIP"
- (3) click to Install
-
After intalling VoIP Module add VoIpstudio as VoIP provider.
-
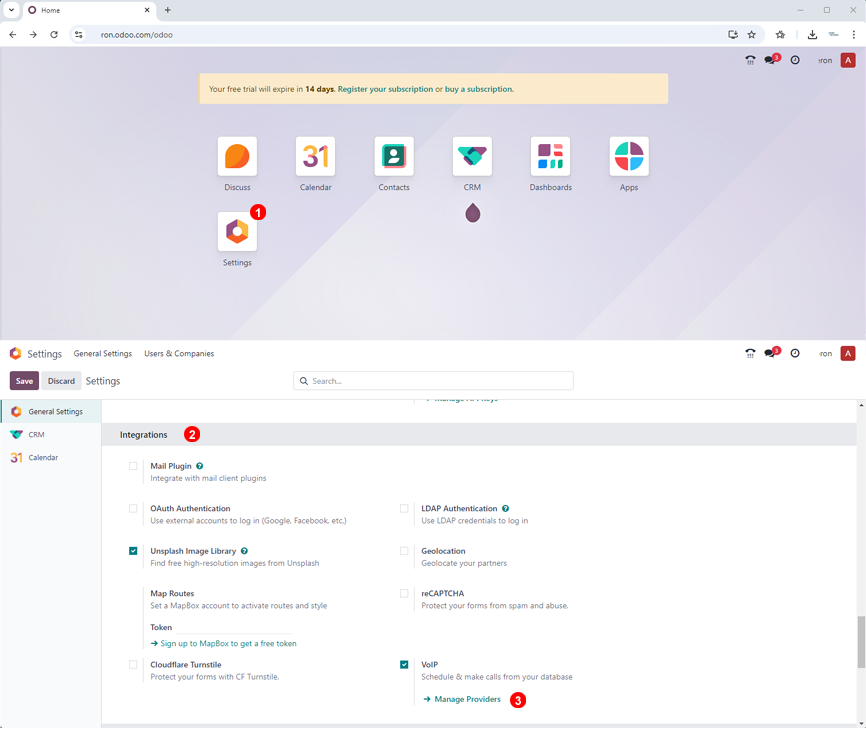
(1) Click "Settings" icon from dashboard
- (2) Scroll to "Integrations" section
- (3) from VoIP sections click "Manage Providers"
-
Set VoIPstudio as default provider and set settings as bellow:
-
(1) IP PBX server: eu.sip.ssl7.net
- (2) WebSocket: wss://eu.sip.ssl7.net:443
- (3) Set the environment to "Production"
Note: you may need to change "eu" to "amn" if your VoIPstuido account is set on the AMN data center.

- Look for your VoIPstudio SIP account details from your VoIPstudio user or admin dashboard.
https://voipstudio.com/docs/administrator/users/#sip-endpoints-dialplan-and-registered-endpoints
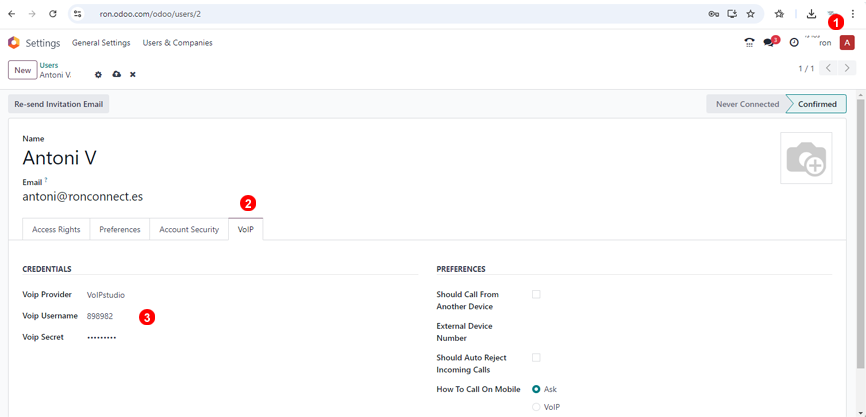
- From top right user section, click preferences (1). Then open VoIP tab(2). Set VoIP provider as VoIPstudio and setup Username and VoIP Secret (3) of your VoIPstudio user from previous step.
Supported features
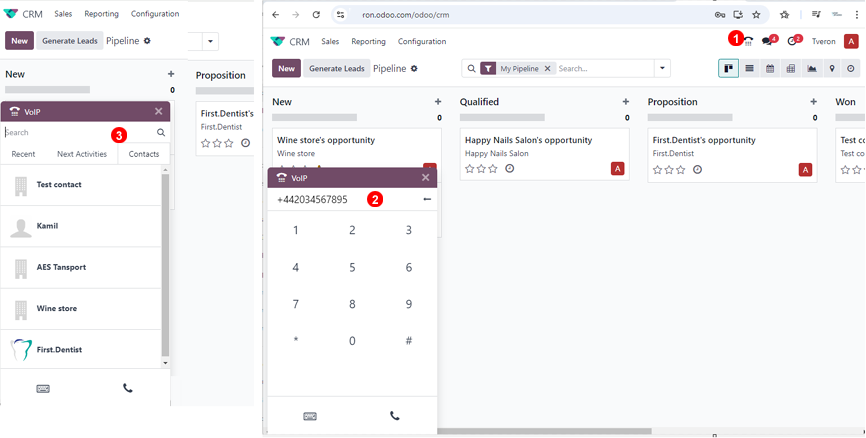
- Making and answering calls - from top right open the phone widget (1). Then you just need to browse contacts, user search tool (3) or type destination phone number with leading + and destination number (2). To answer calls you will get them on bottom left corner and you only need to anser or reject them using red button.
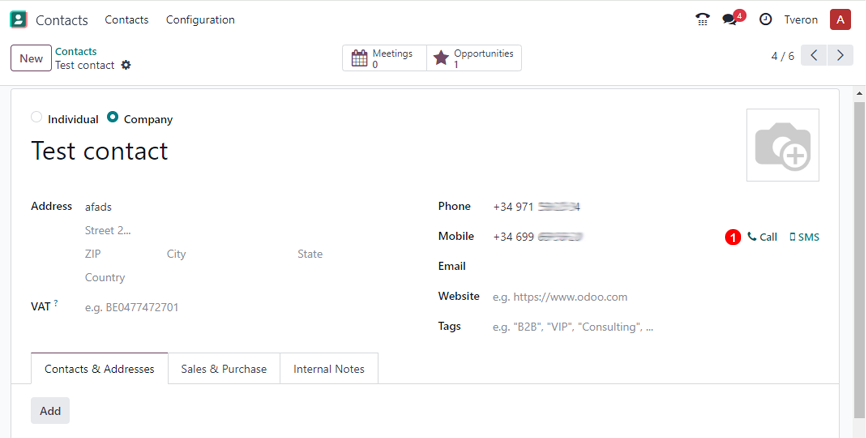
- Click to call - within the Odoo interface (computer & mobile), just click the number as shown in point 1 of the screenshot below and our softphone will start ringing.
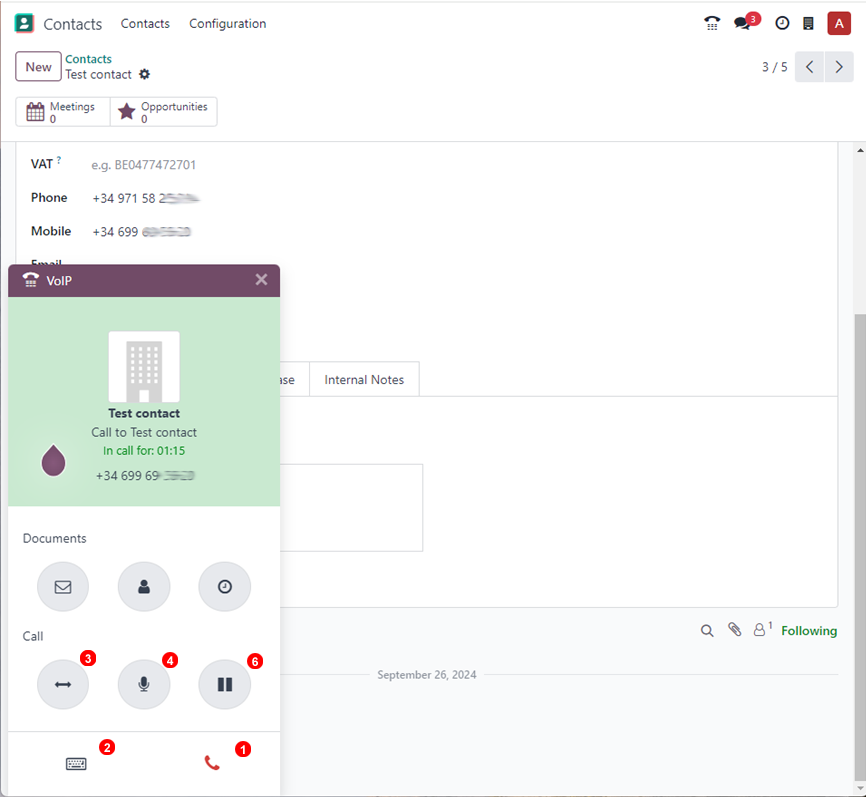
- Full call control is supported within the Odoo interface - Calls can be terminated(1), DTMF tones (for IVR menus etc.) can be sent (2), calls can be transfered (3), muted (4), plaed on hold (5) without leaving the Odoo interface.
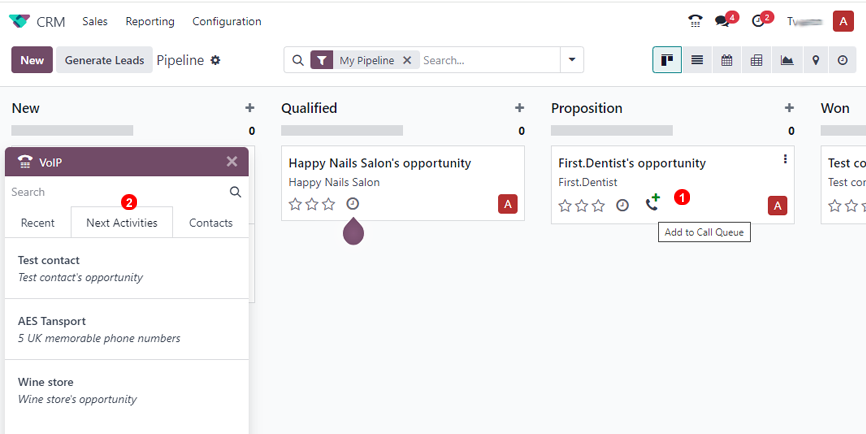
- Call queue - Under phone widget you may find "Next Activities" (2) this is showing contacts that need to be called. You may add or remove this leads from Odoo CRM > opportunities > pipeline by clicking phone icon. Leads that need to be called will show with
+sign (1).
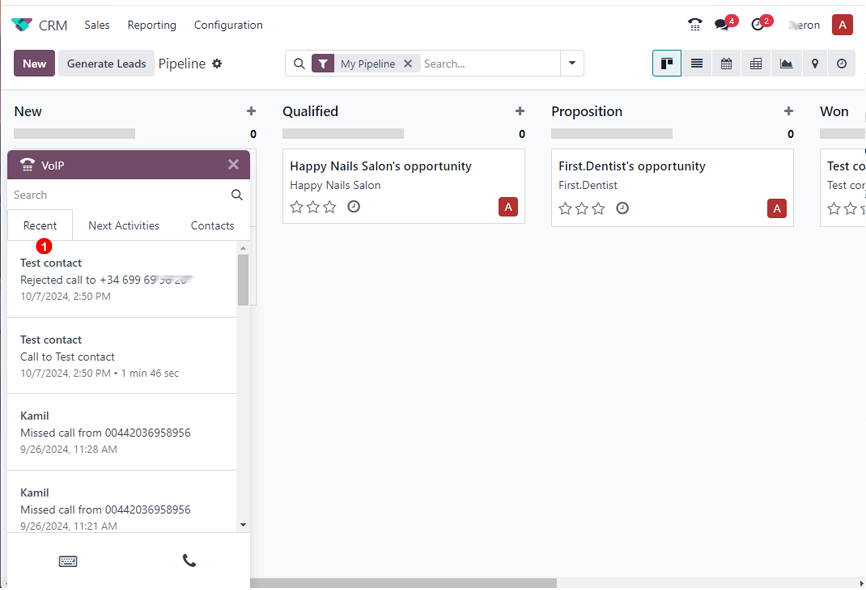
Call history. All incoming/outgoing calls are visible and logged in Odoo from phone widget, Recent calls section (1).
For further details please check Odoo Manual on this link