Integrations - Salesforce CRM
Instructions below show how to enable Call Center functionality in Salesforce CRM which allows for "click to call" and incoming calls screening for easy management of Leads and Contacts interactions.
Note: VoIPstudio Call Center module is compatible with the following Salesforce editions: Professional, Enterprise and Unlimited . You also need to ensure all telephone numbers in your Salesforce records are stored in +E164 format, which is +[country code][telephone number]. For example +12124453312 (for United States number 212 445 3312) or +442036427900 (for United Kingdom number 0203 642 7900)
Configuration - Lightning
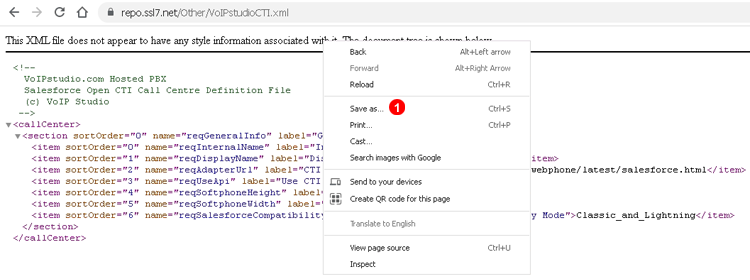
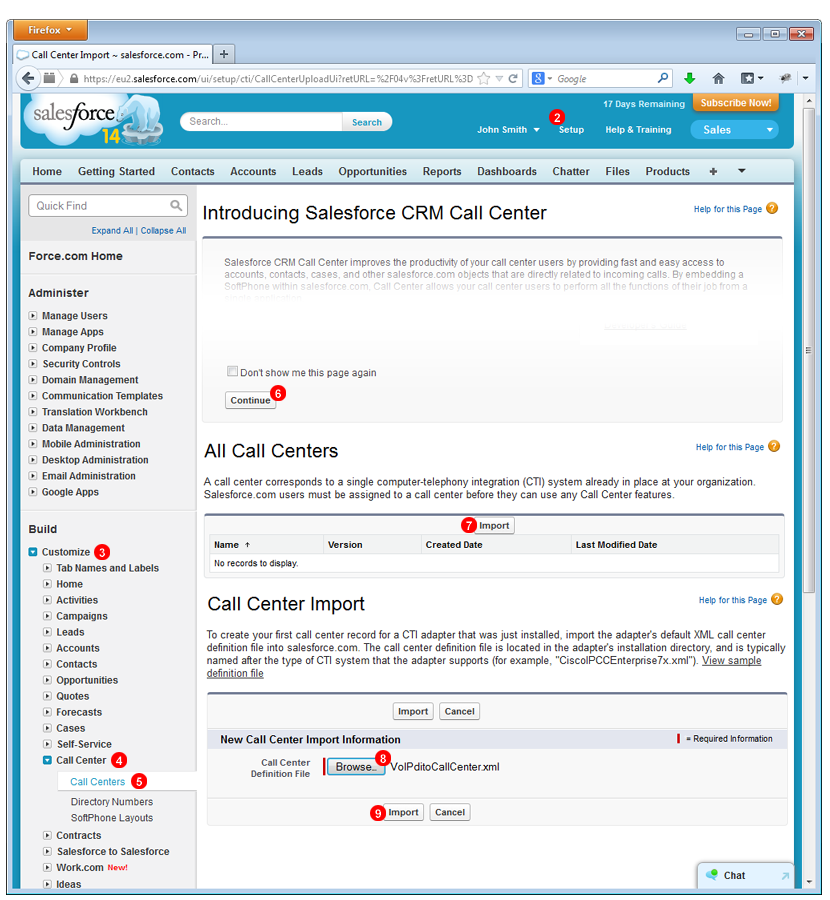
- Open VoIPstudioCTI.xml right click and select "Save as..." from context menu.
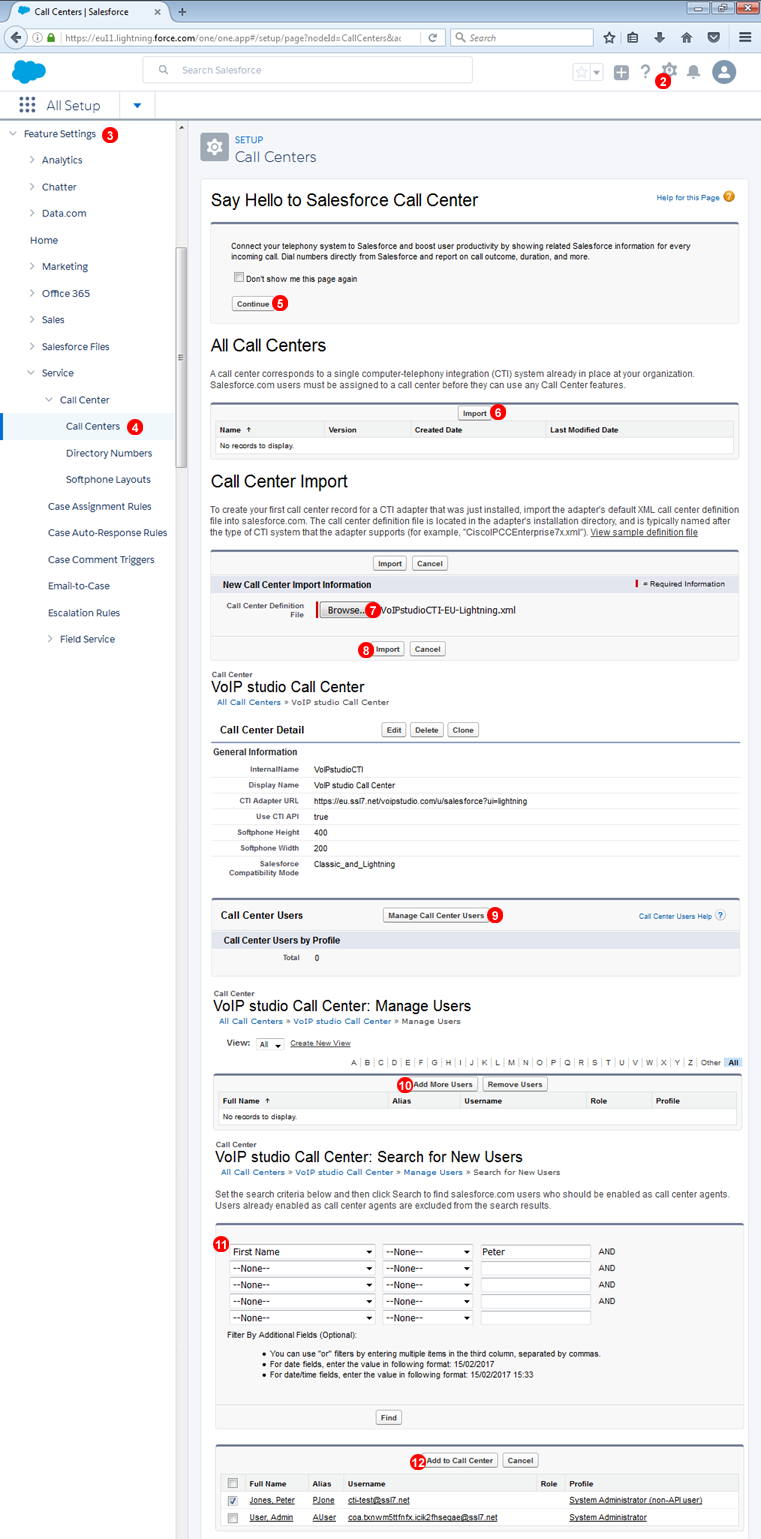
- Login into your Salesforce account and click
Setupin the top toolbar. - Select
Feature Settingsfrom the toolbar on the left - Select
Service->Call Center->Call Centers - Click
Continuebutton on introduction page. - Click
Importbutton - Select
VoIPstudioCTI.xmlfile downloaded in step 1 - Click
Importbutton - Click
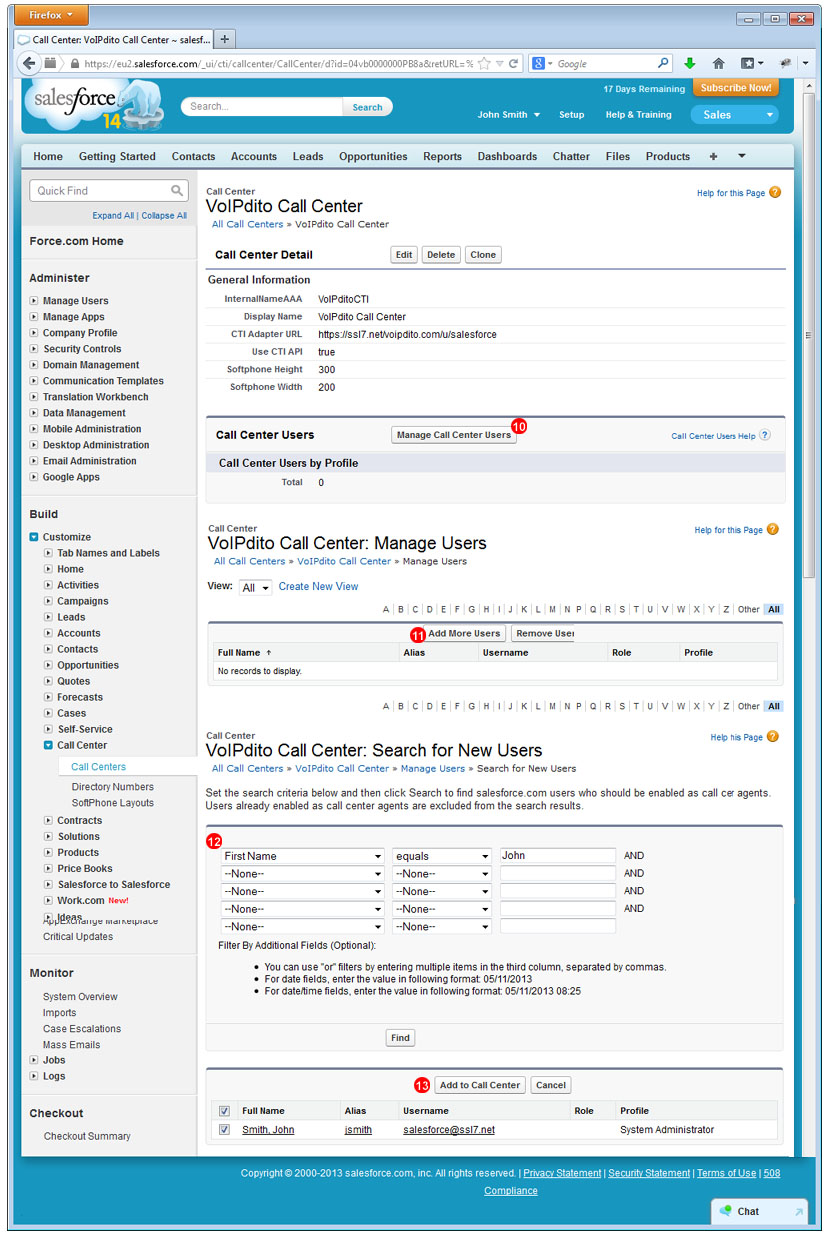
Manage Call Center Usersbutton - Click
Add More Usersbutton - Use filter form to find user you wish to add to your Call Center
- Select your users and click
Add to Call Centerbutton
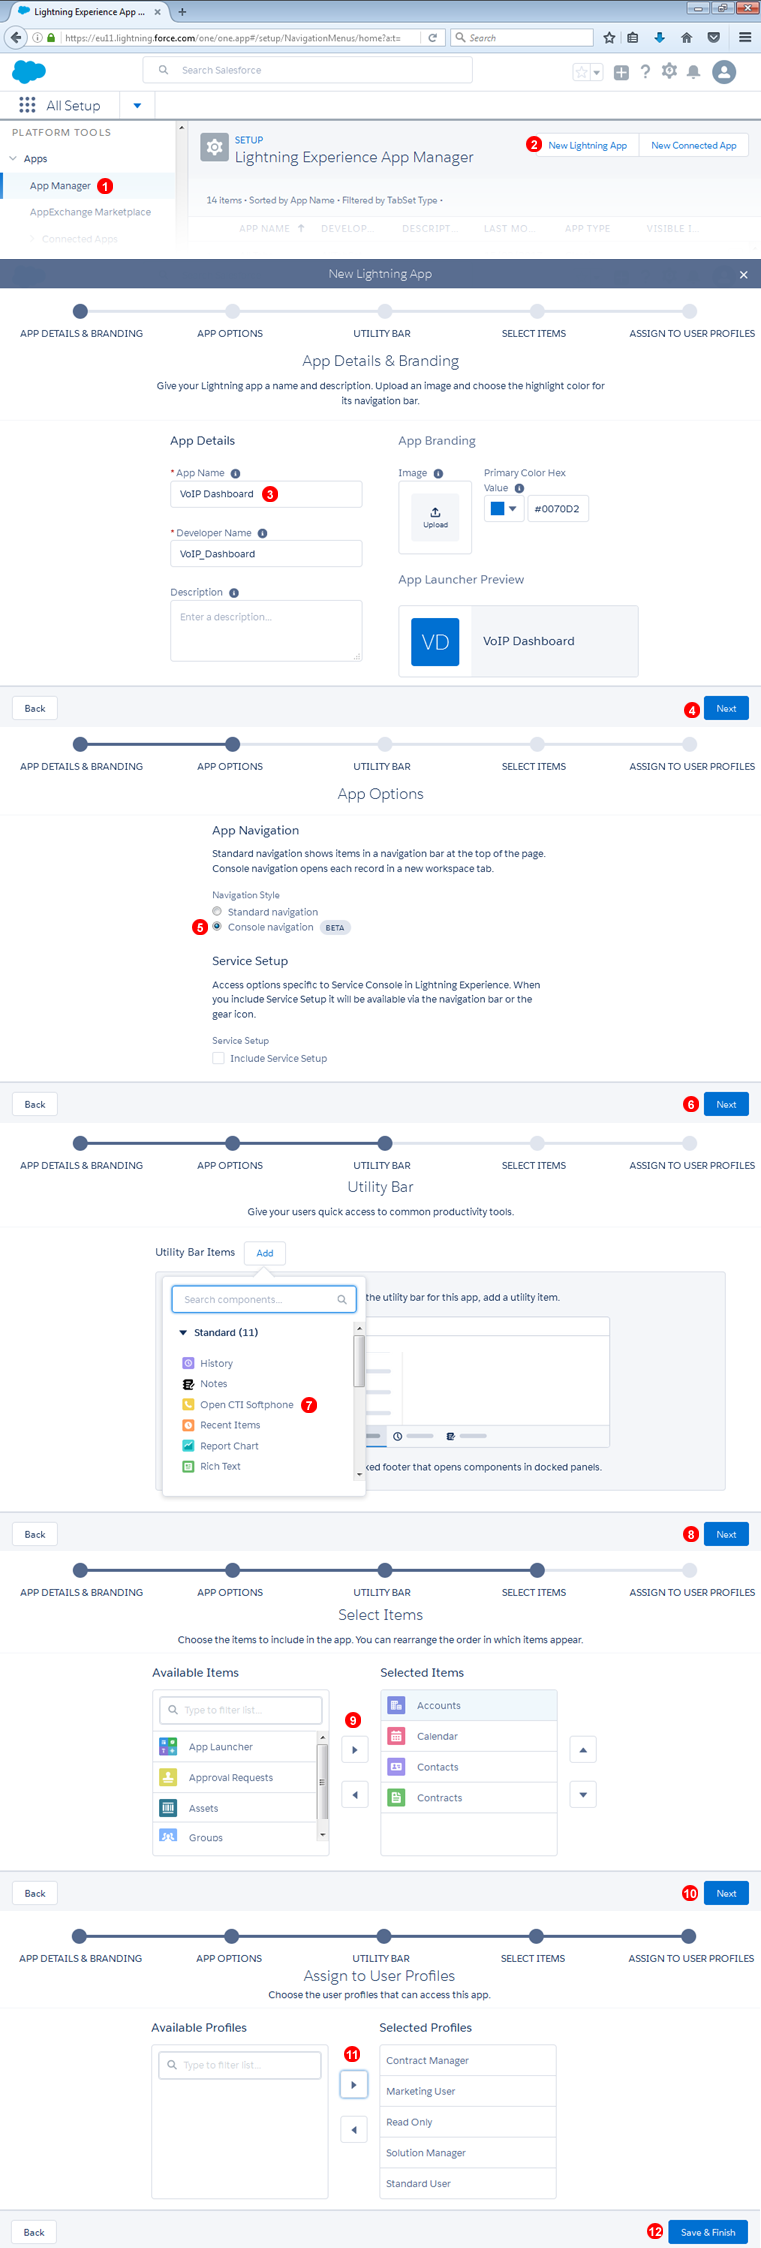
- Select
Apps->App Managerfrom the toolbar on the left - Click
New Lightening App - Enter app name
- Click
Next - Select
Console navigation - Click
Next - Add
Open CTI Softphoneto Utility Bar (also add any other items you may require) - Click
Next - Select items which you require in this app
- Click
Next - Assign User Profiles to this app
- Click
Save & Finish
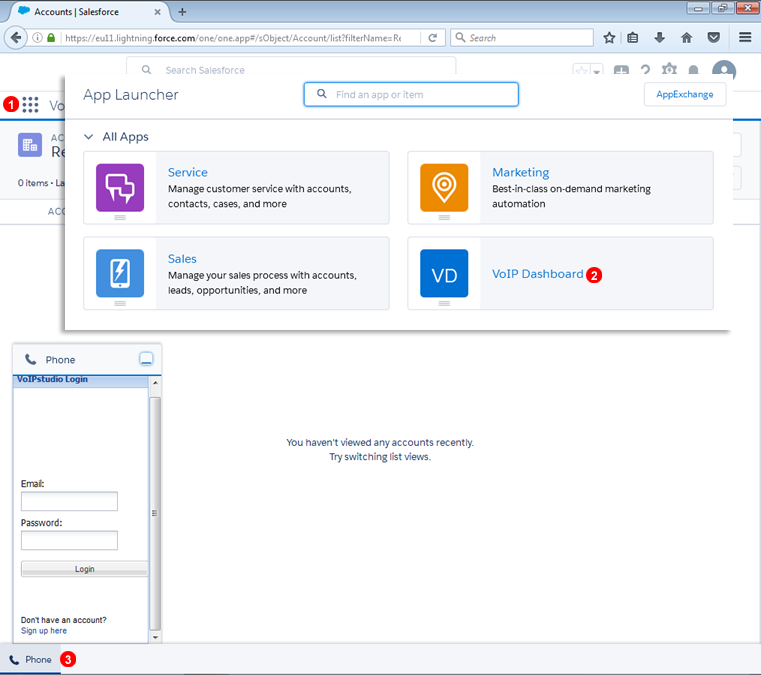
- Click app launcher button in to left part of the page
- Select app created in previous step
- In bottom toolbar click
Phonelink and login into VoIPstudio softphone
Configuration - Classic
- Open VoIPstudioCTI.xml right click and select "Save as..." from context menu.
- Login into your Salesforce account and click
Setupin the top toolbar. - Select
Customizefrom the toolbar on the left - Select
Call Center - Select
Call Centers - Click
Continuebutton on introduction page. - Click
Importbutton - Select VoIPstudioCTI.xml file downloaded in step 1
- Click
Importbutton
- Click
Manage Call Center Usersbutton - Click
Add More Usersbutton - Use filter form to find user you wish to add to your Call Center
- Select your users and click
Add to Call Centerbutton
Outbound Calls
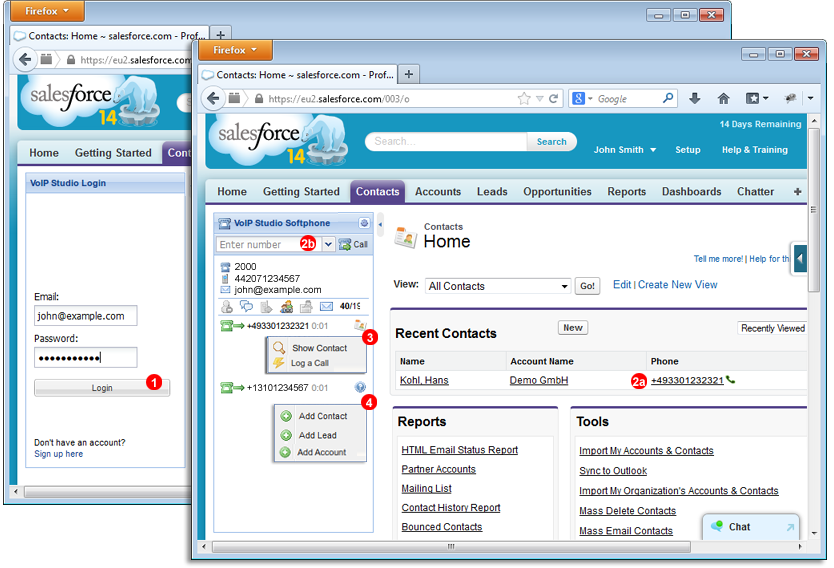
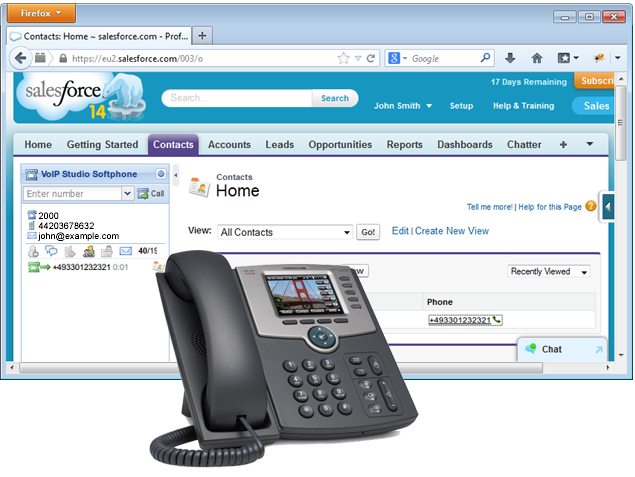
- Before you can start making or receiving calls using VoIPstudio Salesforce Call Center module you need to login into the softphone using your VoIPstudio email and password.
- To place an outbound call you can click on the telephone number of your Contact or Lead
(2a)or enter the number you want to call into top field of VoIPstudio softphone(2b)and click "Call" button. VoIPstudio PBX will call your registered SIP Endpoint (softphone running on your PC or hardware phone on your desk) and as soon as you answer the call will be placed to your destination number. - At any time when on call to one of your contacts you can click
Contacticon and selectShow ContactorLog a Call` from the context menu. - If the call is to unknown destination you can click
Question markicon and selectAdd Contact,Add LeadorAdd Accountfrom the context menu.
Inbound Calls
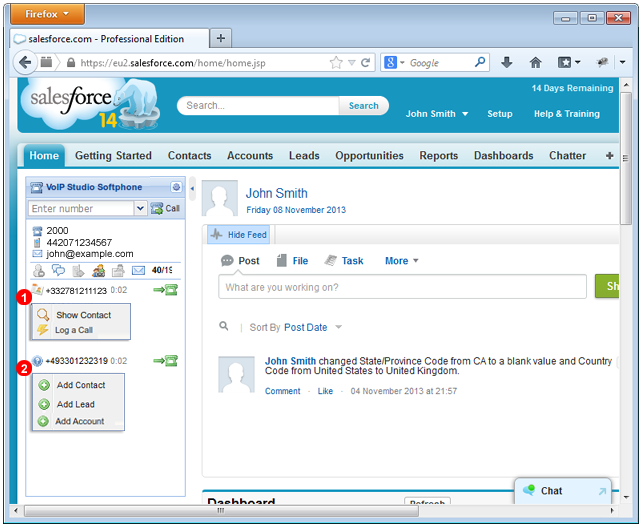
- When receiving an incoming call from known number you can click
Show ContactorLog a Callin the context menu to have the relevant record opened. - Incoming calls from unknown numbers will open a menu which allows to
Add new Contact,Add LeadorAdd Account.
Salesforce Web Softphone Layout
A new Salesforce Softphone WEB version will soon be released, and certain changes in Softphone Layout configuration are required in order for our Softphone to work correctly. These changes affect with which Salesforce Objects our softphone will be able to integrate.
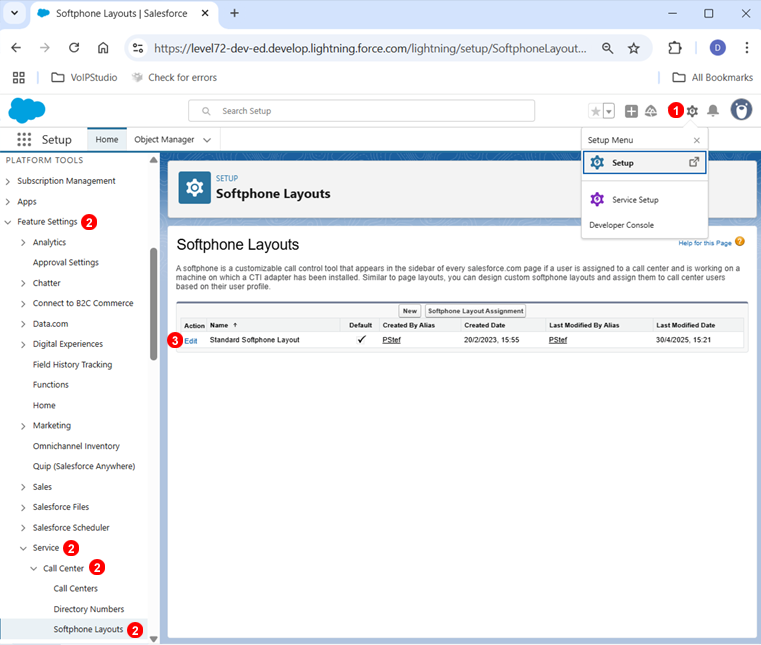
- Access Salesforce Setup dashboard or Setup menu, and navigate through Slaesforce's Softphone Layout options.
- Platform Tools> Feature Settings> Service> Call Center> Softphone Layouts.
- Click on Edit current Standard Softphone Layout.
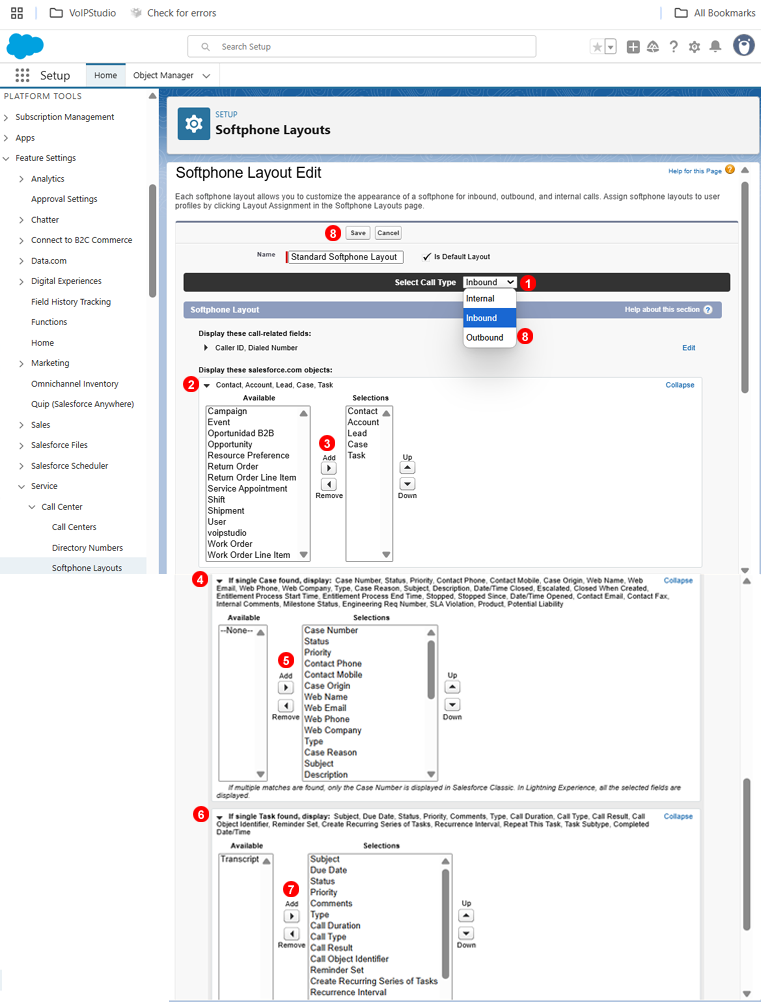
- Select call type Inbound.
- Click on the salesforce.com objects dropdown, to Add / Remove Objects.
- Add objects ´CASE´ and ´TASK´ using the Add / Remove buttons.
Edit new added salesforce.com objects:
- Click on the dropdown to reveal the ´CASE´ object's modifications.
- Add all needed objects.
- Click on the next dropdown to reveal the ´TASK´ object's modifications.
- Add all needed objects.
- Save the changes, and repeat this process for call type Outbound.
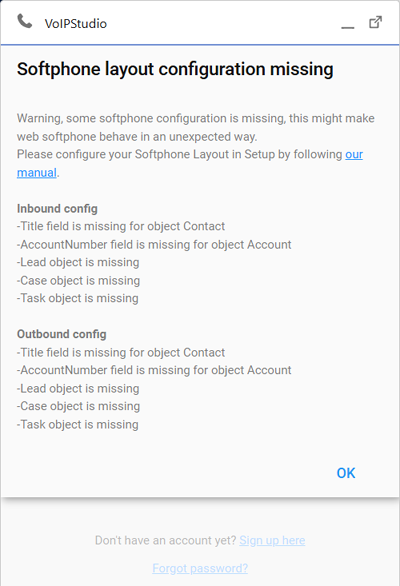
Webphone Error Message.
The following Error might appear is the setup was not completed succesfully, please recheck the settings and try again.
Additional Settings.

Here you can Select if other devices for example hardware phones will be use for outbound calls instead of the webphone, this is most usefull for click to call.
For the Salesforce Integration if other devices are used you can enable this setting to have the Web Phone capture the data of calls made on these devices.