History
Chat
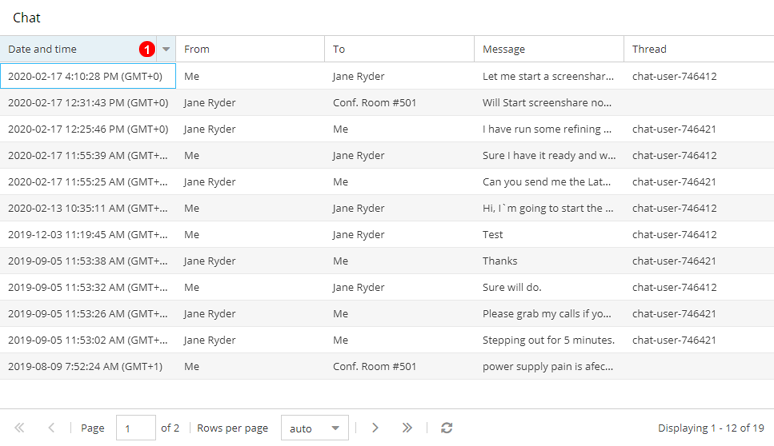
Here you can view history of Chats between users and in Conference Rooms.
- Click headers to filter history using specific criteria like date ranges etc.
CDR
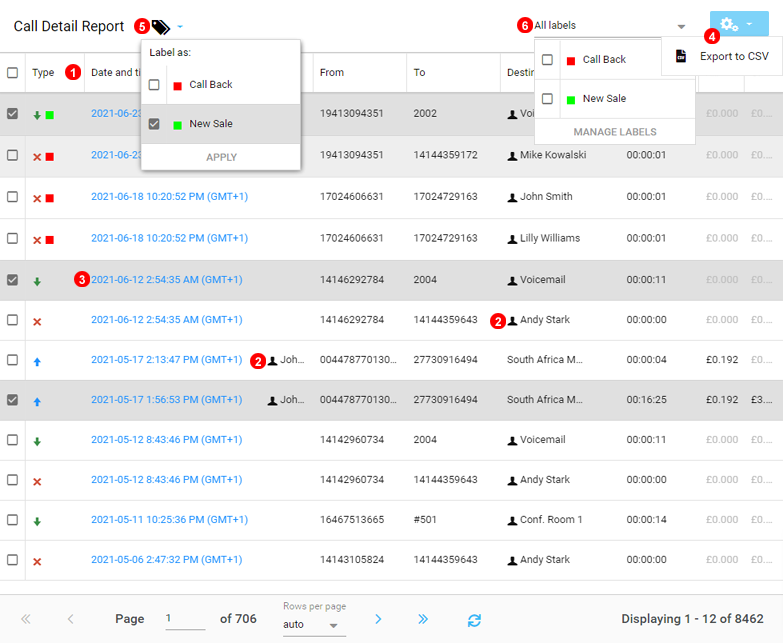
Here you can view Call Details Records.
- Click headers to filter history using specific criteria like date ranges etc.
- If a Contact for the source or destination is known the Contact will be displayed in the respective columns.
- Click icon shown as
(3)in Figure 5.2 above to view detailed call information. - Click icon shown as
(4)in Figure 5.2 above to export Call Details Records to .csv file. See CSV file columns description below for further details. - View and assign Labels to any selected Call Records, more on labels in Figure below.
- Filter Call Records according to slected labels.
CDR CSV export
Here’s a brief description of each column in your Call Detail Record (CDR) CSV export:
| Column Name | Description |
|---|---|
Date and time (UTC) |
The date and time the call was initiated, recorded in Coordinated Universal Time (UTC). |
Date and time (Local) |
The same timestamp as above, but adjusted to your local time zone. |
Type |
The direction or nature of the call — typically “Inbound” (incoming) or “Outbound” (outgoing). |
Caller ID |
The displayed caller identification — may include the number and/or name of the caller. |
Source |
The originating source of the call (often blank for inbound calls, or shows the extension/user for outbound). |
From ID |
The internal system ID or extension representing the call origin within the phone system. |
From |
The originating phone number (the number that initiated the call). |
To |
The destination phone number (the number that received the call). |
To ID |
The internal identifier, queue, or user ID the call was directed to. |
Destination |
The name or description of the final destination (e.g., “Contact Name” “United Kingdom Mobile”). |
Duration |
Total duration of the call in seconds (from start to end, including ringing and hold time). |
Connected Duration |
The actual time in seconds when the call was connected and audio was live. |
Rate |
The billing rate per minute applied to the call. |
Charge |
The total monetary charge for the call, calculated from connected duration × rate. |
Labels |
Any assigned labels or tags (e.g., “Sales,” “Support,” or campaign identifiers). |
Info |
Additional call metadata — can include queue, routing, or plan details. |
Notes |
Free text field for any call-related notes or comments |
Call ID |
The unique identifier of this specific call record in the telephony system. |
Root Call ID |
The ID of the original call if this call was part of a chain (e.g., IVR -> Queue -> transfer). |
Transferred |
Indicates whether the call was transferred (Yes/No). |
Inbound calls in VoIPstudio system often appear as multiple linked CDR records for one customer call. They share the same Root Call ID, but each line shows a different stage of the call’s journey.
CDR Call Labels
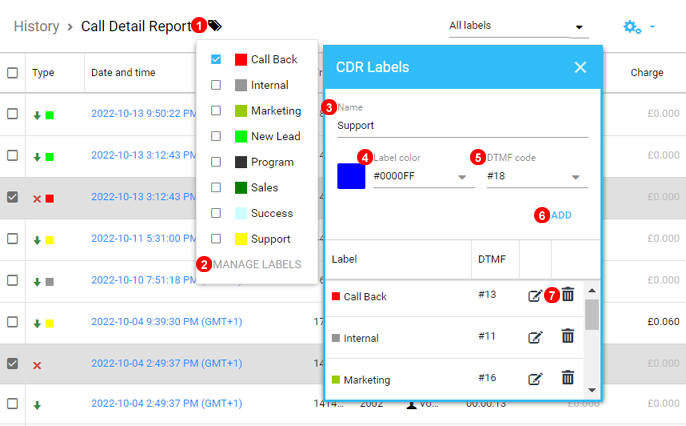
- With one or More Call Records Selected click the Labels Icon.
- Click manage Labels to open the create and edit menu.
- Name the new Label, short and simple generally works best.
- Select a Colour Identifier for the new Label.
- Call Label Prefix can be assigned for use while on call using 3rd party applications and Hardware Phones.
- Click add to save.
- Any existing labels can be deleted or edited.
Call Recordings
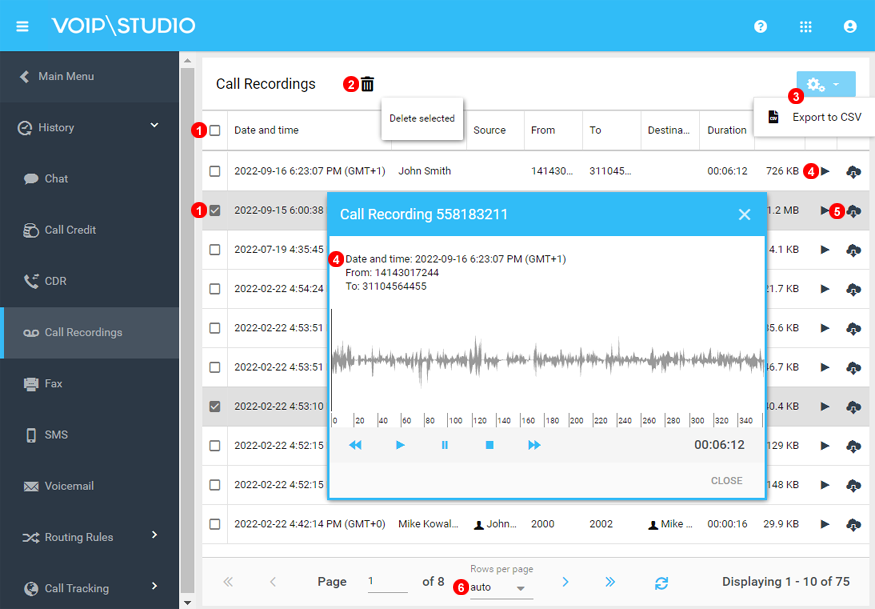
Here you can view Call Recordings history.
- Select the Call Recordings you want to remove.
- Click Delete to Remove selected Recording from the Server.
- Click icon shown as
(3)in Figure 5.4 above to download recordings history as Excel file. - Click icon shown as
(4)in Figure 5.4 above to playback recording audio. - Click icon shown as
(5)in Figure 5.4 above to download recording MP3 file. - Change how many Records show, Auto changes according to browser sizing.
Fax
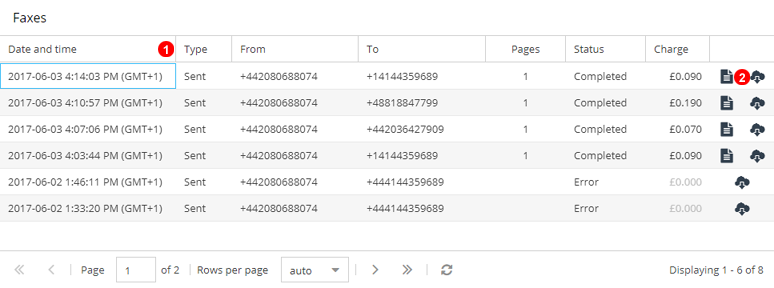
Here you can view Faxes history.
- Click headers to filter history using specific criteria like date ranges etc.
- Click icon shown as
(2)in Figure 5.5 above to download fax file or Confirmation file.
SMS
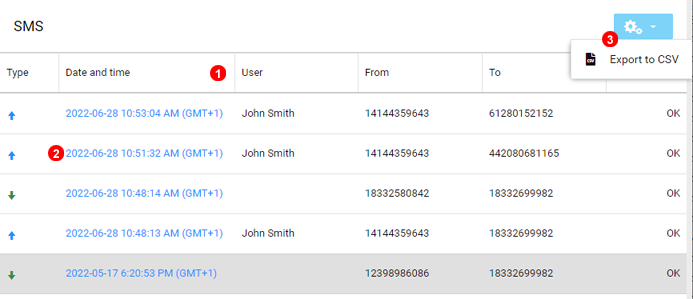
Here you can view SMS Messages history.
- Click headers to filter history using specific criteria like date ranges etc.
- Click icon shown as
(2)in Figure 5.6 above to view SMS message. - Click on Gear Icon as shown by
(3)in Figure 5.6
Voicemail
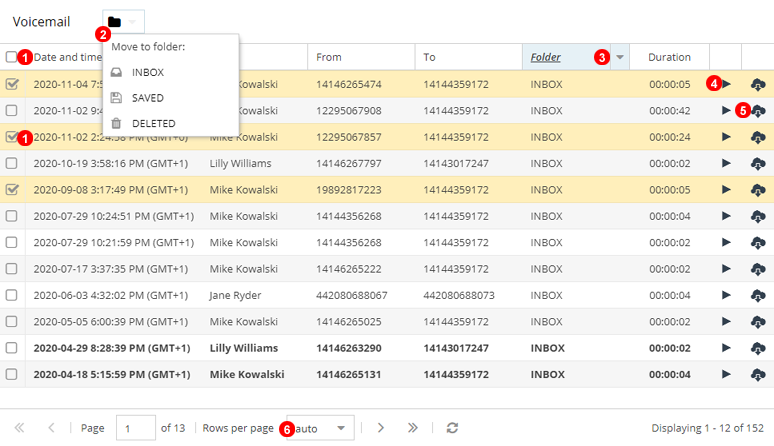
Here you can view Voicemail history.
- Select the voice mail messages to move or delete.
- From the dropdown select what action to apply to selected messages.
- Click headers to filter history using specific criteria like date ranges, folders etc.
- Click icon shown as
(4)in Figure 5.7 above to playback voicemail audio. - Click icon shown as
(5)in Figure 5.7 above to download voicemail MP3 file. - Change how many Records show, Auto changes according to browser sizing.
Call Tracking
Visitors
![]()
- Select History to Expand.
- Expand Call Tracking then Select Visitors.
- Filter by Campaign.
- By clicking Visitor IP Additional details will display as per figure below.
![]()
Additional Visitor details available like Browser Type, IP Location and Landing Page details.
Calls
![]()
- Expand History.
- Expand Call Tracking.
- Select Calls.
- Filtering can be done by using CDR Labels.
- CLick the Gear Icon to Export filtered data.
- Click on Date and Time of call to view CDR data.
- By clicking Call Source Additional details will display as per figure below.
![]()
Additional Visitor details available like Browser Type, IP Location and Landing Page details.
Routing Rule Logs
Call Flow Logs for Routing rules can assist with optimizing call delivery.
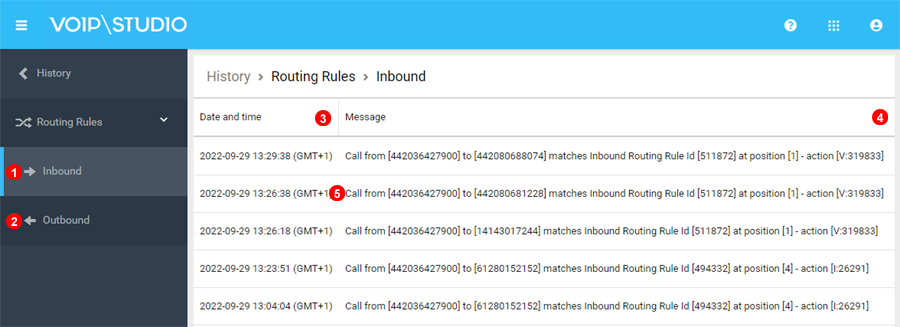
- Select to see all inbound calls caught and routed through routing rules.
- Select to see all oubound calls affected by routing rules.
- Select date and time filter as required.
- Call Details can be filtered to see specifics of rules that are in play.
- Full Call Record shown along with Rule and Result of routing.