Third party softphones - ZoIPer Android
In order to set up ZoIPer Android with VoIPstudio, download installation package from https://play.google.com/store/apps/details?id=com.zoiper.android.app&hl=en_GB and follow instruction below:
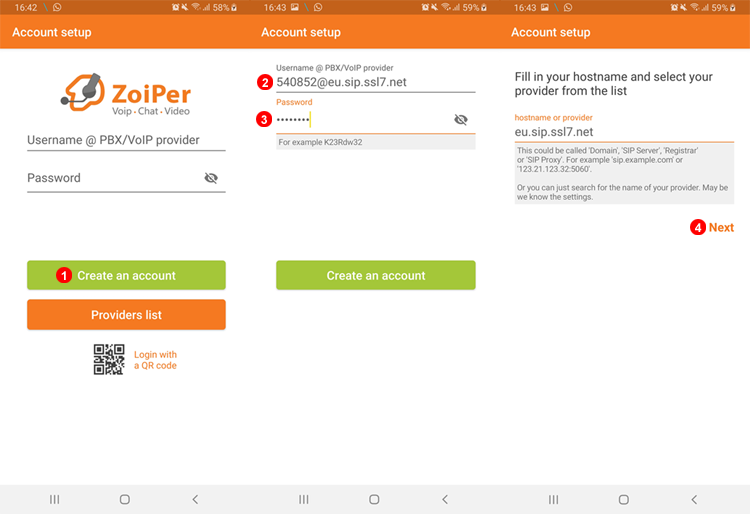
Figure 19.1 ZoIPer Android account set up.
- Select Create an Account.
- Enter SIP Username@domain in this example "540852@eu.sip.ssl7.net"
- Enter SIP Password.
- Click Next without making any changes.
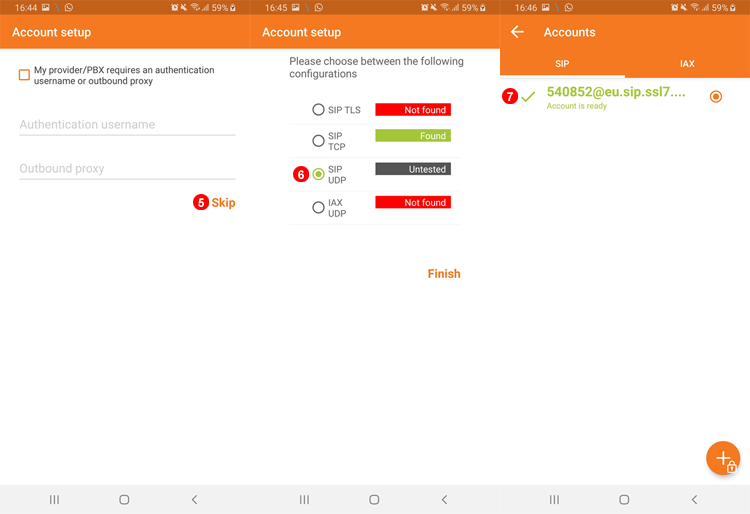
Figure 19.2 ZoIPer Android Manual account set up.
- Select Skip without making any changes.
- Wait for Tests to complete then select UDP regardless of Test results.
- Account should go green if succesfully registered.
Dial #123 to make a test call.
Third party softphones - ZoIPer Android Adjust transport protocol
If you have not selected transport protocol to UDP as describen on previous step 6. Zoiper will use TLS and will not receive or make calls. Please follow steps below to adjust transport to UDP
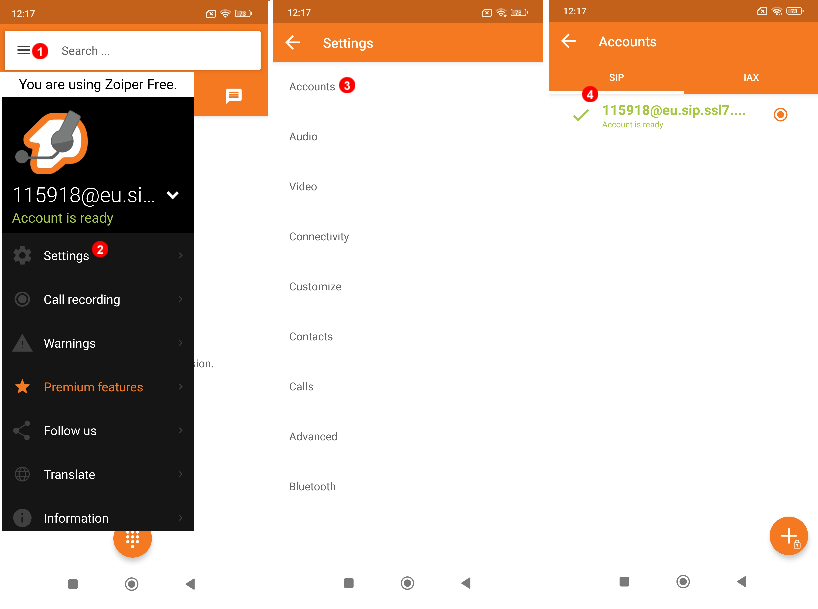
Figure 19.3 ZoIPer Android SIP Settings.
- Select Menu.
- Select Settings.
- Select Accounts.
- Select SIP Username@domain in this example "115918@eu.sip.ssl7.net"
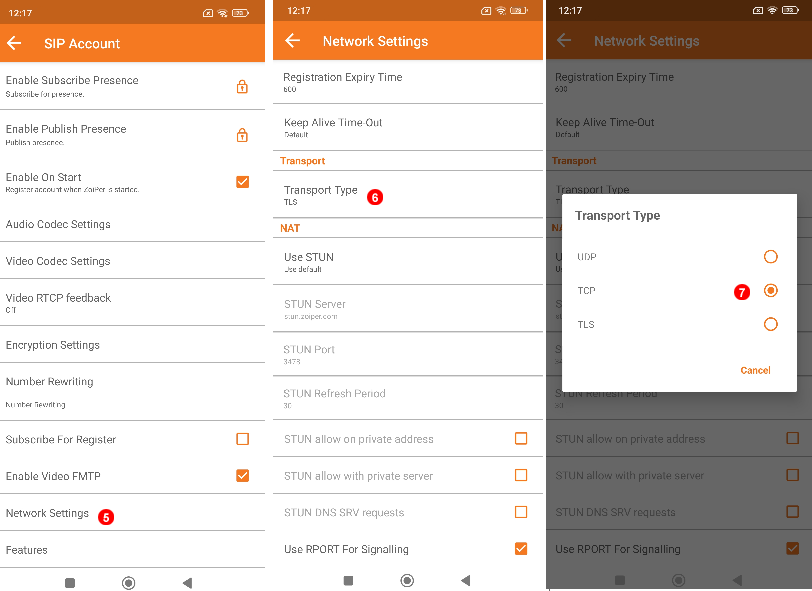
Figure 19.4 ZoIPer Android Network Settings.
Then in SIP account settings:
- Go to Network Settings.
- Select Transport Type.
- Switch from TLS to TCP or UDP.