Third party softphones - ZoIPer iPhone
In order to set up ZoIPer with VoIPstudio download installation package from https://itunes.apple.com/gb/app/zoiper-sip-softphone-for-voip/id438949960?mt=8 website, obtain your VoIPstudio SIP account details as shown in Figure 9.1 above and follow instruction below:

-
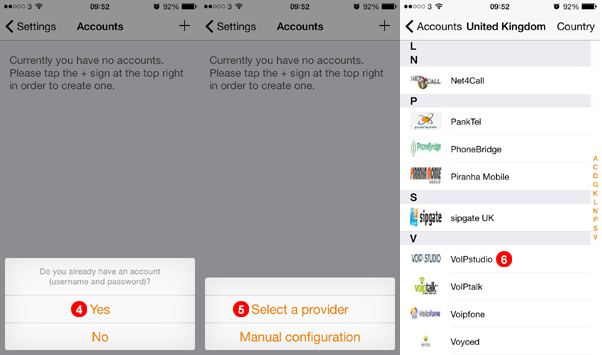
Select Settings.
-
Select Accounts.
-
Tap the Plus Sign to start setup.
-
Select Yes.
-
Choose Select a Provider.
-
Scroll down and Select VoIP Studio.
-
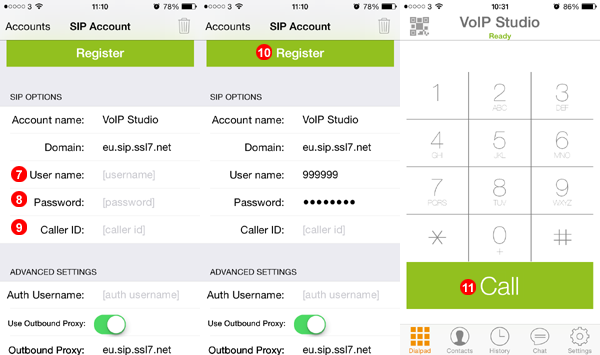
Fill SIP Username into field
(7). -
Fill SIP Password into field
(8). -
Enter Identifier of Choice into field
(9). -
Tap Register to register with our servers.
-
After Registration is complete enter any number and tap the call button.
After a short while ZoIPer will connect to our servers and you will be able to start making and receiving calls.
Third party softphones - ZoIPer iPhone Adjust transport protocol
If you have not selected transport protocol to UDP or TCP. Zoiper will use TLS and will not receive or make calls. Please follow steps below to adjust transport to UDP.
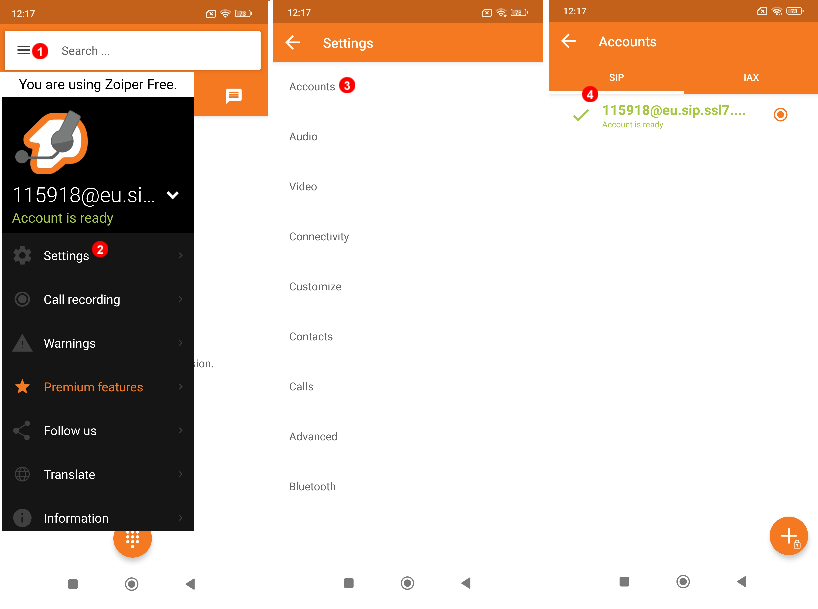
- Select Menu.
- Select Settings.
- Select Accounts.
- Select SIP Username@domain in this example "115918@eu.sip.ssl7.net"
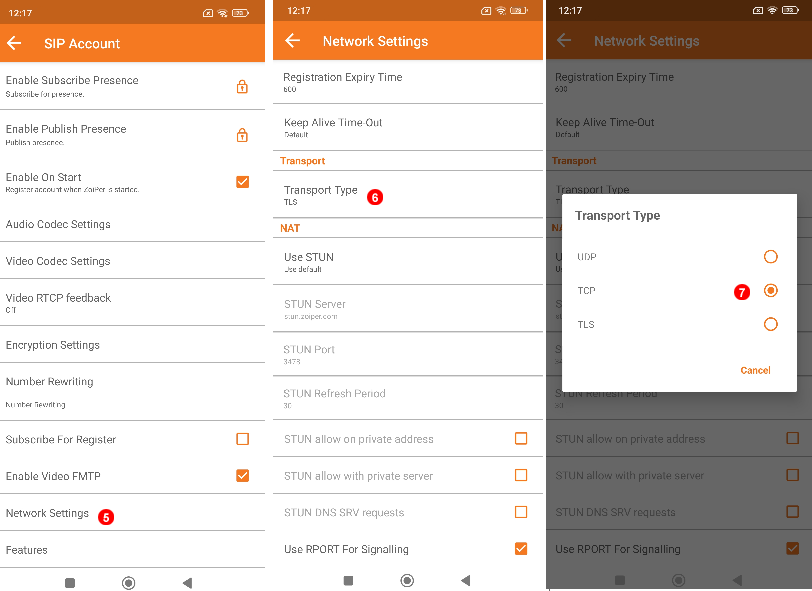
Then in SIP account settings: 5. Go to Network Settings 6. Select Transport Type 7. Switch from TLS to TCP or UDP.