Layouts
Add
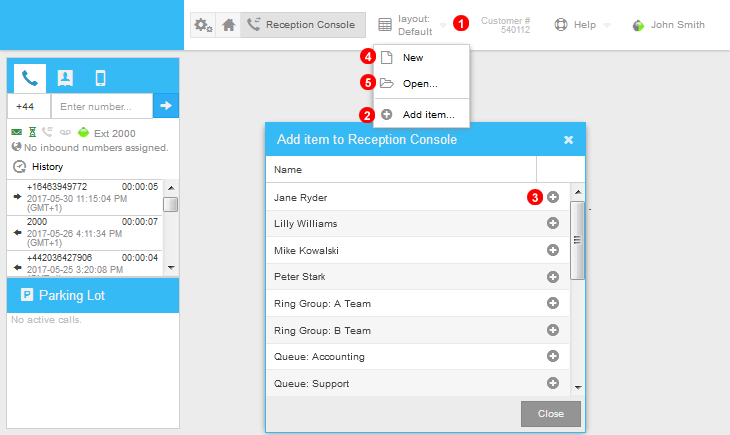
Figure 2.1 Reception panel.
Before you can start using your Reception Console dashboard the Layout needs to be created.
Layout consists one or more panels which represent your PBX objects such as Users, Ring Groups, Queues, IVRs etc. To create a new Reception Layout:
- Click
Layoutmenu in top toolbar. - Select
Add item...from the menu. - Click
(+)icon next to objects which you want to include in the dashboard.
Multiple layouts can be created using New menu option shown as (4) in Figure 2.1 above. To load previously saved layout use Open... shown as (5) in screenshot above.
Edit
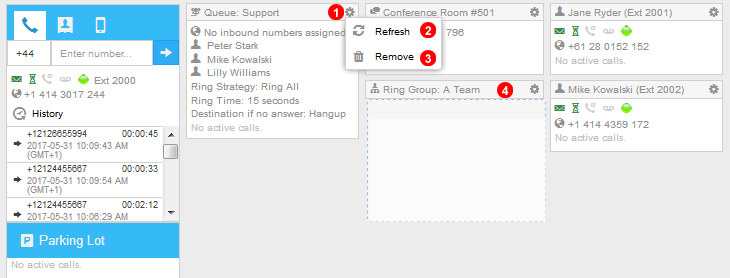
Figure 2.2 Edit reception panel.
Panels in reception console can be edited as follows:
- Click gear icon located in top right part of the panel.
- Select
Refreshto update content of the panel. Note: active calls will update automatically in real time when inbound or outbound call happens. Refresh is only required to update number assignments etc. - Select
Removeto remove panel from the current dashboard layout. - Panels can be re-arranged by dragging them by the header.