Telephone - Mobile Softphone
The Mobile Smartphone application enables you to make and answer VoIPstudio calls on your smartphone.
The application needs to be installed and running on every smart device that you want to use for VoIP calls.
Requirements Android 11+, iOS 12.0+
Download
The application can be downloaded from the Android and iOS app stores. Quick links can be found here:
- Google play store: https://play.google.com/store/apps/details?id=uk.co.level7systems.softphone
- Apple store: https://itunes.apple.com/us/app/voipstudio/id1388435054?ls=1&mt=8
Install
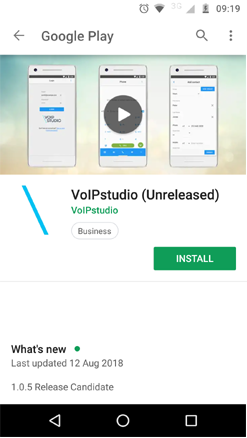
To install the app search for VoIPstudio on app store or google play and select 'install'.
Permissions Android
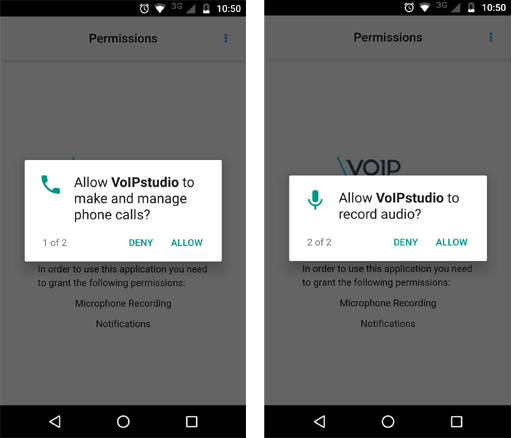
The app will request the right to make and record phone calls.
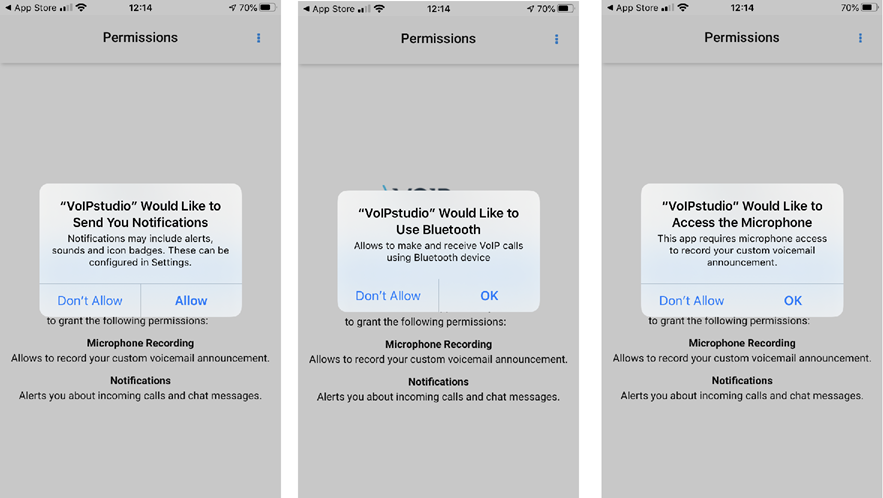
Permissions Iphone
Login
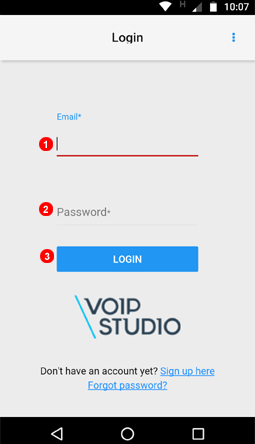
To start making VoIPstudio calls simply login into the app with your email and VoIPstudio password (the same credentials you use for web Control Panel).
- Enter your email address into field
(1). - Enter password into field
(2). - Click the Login button
(3).
Contacts
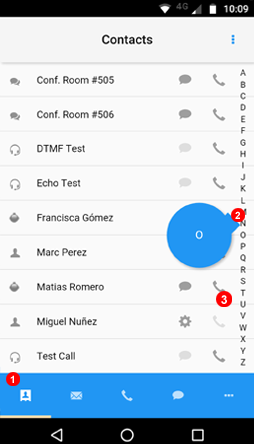
All your contacts are kept in a contacts section with direct links for you to call them, chat or edit their information.
- To access the contact section just click on the icon
1in the screenshot above. - You can find easily a contact using the alphabetical search. To do this simply press and hold the touch screen on the right side of the screen and drag to go to the desired initial. See the dynamic icon
2on the figure above. - Once you locate the contact just click the phone icon
3to call. If you call an internal contact you will see the chat icon4to enable quick access to the chat function.
Edit Contacts
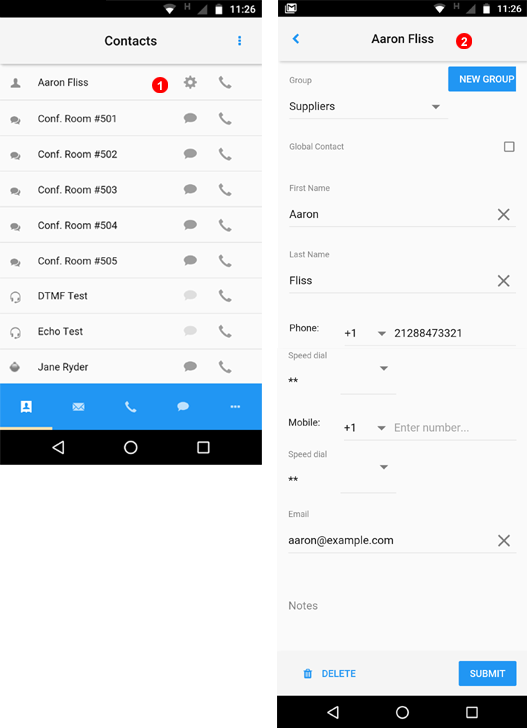
- External contacts can be easily edited by pressing the gear icon
1in the image above. - This will expand the contact information, allowing you to assign the contact to a specific group and modify the contact's name, email or phone number.
Add Contacts
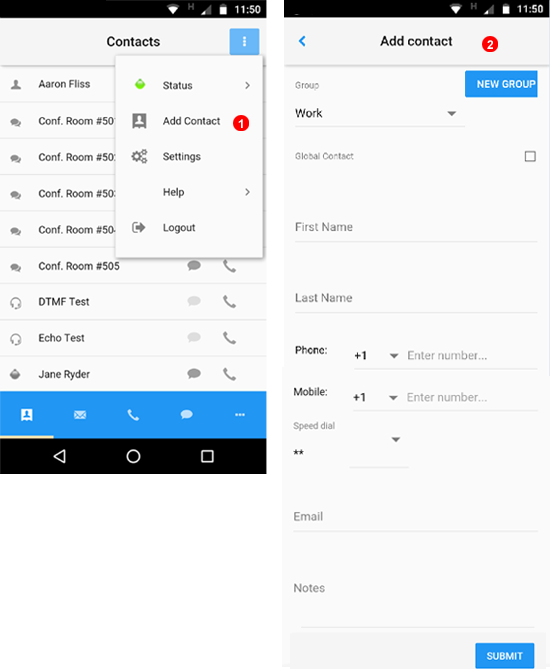
- To add a contact click on the menu located on the upper-right corner
1and select 'add contact'. - This will open the contacts form, allowing you to set up the contact's name, assign the contact to a specific group and modify the name, email or phone number.
Note: remember that you can easily import your contacts from Google Mail or Microsoft Exchange through your dashboard. For your reference: here
SMS
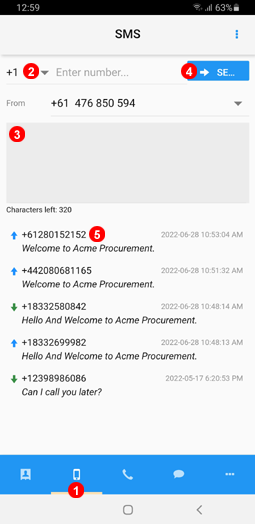
- Select SMS.
- Enter recipient number.
- Type Message to send.
- Select Send when ready.
- SMS send and receive history can be viewed.
Voicemail

- To access your voicemail messages click on the icon
1on the bottom bar. - This will display all inbox messages, you can easily hear them by pressing the icon
2near the message. - You can also see message details and save or remove the message by pressing the icon
3and selecting the desired option4.
Voicemail folders

- Voicemail folders can be accessed from the voicemail section
1. - This opens the drop-down menu
2and shows your voicemail folders.
Dial Pad
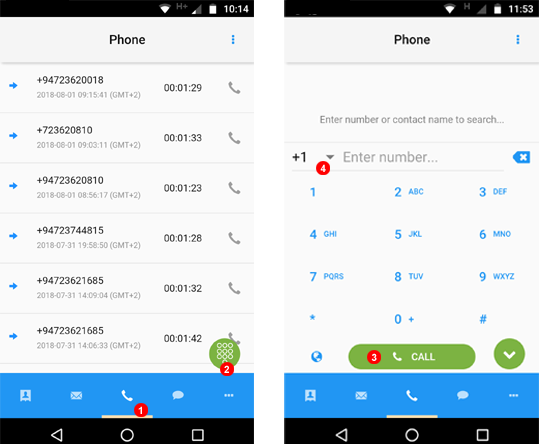
To dial a number:
1. Click on the phone icon 1 on the bottom bar.
2. To expand the keypad select the dialing icon 2.
3. Dial the number and press the call icon 3.
Note: If you need to call an international number you will need to select the country prefix first 4.
On-Call Options
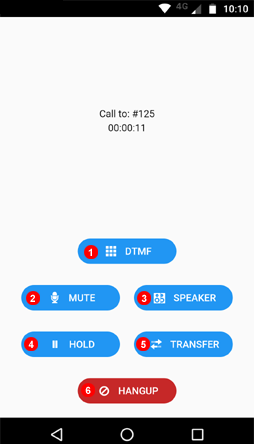
During a phone call, the app will display the on-call options panel as shown on the picture above. This panel allows you to: 1. Send digits (DTMF) on the keypad 2. Mute the microphone 3. Activate the speaker 4. Put the call on hold 5. Transfer the call 6. Hang up the call
Call transfer
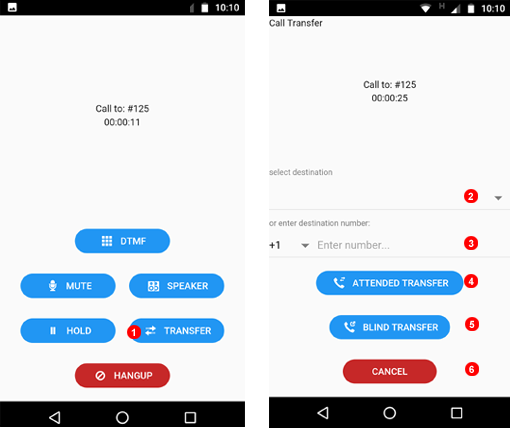
Transferring a call allows you to connect the call with a different extension or number. You can transfer an ongoing call by:
1. Clicking the transfer button 1 in the on-call options panel.
2. you need to select the destination by selecting the contact 2 or dialing the number 3.
Then you have three options:
- Attended Transfer: This places the call on hold and connects you to the end destination number. This gives you the option to speak to the destination before transferring the call and to make sure that the call is answered.
- Blind Transfer: The call is immediately transferred to the end destination number which rings until answered.
- Cancel the transfer.
Call History
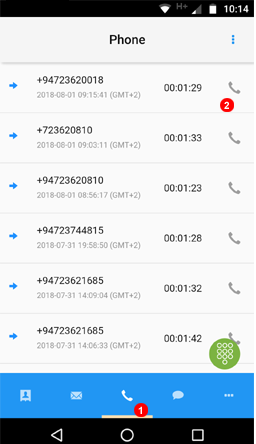
- To access your Call History click on the icon
1on the bottom bar. - You can redial or return the phone call by pressing the icon
2near the phone number.
Chat History
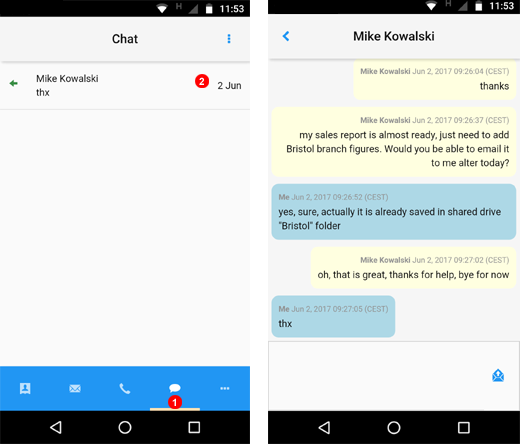
- To access messages in your chat history click on the icon
1on the bottom bar. This will display all your chat conversations. - You can easily review the conversation or send new messages by pressing the icon
2near the message.
Voicemail & Fax History
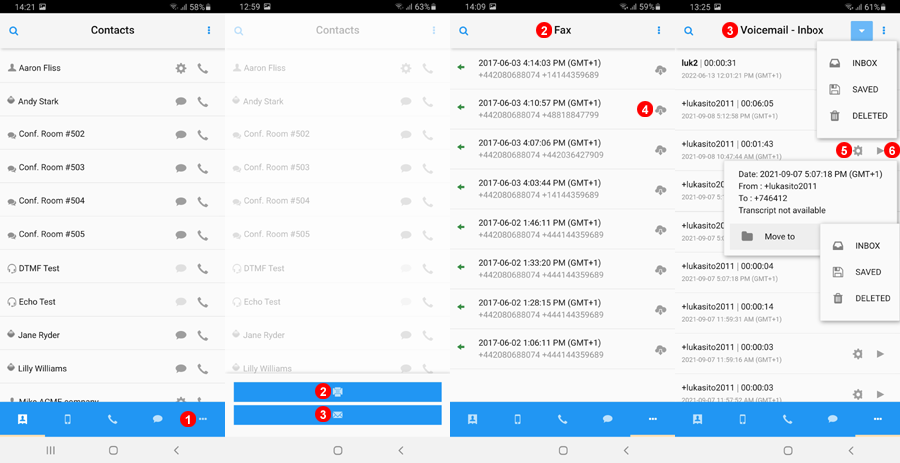
- To access Voicemail or FAX history click on the icon
1on the bottom bar. This will allow you to select2Fax History or3Voicemail. - From
FAXsection you can check for Inbound/Outbound FAX and download them by clicking the download icon4. - From
Voicemailsection you can access all user Voicemails make changes to folder of voicemail using theSettingsicon5and listen to the recording using thePlayicon6.
Main Menu
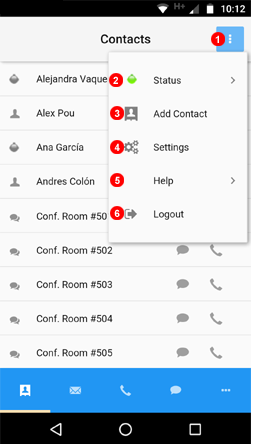
You can access the application main menu by clicking the button 1 from the figure above. This will expand a drop-down menu which gives access to:
Status- this allows you to change the phone and chat statusAdd Contact- this allows you to add new contact in the personal directorySettings- this is described belowHelp- this is described belowLogout- this is described below
Help button

Through the help feature, located on the main menu you can:
1. View the current release of the app in 'About'
2. Report a problem
3. Troubleshooting will display all the relevant data such as the current app and OS releases and SIP credentials.
Reporting a problem
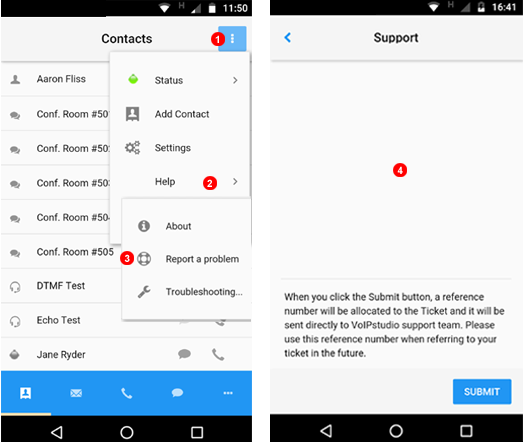
To report a problem with a softphone application or calls made / received:
- Click the main menu icon.
- Select
Helpfrom the contact menu. - Select
Report a problemfrom theHelpsub-menu. - Enter the details of the issue. If the problem relates to a particular phone call make sure to include the date and time of the calls and the number dialed (for outbound calls) or Caller ID for inbound calls.
- Click the
Submitbutton to open a Support Ticket.
Logout
The Log out button will disconnect our SIP user from the smart device so VoIPstudio won't continue receiving calls until you log in again. If you use a shared device it is recommended that you log out each time you finish using the device.
Status
You can switch the phone status to Do not Disturb which will prevent VoIPstudio calls from being received on your smartphone.
You have the following Status options:
OnlineThis is your usual setting and indicates that you are available to receive callsAwayYour contacts can see that you’re signed in, but not availableDo not DisturbThis setting will prevent chat messages from being received on your smartphoneInvisibleThis will make you appear offline but you will be able to use the app as usual.
Settings
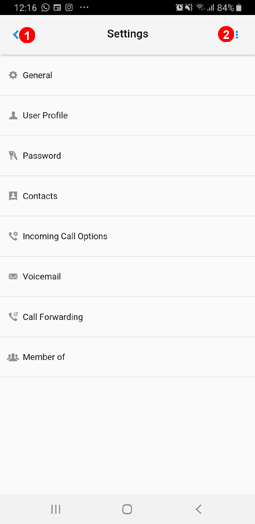
Within the Settings section, you can change numerous settings the same way as on the browser login.
Details of each menu will be discussed further below.
- Use the Back Button to Navigate to the previous Menu.
- Quick access to other menu`s and settings for example: Help
General
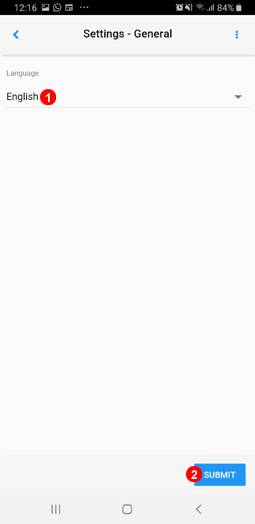
- Select desired language for your User Account.
User Profile
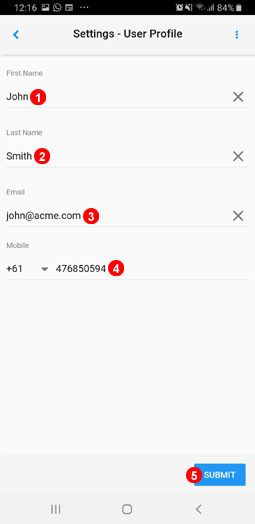
- Change the First Name associated with user.
- Change the Last Name associated with user.
- Change Email address user for login and voicemail delivery of User.
- Change the mobile number associated with user also changes number used when sending SMS.
- Tab Submit to save changes.
Password
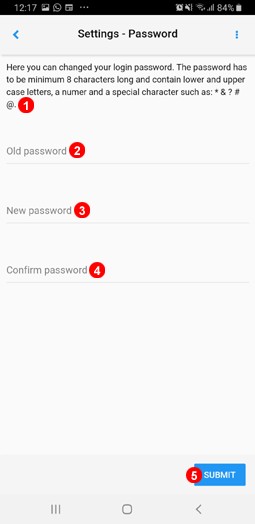
- Details of Password Requirements can be seen here.
- Enter Current Password to authenticate the password change.
- Enter new password as desired following rules discussed by point (1)
- Enter new Desired Password again to confirm the change.
- Select Submit to save the change.
Contacts
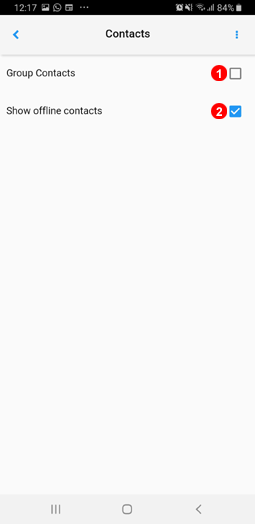
- Select to enabling group contacts according to type for example: Internal or Global.
- Select to show all contacts or deselect to show only online contacts.
Incomming Call Options
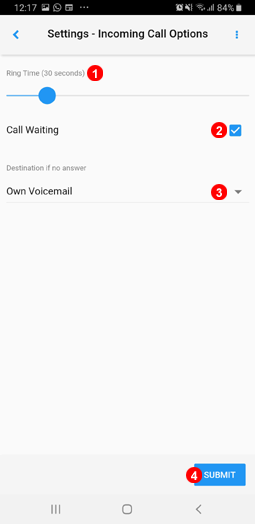
- Use the Slider to select the time in seconds before incomming calls go to destination if no answer.
- Enable or Disable Call Waiting.
- Select what action will be taken once Ring Time threshold is reached.
Voicemail
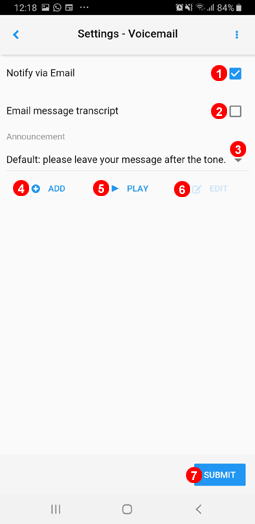
- Select to enable email notifcations for Voicemails.
- Select to have a transcription of Voicemails added to email notifications.
- Use the Dropdown list to select a different audio file for voicemail.
- Select to upload a MP3 file of a different voicemail greeting.
- Tap to play the currently selected voicemail greeting.
- If a Custom audio file has been uploaded the edit button becomes available you can see more on this in Figure x.xx below.
- Select Submit to save all changes.
NOTE: Voicemail can be retrieved and modified by dialing #445 and following the prompts.
Call Forwarding
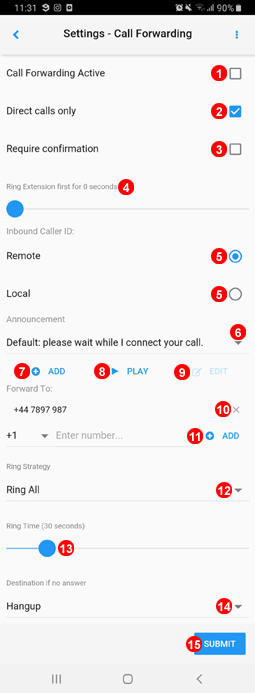
- Select to enable call forwarding.
- Select Direct calls only to have fowarding only happen if a call is directly to your user and not via a Ring Group or Queue for example.
- If Selected when a call is forwarded to a mobile to complete the forward the recipient will need to press the '1' Key to accept.
- Using the slider select how long calls will ring to any registered SIP devices before forwarding will start.
- Caller ID displayed on Forwarding number can be Remote or Local, Remote will show the caller Number and Local will show the Inbound number the call was received on.
- Use the Dropdown list to select an audio file to play before forwarding starts or none to have forwarding start immediately.
- Select to upload a new audio file to play before calls are forwarded.
- Select Play to listen to the currently selected audio file.
- If a custom audio file is selected the edit button can be used to further customize further details in Figure x.xx below.
- Currently selected numbers will show here and can be removed by selecting the
X - Select the country code and then enter the number you wish to forward calls to and then select add.
- If more than one number is being forwarded to different Ring Strategies can be selected from the dropdown list.
- Using the slider select how long calls to ring to the forwarding number before going to destination if no answer.
- From the Dropdown select where forwarded calls should be directed to if rejected or reaching the time limit set for ringtime.
Edit Recordings
The Following shows the settings when editing a custom recording for both Follow Me and Voicemail.

- The Name of the Recording can be changed for easier identification.
- Tap to Play and listen to the Recording.
- Tap the Record button to Record a new file using the Smart Phone mic.
- Select Submit to save any changes.
Member of
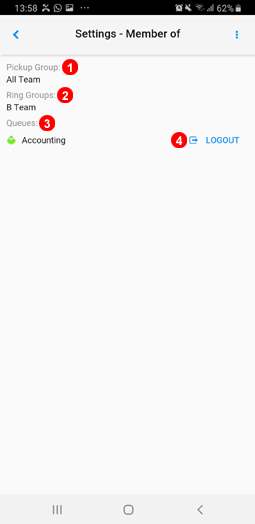
- Shows Pick Up Groups user is a member of.
- Shows Ring Groups User is a member of.
- Shows the Queues the user is a member of.
- Tap to Logout/Login of the selected Queue