


Please follow steps below to configure Cisco 79xx series phone with VoIPstudio service.
Note: instructions below will only work for phones with SIP firmware. If your phone uses Callmanager (SCCP) firmware, please follow instruction here to convert it to SIP.
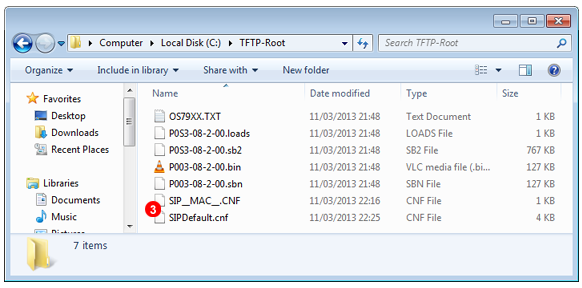
- Download and extract TFTP-Root.zip to
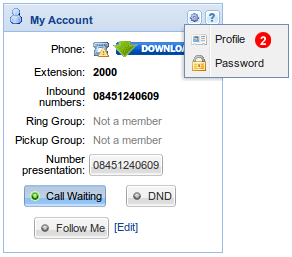
c:TFTP-Root - Go to your VoIPstudio admin panel and open Profile window – see (2) in screenshot below.

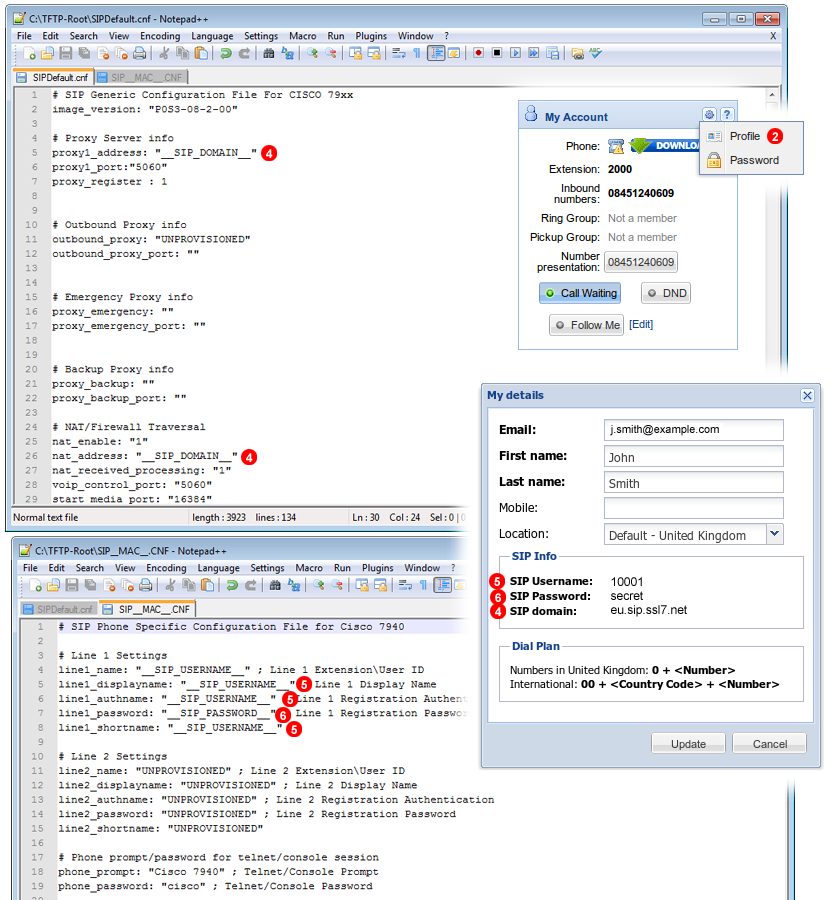
- Open Cisco79xx-Default.cnf and SIP__MAC__.CNF files in text estudior.

- Replace
__SIP_DOMAIN__as shown below. - Replace
__SIP_USERNAME__as shown below. - Replace
__SIP_PASSWORD__as shown below.

- Save both .CNF files and rename
SIP__MAC__.CNFreplacing__MAC__with Mac address of your Cisco phone which can be found printed on the label on the back of the device. - Download, install and run Solar Winds TFTP Server
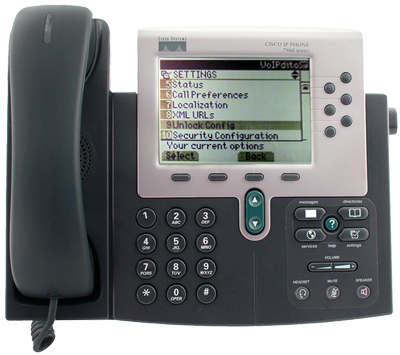
- Power up your Cisco phone, wait till it boots up and press
Settingsbutton. - Navigate to
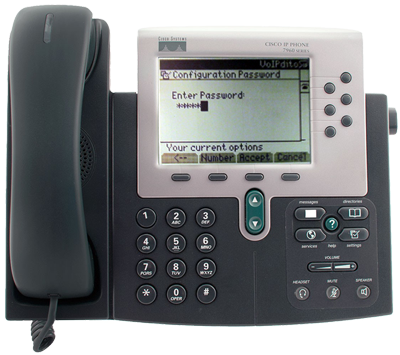
9. Unlock config
- Enter
ciscoas password and pressAccept. - Navigate to
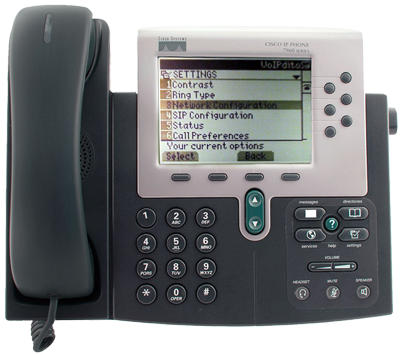
3. Network Configuration - Go to option
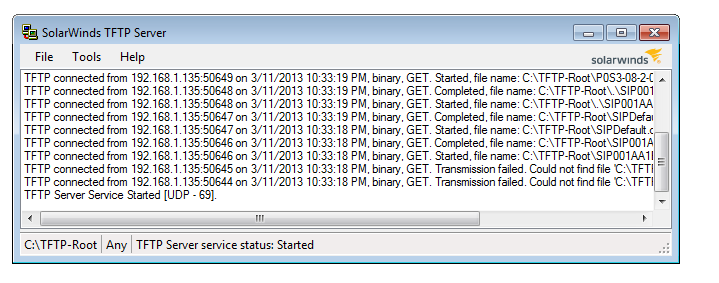
7 TFTP Serverpress Edit and enter IP address of a PC which is running Solar Winds TFTP Server, pressAcceptnextSaveandBack - Reboot your phone. After a short while you should see in Solar Winds TFTP Server console window your Cisco phone downloading configuration files. Next the phone will register on VoIPstudio network and you will be able to start making and receiving calls.