Table of contents
Notice: Please check our new “Click to Call” recommended solution: JavaScript CTI Connector which allows for Computer Telephony Integration (CTI) of customer’s website or application and VoIPstudio Cloud PBX. This integration does not require PHP or any other server side components anymore. Visit VoIPstudio CTI Connector’s official documentation to get all details.
Some time ago I wrote a blog post on our company website on how to create Click to Call functionality using PHP-SIP class we released as Open Source under the terms of GPL license. We use it extensively within our platform for various SIP functionality, however as comments to the mentioned post suggest it isn’t always easy for the web developers to deploy it. The main reason is the class is self contained fully functional SIP UAC, but that means it needs to bind to a local network interface on UDP port 5060. This is often problematic in shared hosting environments, where hosting companies place various restrictions on low level networking functions (specifically socket_create function is often disabled on typical shared PHP hosting environment).
Fortunately there is now another much easier way to implement Click to Call in PHP based website in any environment using VoIP Studio API. Below I will show steps by step guide how to achieve this.
VoIP Studio API key
First (if you haven’t done so yet) sign up for a Trial account (which offers all available functionality free of charge for a month). Next login and go straight to Administration (see point 1 in Figure 1 below) section. In Users grid click icon next to the user name (see point 2 in Figure 1 below) to open User Edit window. Click arrow on the right side of the window (see point 3 in Figure 1 below) and next Advanced tab (see point 4 in Figure 1 below). Finally copy to the clipboard API Key, as it will be needed (along with the email address associated with this user account) in the next step.
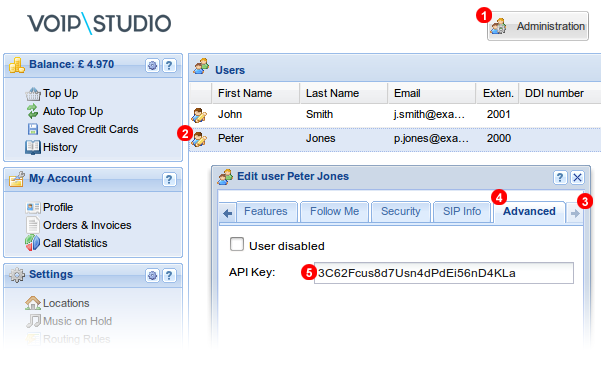
Figure 1. VoIP Studio API Key
Backend PHP script
In this step we will create a simple PHP script which will handle POST requests from our Click to Call HTML page. All it needs to do is capture to parameter (which will be a phone number we want to call) and pass it to the VoIP Studio API.
click2call.php
<?php
// validate the number is in format +NUMBER
if (!isset($_REQUEST['to']) || !preg_match('/^+[0-9]{6,15}$/', $_REQUEST['to'])) {
    die("Error: to parameter missing or has invalid format");
}

$url = 'https://ssl7.net/voipstudio.com/u/api';

$post_data = array(
    'api_email' => 'p.jones@example.com', // your VoIP Studio email here
    'api_key'   => '1234567890abcdef',    // your API key here
    'o'         => 'webcall',
    'a'         => 'c2c',
    'to'        => $_REQUEST['to']
);

$options = array(
    'http'    => array(
        'header'  => "Content-type: application/x-www-form-urlencodedrn",
        'method'  => 'POST',
        'content' => http_build_query($post_data),
    ),
);

$context  = stream_context_create($options);

// send POST request to the API url and return JSON response
echo file_get_contents($url, false, $context);


?>
HTML page with clickable phone number
Now as we have our backend PHP script ready lets create a simple page with a clickable phone number. To do that, we will use popular jQuery library to help us send Ajax request.
<!DOCTYPE html>
<html>
<head>
<meta charset="UTF-8">
<title>Click to Call via VoIP Studio API</title>
<script src="//ajax.googleapis.com/ajax/libs/jquery/2.1.1/jquery.min.js"></script>
</head>
<body>
Click phone number below to place a call<br/>
<a href="#" onclick="click2call('+13108709750')">+1 310 870 9750</a>

<script>
function click2call(number)
{
	$('body').append('<div>Trying to call '+number+'...</div>');

	$.ajax({
    	url: 'click2call.php',
    	data: { to: number },
    	dataType: 'json',
    	success: function (response) {
        	if (response.success) {
            	    $('body').append('<div style="color: green;">' + response.info + '</div>');
        	} else {

            	if (response.error) {
                	$('body').append('<div style="color: red;">' + response.error + '</div>');
            	} else if (response.errors) {
                	var errors = [];

                	for (error in response.errors) {
                    	  errors.push(response.errors[error ]);
                	}

                	$('body').append('<div style="color: red;">' + errors.join('<br/>') + '</div>');
            	}

        	}
    	}
	});
}
</script>
</body>
</html>
Test calls
Lets save both files on our web server and open the URL http://127.0.0.1/click2call.html in a web browser. We should see page similar to shown in Figure 2 below:
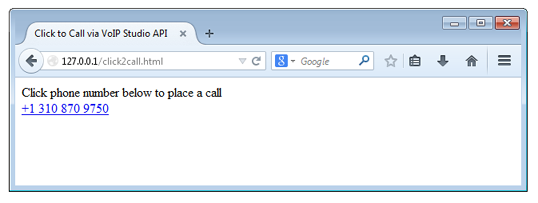
Figure 2. Click to call HTML page
If we click on the number no, we will most likely end up with an error message as shown in Figure 3 below:
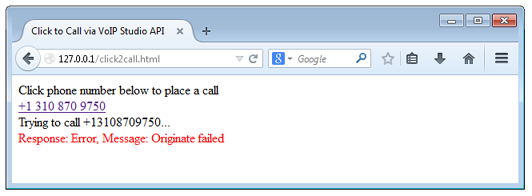
Figure 3. Click to call – API error
The above error indicates VoIP Studio network was unable to place a call to the requested number. In our case the reason for that is we don’t have any SIP Endpoint (Softphone or a hardware IP phone) registered. Lets download free softphone application and login into it using email address and password.
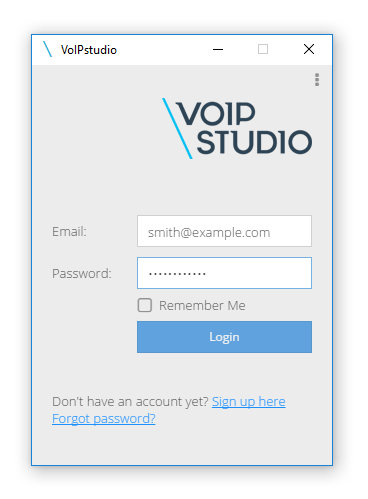
Figure 4. Softphone login
Lets try to click on our link again…
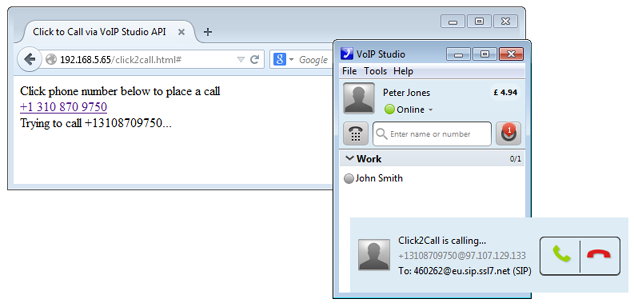
Figure 5. Test call ringing
This time as soon as we clicked the link our softphone starts ringing indicating a call from “Click2Call”. As soon as we answer, VoIP Studio API will attempt to place a call to the number we have clicked on.
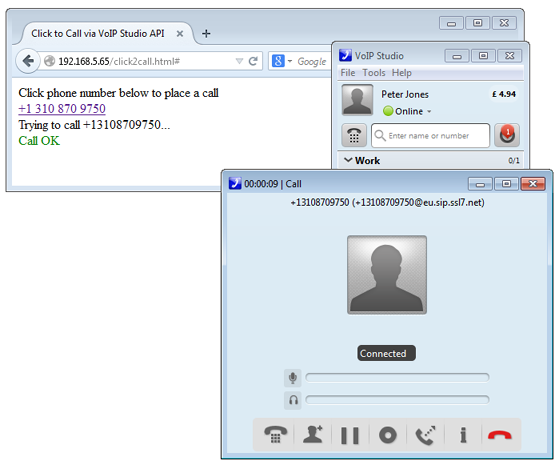
Figure 6.Test call connected
The above illustrates the most basic example. In real world you would probably want to connect your PHP backend to a database or CRM system for call logging and other business processes.
In the next post I will show how to use NodeJs to register your server side JavaScript code with VoIP Studio network and receive notifications about incoming calls. So both this tutorial and next weeks one will allow you to build complete Hosted Telephony Integrated solution.
Read this post in: Polski
More from the blog
Want to improve your business communication?
Unlock enterprise-class call center power at affordable prices – no hardware, no delays, no surprises!
