Hardware Configuration - Auto Provisioning - Yealink
Yealink phones can be auto provisioned by VoIPstudio VoIP service. This greatly simplifies device deployment and configuration.
If your phone was purchased from VoIPstudio, it has been already pre configured and there is no need to provision it. Please refer to Phone edit section to assign extensions. If your phone was not purchased from VoIPstudio, please perform a Factory Reset described in Factory Reset section above and Firmware upgrade.
You can obtain your phone IP by following the steps described in Find phone IP section above.
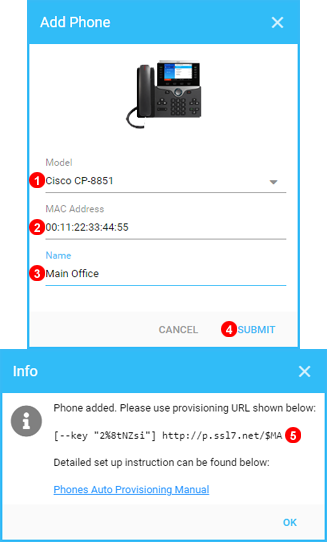
Click Add button located in Phones panel.
1. Select your device model.
2. Enter your device MAC address - five groups of digits and letters separated by a colon sign for example: 00:1a:4d:5c:25:8d. Usually printed on the label located at the back of the device.
3. Name Device as required.
4. Click Submit button.
5. Copy and Paste URL into Phone Configuration as shown below.
Example of Server URL and AES Key: http://p.ssl7.net | AES Key: Point 4 In Image Below 8Lx4TTur7xxxxxxx
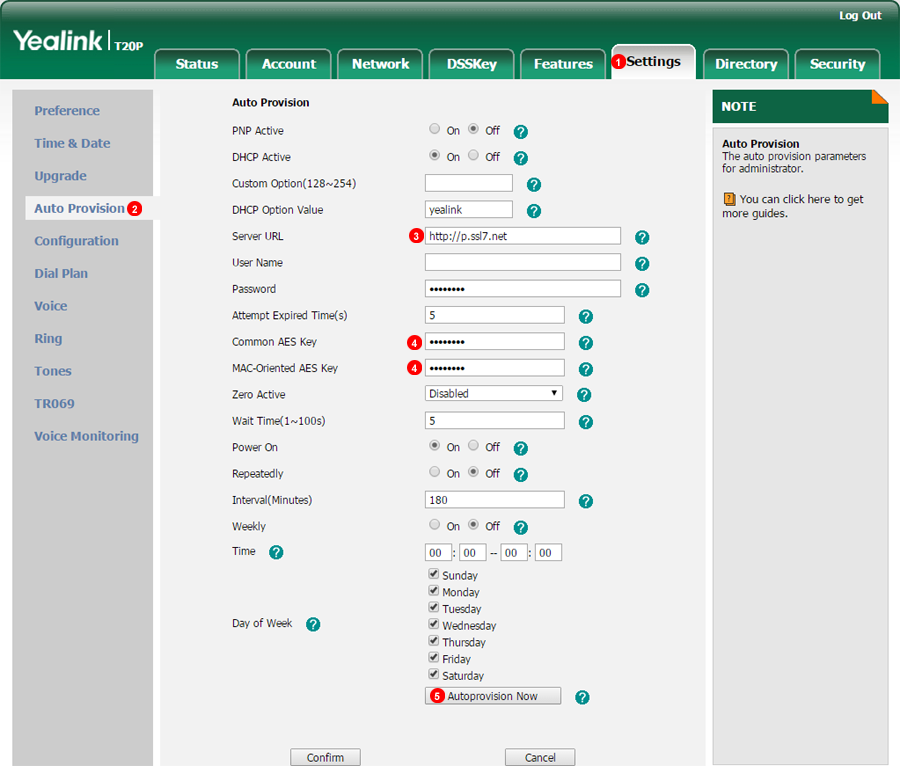
To auto provision Yealink phone login into web interface of the device and follow steps below:
- Click
Upgradetab at the top of the page. - Click
Advancedlink at the top. - Enter
http://p.ssl7.netas Configuration Server Path. - Enter
AES KeyintoCommon AES KeyandMAC-Oriented AES Keyfields. - Click
Auto provisionbutton.
After a short while your Yealink phone will reboot and obtain configuration data from VoIPstudio provisioning service.