Telephone Numbers
Inbound numbers allow to make calls from traditional telephone network to your hosted VoIP systems.
We can assign telephone numbers from more than 4000 cities around the world.
- Click
Add Inbound numberto provision a new telephone number. - Click
Port Number(s) You Ownto being the porting process and transfer existing number/s you currently have hosted with a different provider. - Numbers can be exported to CSV file for records.
- Click on the Number in blue to edit and change parameters and target.
- When numbers are selected the Delete Icon will appear to remove numbers in bulk.
Add Number
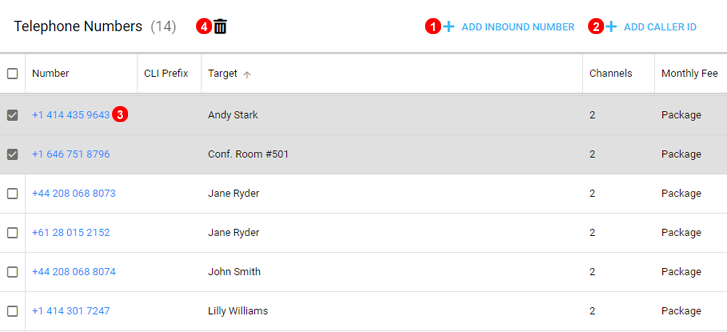
To add a new telephone number click Add Inbound Number button shown as (1) in Figure 4.1 above and follow steps below:
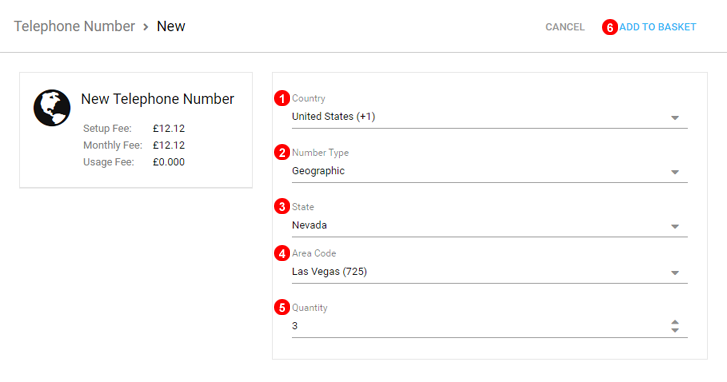
- Select Country in which your telephone number should be located.
- Select number type: Geographic, National or Toll Free.
- Select State (for United States only).
- Select City in which your telephone number should be located.
- Enter desired amount of number(s) you want to purchase.
- Click
Add to Basketbutton.
Complete checkout process to finalize number provisioning.
Note: Once the numbers have been added, documents associated with the corresponding location will be reviewed. This process can take between 4 and 72 working hours depending on the country and type of number. You will receive a notification as soon as the numbers are enabled or if anything else is required.
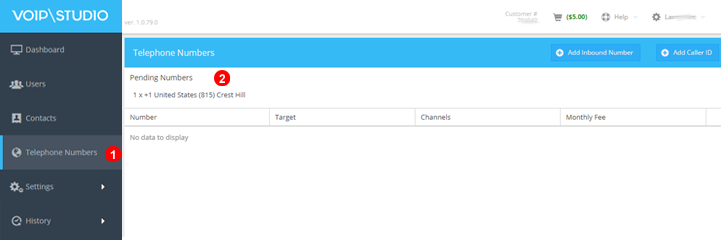
Note: Under some scenarios DDI can not be provisioned immediately and will be marked as pending while our support team processes them. The DDI will be displayed as pending as shown on the screenshot below.
Edit Number
To edit telephone number settings click icon shown as (3) in Figure 4.1 above and follow steps below:
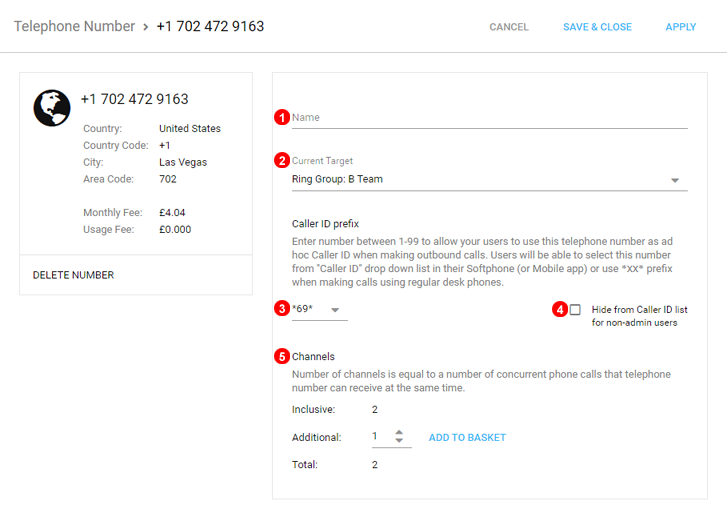
- Provide Identifier for the number, this will display on web dashboard, desktop app and mobile app.
- Set where inbound calls should be routed to.
- You can have many caller IDs and easily switch between them. Choose any 2 digit number to dial before making an outgoing call to use number as CLI for that call only.
- Select Box to hide number from user caller ID lists unless number is assigned directly to User as Default or Dynamic Caller ID.
- Set required number of channels. Each number is initially provisioned with 2 channels which allow for maximum of 2 concurrent inbound calls. Additional channels are required to be able to receive more than 2 calls simultaneously.
NOTE: Additionally the code code *141* can be dialed to set Caller ID to anonymous for that call.
Port Number(s) You Own
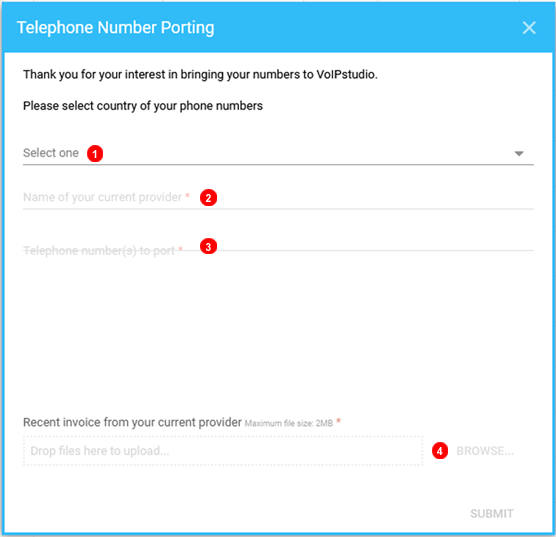
- Select number/s' country of origin.
- Enter the name of the current provider.
- Enter the telephone number/s to port in.
- Submit a recent invoice from the current provider. Note: Invoice must be dated from within the last 3 months.
Fax Setup
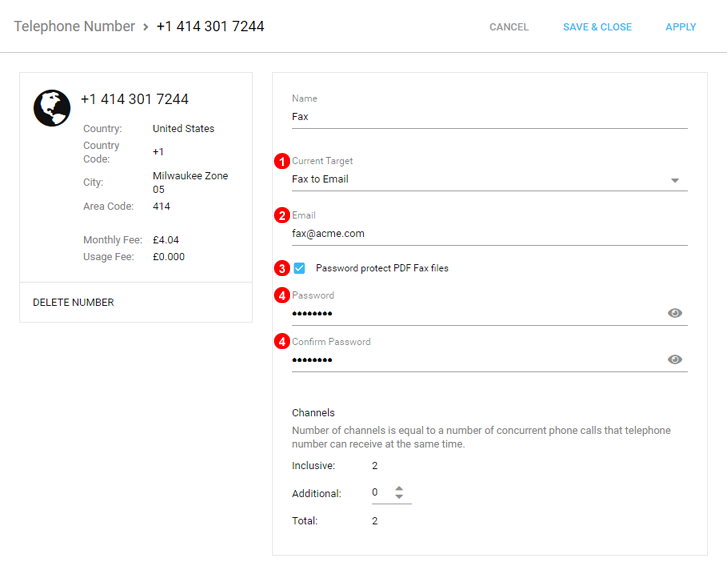
To edit telephone number settings click icon shown as (3) in Figure 4.1 above and follow steps below:
- Change Number Target to Fax to Email.
- Enter the email address you want Faxes delivered to.
- Tick box to set password protection on PDF file.
- Enter and Confirm the Password PDF Files will be encrypted with.
- Click Submit to complete the set-up.
Note: Maximum File size of 20MB and Supported Formats are: gif, jpg, png, ppt, txt, gzip, pdf, doc, xls, odt, odp
SMS Setup
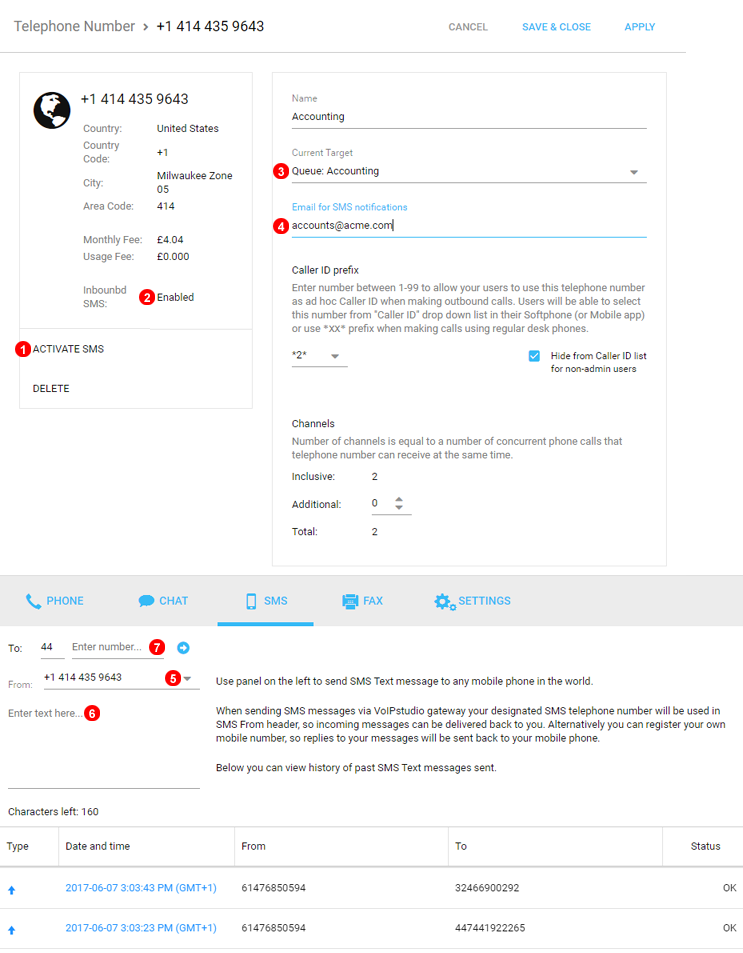
- Numbers start with SMS inactive and have to be manually activated.
- SMS status will be displayed on the number.
- The Current Target of the number will not change with SMS active and voice calls will continue to function as normal.
- Enter Email address to receive SMS notifcations.
- To send an SMS simply swap over to the User Dashboard and select the number to send from.
- Type the message you wish to send.
- Then enter the receiver number and hit the send button.
Note: Inbound SMS may not be available on all numbers. Note: some countries do not support activation SMS.
## SMS Restrict access
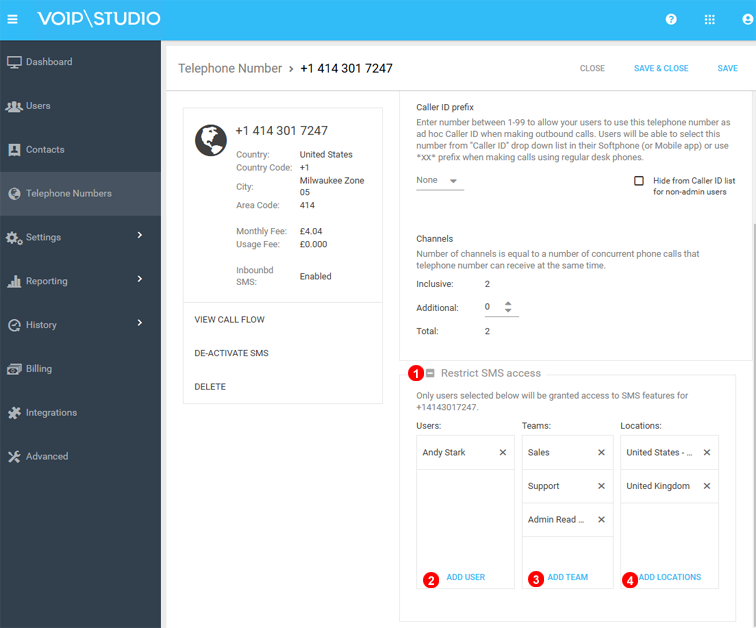
- Click icon to open SMS restrict access section.
- SMS access can be restristed to specific user/s.
- SMS access can be restristed to specific team/s.
- SMS access can be restristed to specific location/s.