Integrations - Zapier
In this chapter you will learn how to integrate Zapier with VoIPstudio.
Authorization
Starting the Integration requires invites to users to authorize communication between Zapier and VoIPStudio.
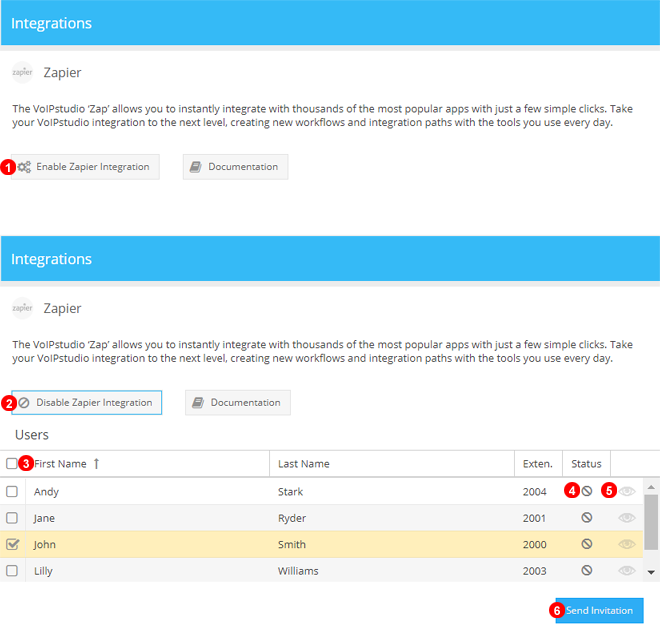
Figure 79.1 Zapier Integration User Invite.
- Click Enable Zapier Integration to begin.
- Integration can be stopped at anytime after by clicking Disable.
- Use the Tick boxes to select one, multiple or all users.
- Current status of the invitation will be shown in the Zapier invitations grid. A green check mark will be shown when Authentication is completed succesfully.
- If needed at anytime later clicking the Eye Icon will show the User API credentials.
- Click Send Invitation to Proceed to the Next step.
NOTE: Invitation to start the authentication will be sent to all selected Users via email.
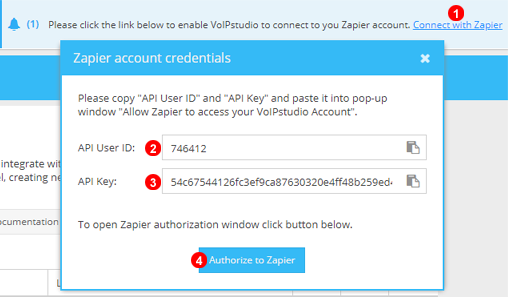
Figure 79.2 Zapier Authentication Step One.
- Click "Connect to Zapier" to Open window with User API Credentials.
- This is User ID needed to authenticate with Zapier.
- This is the API Key for selected user.
- Click "Authorize to Zapier" to Open Authentication window as shown in Figure below.
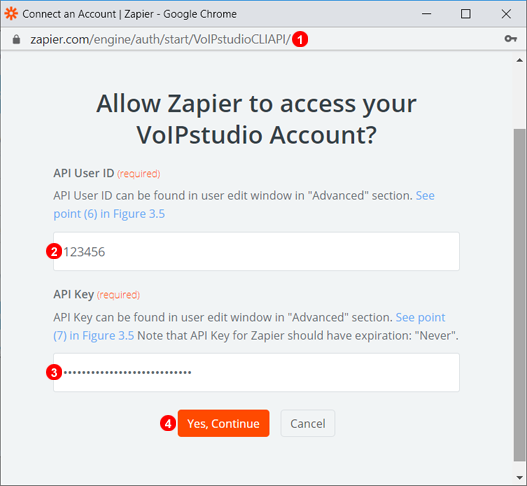
Figure 79.3 Zapier Authentication Step Two.
- Window will pop up after Clicking "Authorize to Zapier" as shown in Figure Above and load to Zapier domain.
- Enter or Paste User ID as shown in Figure Above.
- Enter or Paste API Key as shown in Figure Above.
- Click "Yes, Continue" to complete Authorization and Proceed to Create Zaps.
Building Zaps
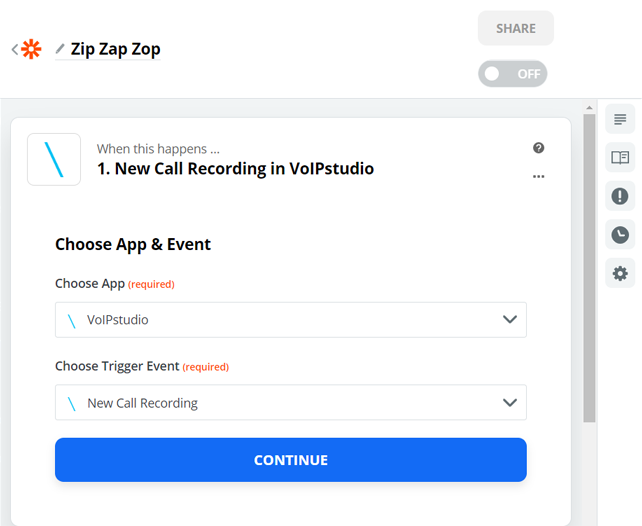
Figure 79.4 Zapier Step One Selecting Event.
With Authentication complete the only thing left to do is define what events and actions to trigger in Zapier through Zaps.
This handy guide will show how to achieve this in Zapier: https://zapier.com/help/create/basics/create-zaps