Integrations - Zendesk
In this chapter, you will learn how to integrate Zendesk with VoIPstudio.
Additional information about this integration can be found at Zendesk marketplace
Configuration
If you don't have a Zendesk account, you can create one here.
Once you login into Zendesk, follow steps below to find VoIPstudio integration:
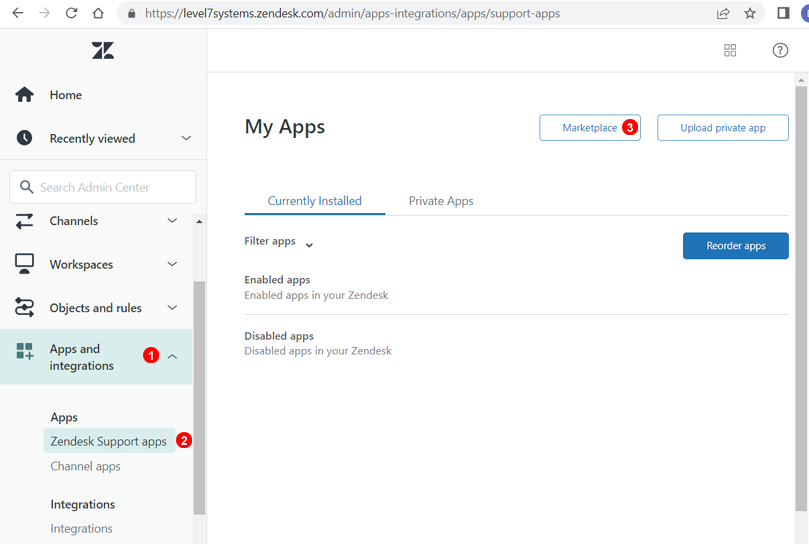
First, access Zendesk's admin dashboard.

- Enter
Settings. - Click on
Go to Admin Center.
- Enter
Apps and integrationssection. - Next click
Zendesk Support apps. - Next click
Marketplacebutton.

- First, filter as
Telephony & SMS. - Type VoIPstudio into keywords field.
- Click in the shown VoIPstudio option.
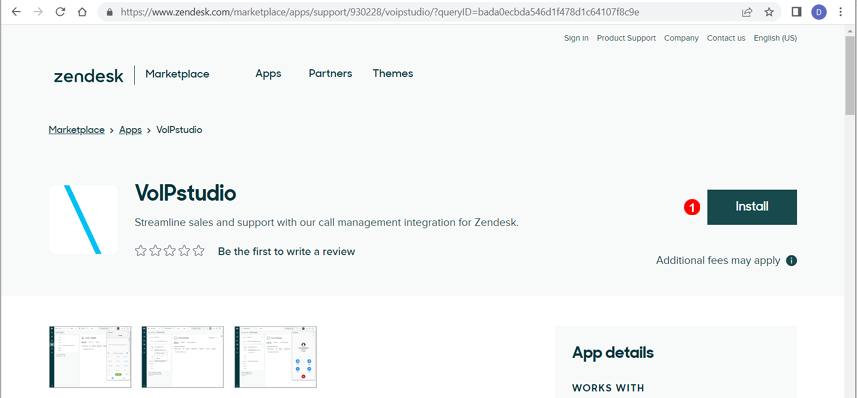
- Click the button
Installin order to deploy this integration.
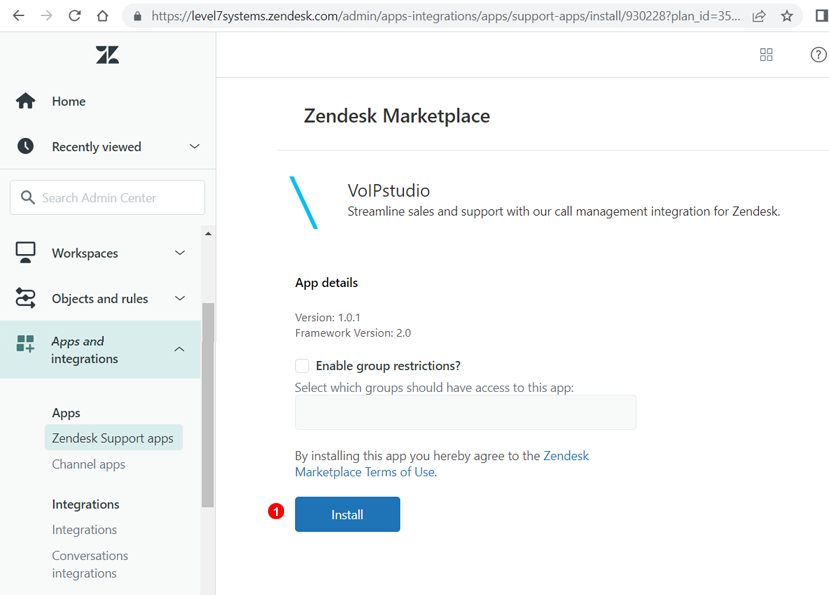
- If there are no restrictions needed, click the
Installbutton to continue with the installation.
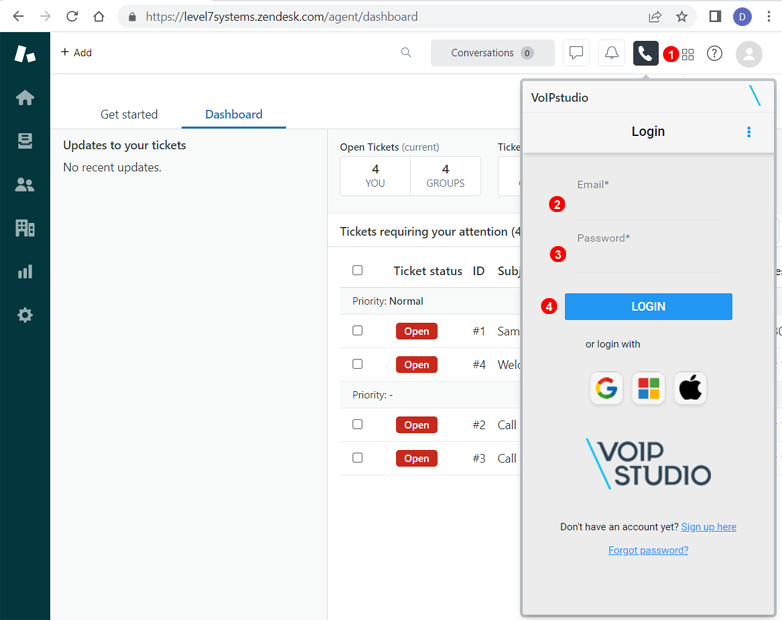
- Once installed, refresh the website and the telephone icon will show up. Click on it in order to open VoIPstudio softphone.
- Enter your VoIPstudio Email.
- Enter your VoIPstudio Password.
- Click the
Loginbutton to continue.
If your Zendesk plan includes "Talk" feature it should be disabled in order for VoIPstudio integration to work correctly.
This can be done through Zendesk's admin dashboard.
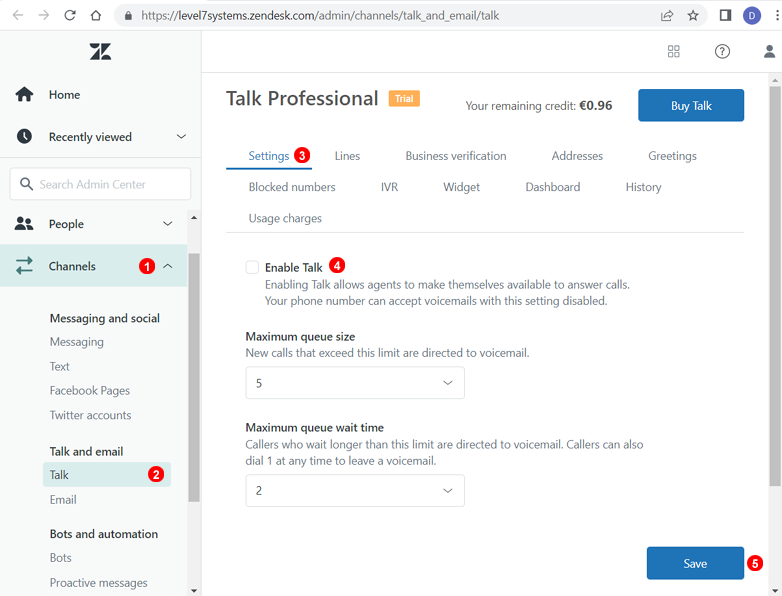
- Enter
Channelssection. - Enter
Talkin theTalk and emailsection. - Click on settings.
- Uncheck
Enable Talkoption. - Click on
Saveto apply changes.
After following these steps, Zendesk is finally integrated with VoIPstudio.
Supported features
Calls and tasks history
Check Zendesk's call and tickets history in the Customers section and VoIPstudio's call history in the softphone.
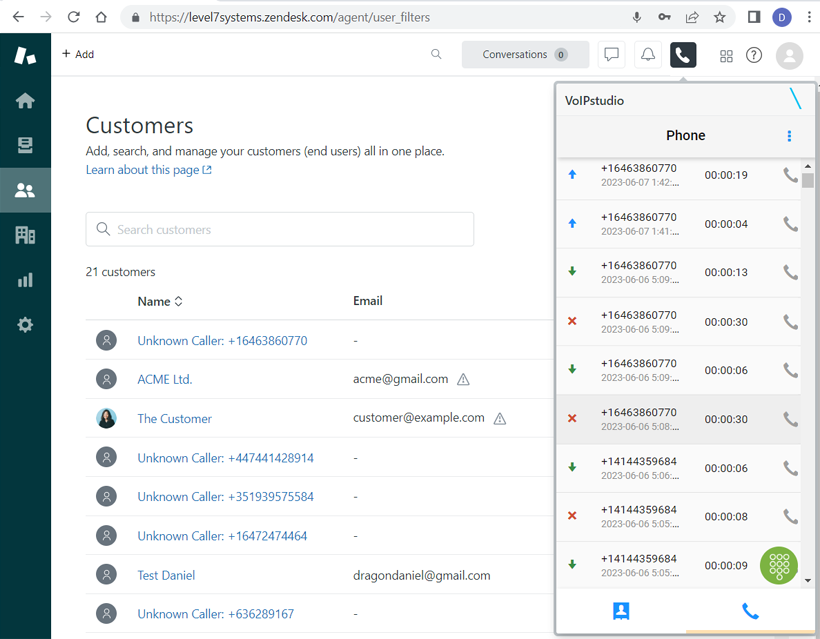
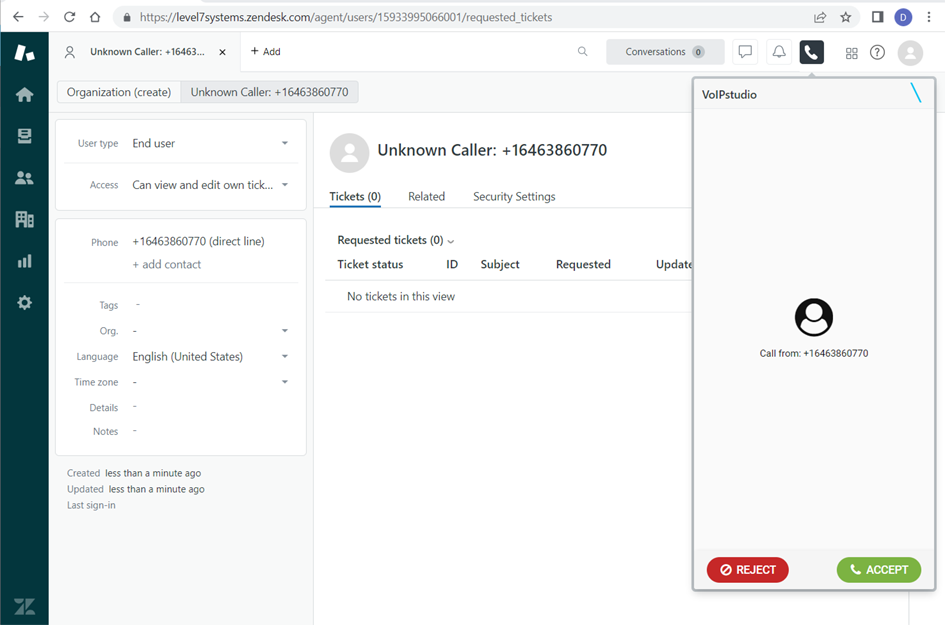
When a unknown inbound call comes in, a call notification will pop up, at the same time, Zendesk will create a customer task and automatically register its contact number.
This information can be modified while you're in the call.
Click to call
In the Customers section, you can choose your registered customers in order to call them.
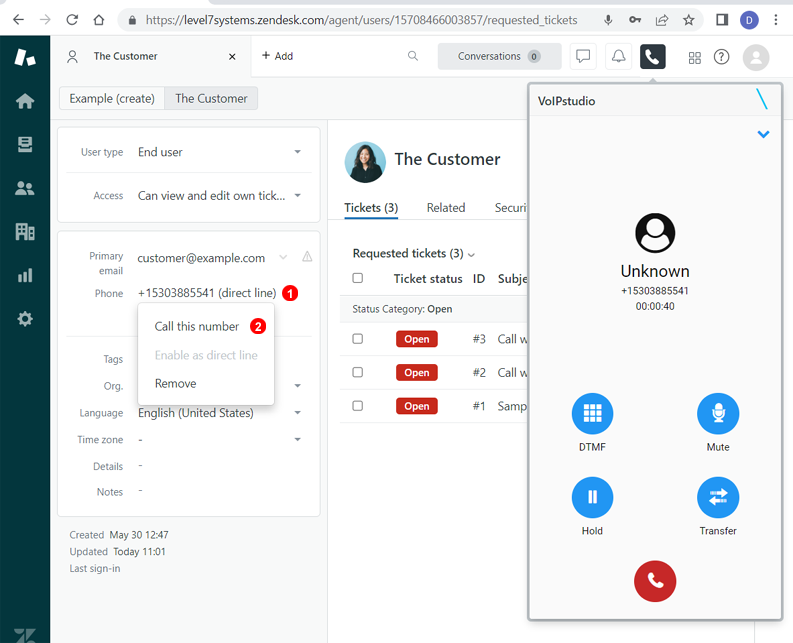
- Click on the customer's phone number
- Click
Call this numberto make an outbound call.
Numbering format
Default numbering format is international +e.164 but if you need you may adjust this tu Local country pone number format. You just need to adjust:
a, From Zendesk Admin dashboard> People> Configuration> End users. “Toggle off Validate user phone numbers” *This allow Zendesk to recognise any phone number and will not apply any modificationd to telphone number. * b, VoIPstudio users will need to browse Zendesk softphone and navigate to Stettings> General, and togle off "Use E.164 for phone numbers"
We strongly reccoment to keep this internaional number format specially if your organization will have employees on different countries. VoIPstudio is capable of handling separate local format for each employee location; but this is not possible from CRM side.