Settings - IVR
Interactive Voice Response system can respond with pre-recorded audio messages to further direct callers on how to proceed.
IVR systems can be used to control almost any function where the interface can be broken down into a series of simple menu choices. The use of IVR and voice automation enables a company to improve its customer service and lower costs, due to the fact that callers' queries can be resolved without the cost of a live agent who, in turn, can be directed to deal with specific areas of the service. If the caller does not find the information they need, or require further assistance, the call is then transferred to an agent who can deal with them directly.
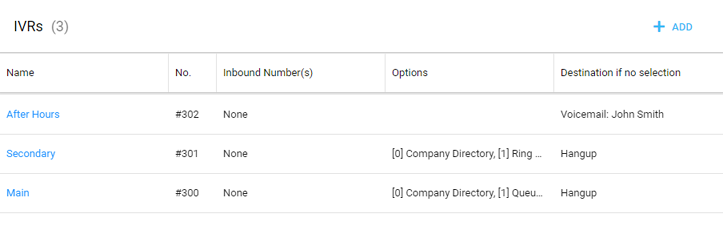
Here you can add an IVR or view and edit their settings.
Add
To add an IVR click button shown as (1) in Figure 15.1 above and follow steps below:
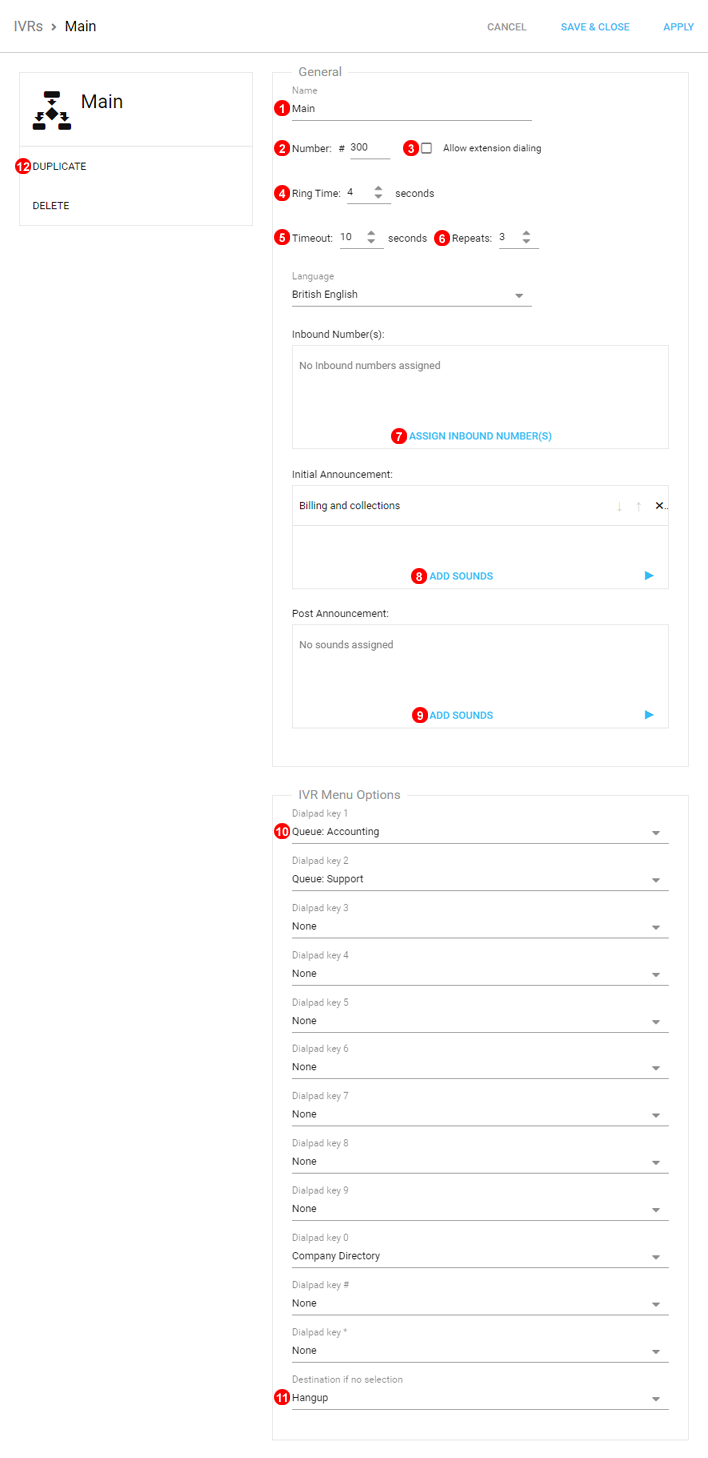
- Enter unique name.
- IVR Number used to transfer calls directly into an IVR, this can be changed to between #300 - #3999. To Transfer use #300 as shown in this example.
- Tick "Allow extension dialing" if you want callers to be able to dial 3 or 4 digit user extensions to be connected directly."
- Number of seconds of ring time before call is connected to an IVR.
- Set timeout in seconds after the last announcement.
- Sets how many times the Audio is played before going to "Destination if not answered".
- Select Inbound Number you wish to assign to this IVR menu.
- Select audio announcement played in the IVR.
- Select optional audio announcement played after caller makes selection.
- Select targets for keypad digits.
- Set how call is handled if Customer does not make a selection.
- After Creation of IVR is Complete the option to duplicate/copy settings becomes available.
Edit
To edit an IVR click button shown as (2) in Figure 15.1 above.