Settings - Auto Dialler
Autodialler offers the ability to optimize your outbound call flow by using predefined parameters to maximize productivity and reduce downtime.
Note: The Auto Dialler feature is only availble to clients on the Pay-as-You-Go plan.
Auto Dialler Softphone Client
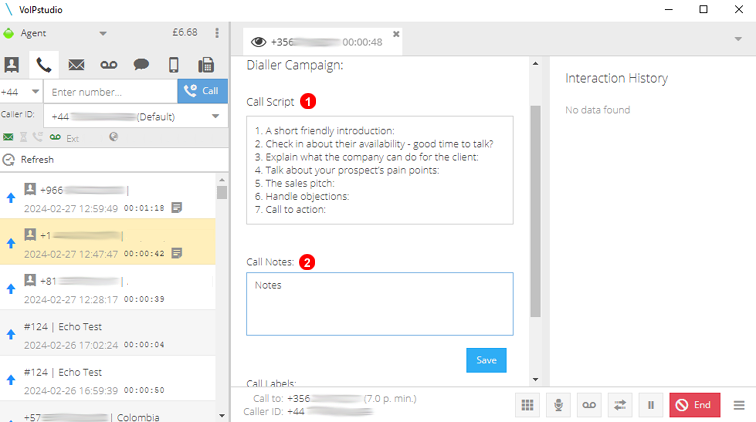
Figure 22.1 Add/Edit Auto Dialler Campaigns.
- Area where Call Script is displayed during call.
- Call Notes - Area where notations of call can be made.
Leads
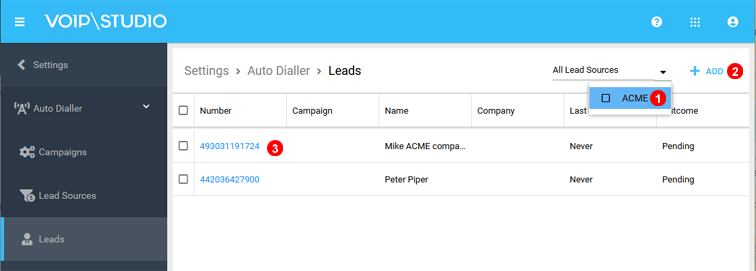
Figure 22.2 Create/Edit Lead.
- Click to filter Leads by different sources.
- Click to add Lead.
- Click on Lead Name to Edit an Existing Campaign
Leads General Settings
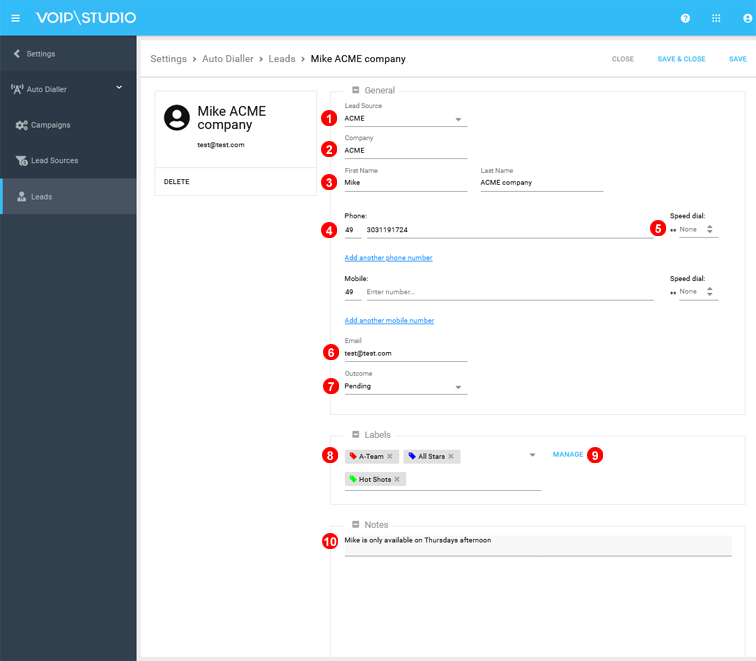
Figure 22.3 General Settings Lead.
- Select the Lead Source.
- Enter unique Company Name.
- Enter unique First Name / Last Name.
- Enter contact phone number/s.
- Select speed dial number for Lead (optional).
- Enter email.
- Select the current status of lead: Pending, Failed, and Success.
- Labels allow for quick and simple filter and management of Lead.
- Allows for managing and assigning labels to a Lead.
- Enter any additional notes if required.
Lead Sources
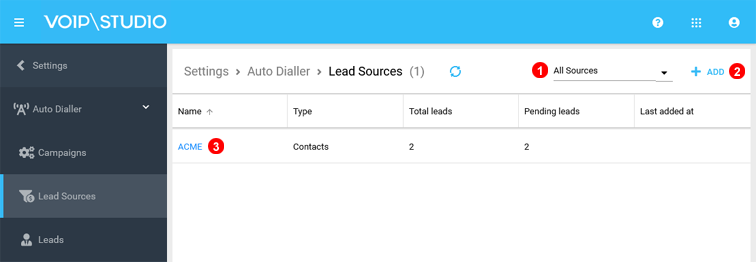
Figure 22.4 Add/Edit Lead Sources.
- Click to filter list by different Lead Sources.
- Add new lead source
- Click on Lead Sources Name to Edit an Existing Lead.
Lead Sources Add
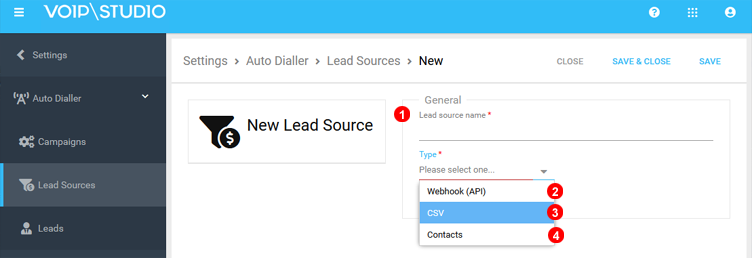
Figure 22.5 Create/Edit Lead.
- Enter Lead Source name.
- Webhook API: Once created edit the source to see the JSON Code for Webhooks.
- CSV: Import contact list with .csv file (Note .csv file cannot exceed 3MBs in size).
- Contact: Add leads via existing VoIPStudio contact list.
Lead Sources Edit
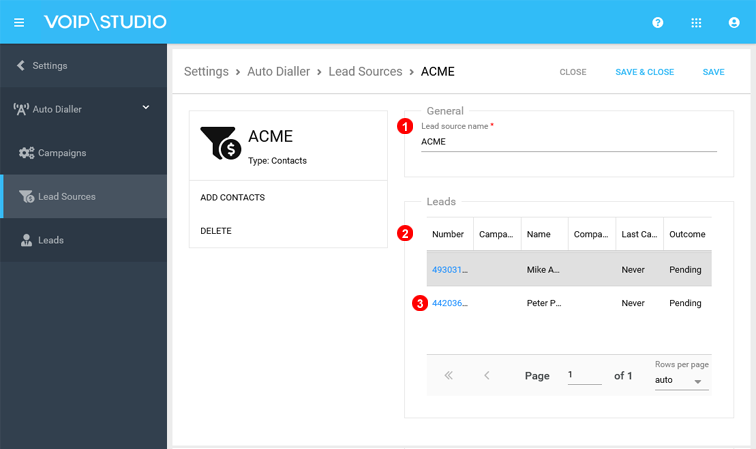
Figure 22.6 Create/Edit Lead.
- Edit current Lead source name.
- Current Leads in Lead Source.
- Click on Number to Edit an existing individual Lead.
Campaigns

Figure 22.7 Add/Edit Auto Dialler Campaigns.
- Click to Add a New Campaign.
- Click on Campaign Name to Edit an Existing Campaign.
Campaign General Settings
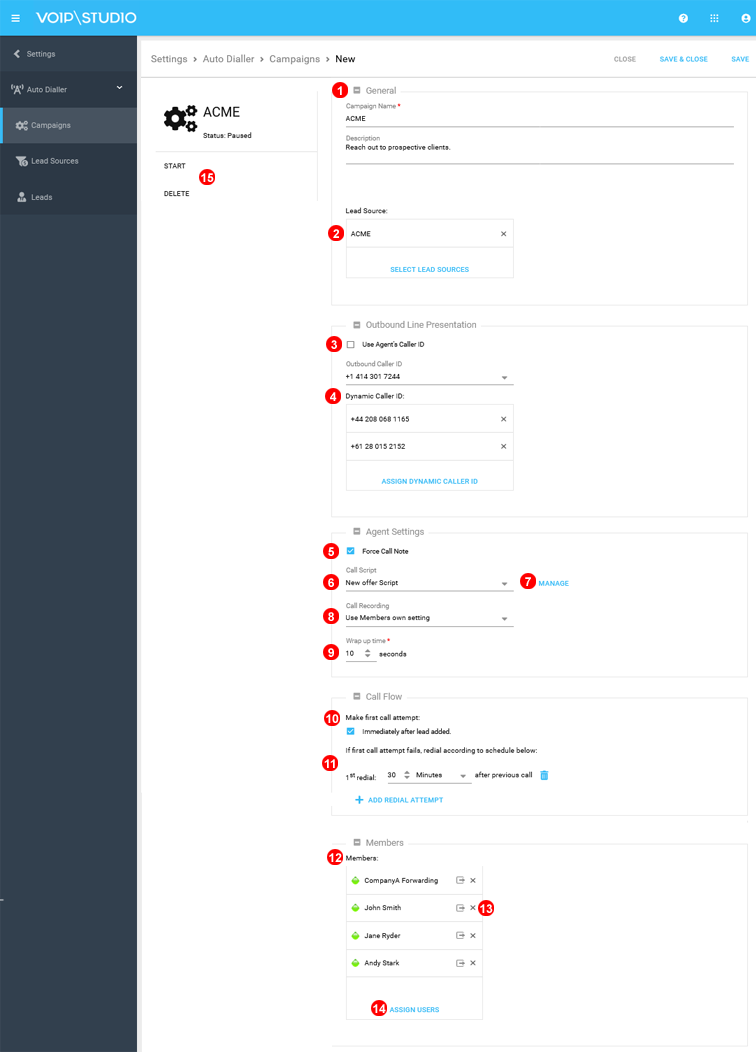
Figure 22.8 Campaign General Settings.
- Enter unique name and description.
- Add lead source.
- Use Agent's Caller ID - If enabled agents will use their existing Caller ID. Outbound Caller ID - Select Default CLI/Caller ID will be displayed for all outgoing calls by agents that do not fit Dynamic Caller ID Criteria.
- Select ALL numbers to be used for Caller ID. NOTE: Dynamic CLI will only apply to countries that match the Inbound numbers assigned.
- When enabled agents can leave a note to summarize last call.
- Select Call Script to be used while agent are actively participating in campaign
- Click to Manage Call Spcipts
- Select Call Recording options: Always or Never record call, Use Members own setting.
- Wrap up time: After a successful call, how many seconds to wait before sending a potentially free agent another call.
- Make first call attempt - When lead is added the system will immediately begin the call flow.
- Governs the retry time (minutes, hours, days) for the leads in this Campaign.
- Dispalys the current users involed with Campaign.
- Use the cross icon to remove user from the queue.
- Click to asign users add to the Campaign.
- Click Start to commence Campaign. Click Delete to reomve exisitng Campaign. Note option only avaible when editing existing campaign.
Campaign Call Script
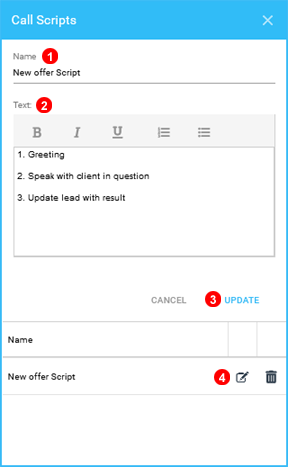
Figure 22.9 Create/Edit Call Script.
- Enter unique name.
- The text that is displayed for agents while actively participating in campaign.
- Click Update to save changes.
- Edit/Delete option for existing Call Script.