Settings - Phones
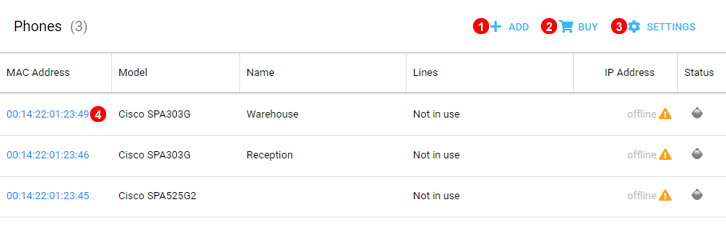
Here you can manage IP phones assigned to your account.
Once a VoIP phone is registered with your hosted PBX you will be able to easily assign users to particular phone. All phones purchased via your Control Panel (see Buy chapter below) will be automatically added to your account. It is also possible to add phones (selected models only) purchased from other vendors.
Add
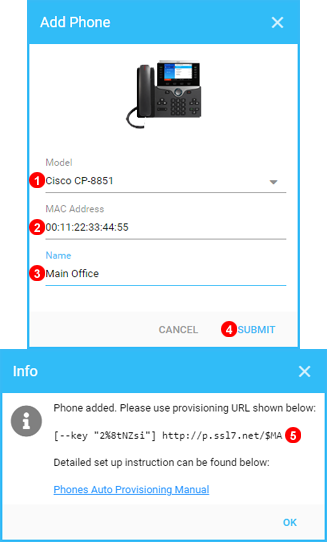
To add a phone purchased from the third party vendor click Add Phone button shown as (1) in Figure 20.1 above and follow steps below:
- Select your device model.
- Enter your device MAC address - five groups of digits and letters separated by a colon sign for example:
00:1a:4d:5c:25:8d. Usually printed on the label located at the back of the device. - Name Device as required.
- Click
Submitbutton. - Copy and Paste provisioning URL into Phone Configuration as shown below.
Once a supported devices is added to our system you will obtain auto-provisioning URL, enter it into device settings and manage the phone via your web based control panel.
Edit
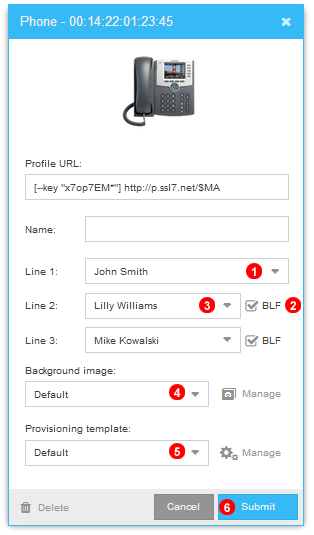
To edit a phone click icon shown as (4) in Figure 20.1 above and follow steps below:
- Select a user you wish to assign to this phone.
- Enable Busy Lamp Field (BLF - when enabled line LED`s display the real time status of the monitored extension. Line key will flash red when phone is ringing, turn solid red when a call is connected and orange to display an error.)
- Select a user you wish to monitor using BLF.
- Use
Background imagedrop down to select image displayed on phone's LCD screen. This open is not available for all phone models. - Use
Provisioning templatedrop down to select Custom Provisioning Template. See Customer Provisioning Templates below for further details. This option is not available for all phone models. - Click
Submitbutton.
After a short while device will obtain new configuration profile from VoIPstudio central provisioning server and re-assign phone lines accordingly.
Settings
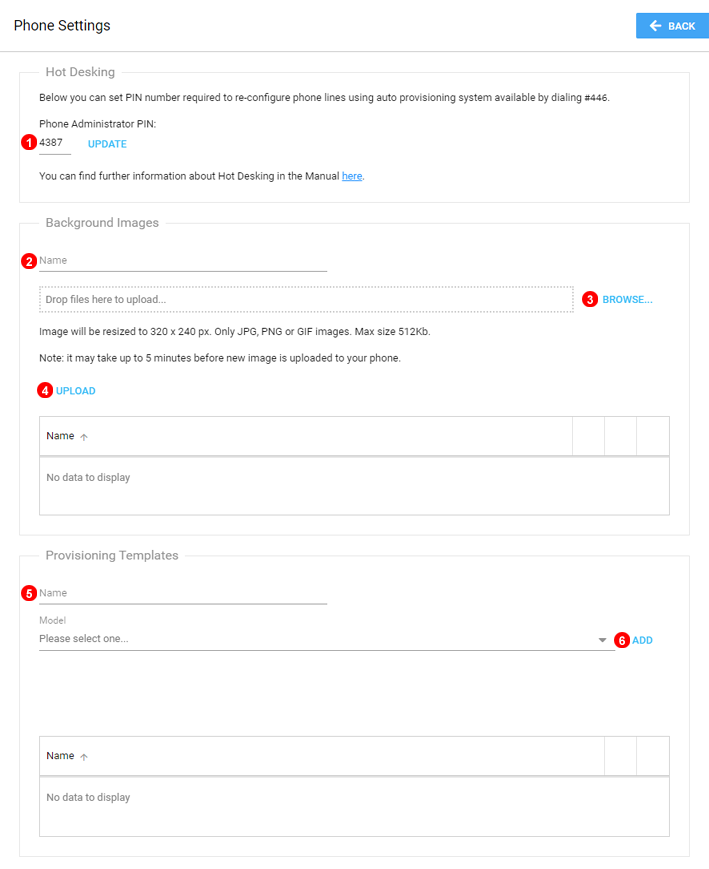
To manage advances phones provisioning settings click Settings button shown as (3) in Figure 20.1 above and follow steps below:
Hot desking
Phones can be re-reconfigured by dialing #446 and providing Administrator PIN number.
- Use field
(1)to update your hot desking Administrator PIN number.
Background Image
Follow steps below to upload new background image:
- Give it a unique name.
- Select image file to upload.
- Click
Uploadbutton.
Custom Provisioning Template
Follow steps below to create custom provisioning template:
- Give it a unique name.
- Select phone's make and model then click add.
Buy
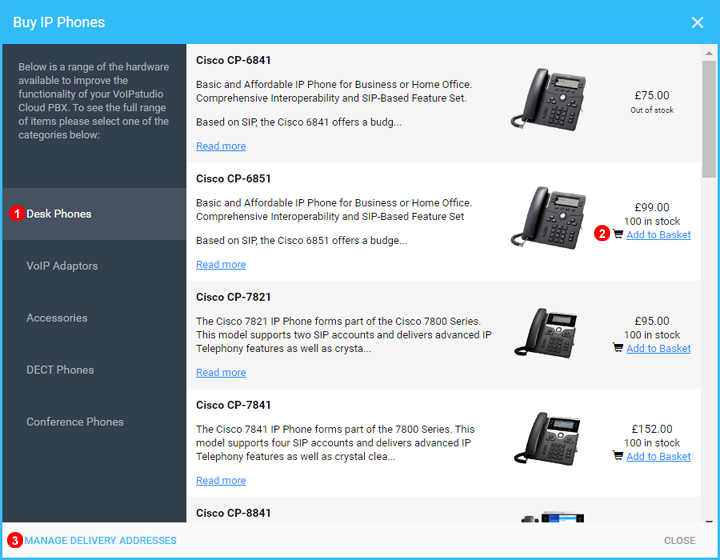
To buy an Internet (VoIP) phone click button shown as (2) in Figure 20.1 above and follow steps below:
- Select hardware category in the left menu.
- Click
Add to Basketnext to phone you wish to buy. - Delivery Addresses can be added and changed here.
Next follow Checkout and delivery steps below to complete the transaction.
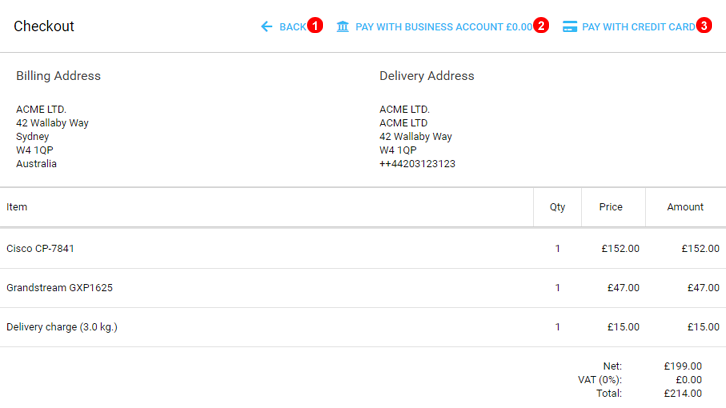
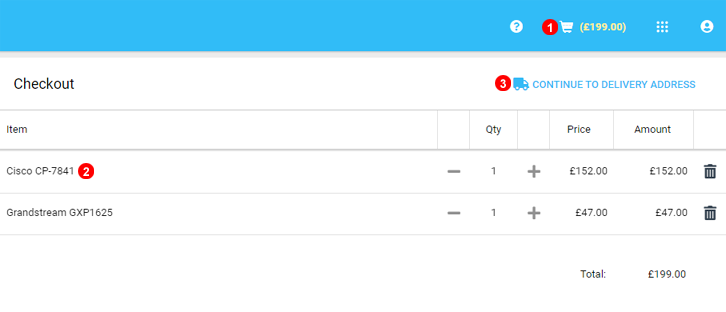
Phone checkout and delivery
- Click
checkoutbutton. Just in case checkout window it is not already open. - Review item description and quantity.
- Click
Continue to delivery addressto introduce delivery details
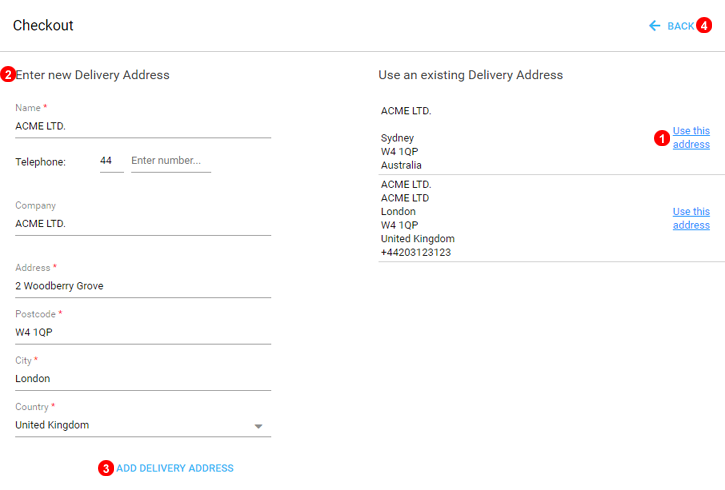
- Click to use a previously saved address.
- Fill with the address details
- Click to
Add the delivery address - Click to come back to the Check out window.
Checkout window will update and add the delivery charges according your items and delivery address. Now system allows you to finish payment procedure using:
- Click back to make any changes.
- Pay using Business Account.
- Pay with a new or saved credit card.