Settings - Routing Rules
Routing Rules can be used to overwrite default settings for inbound and outbound call routing based on pre-defined conditions.
The Following Image will show the basics on how to navigate routing rule settings.
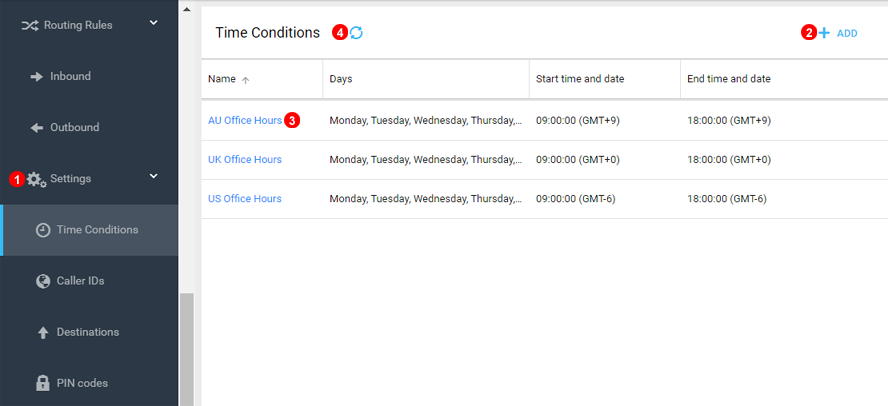
- Routing Rules settings can be accessed by expanding the settings menu.
- Use the add button to create new conditions.
- To edit or delete any existing conditions simply click on the name.
- If any settings don`t show immediately the refresh button will get fresh data from the server.
Before you can start adding Routing Rules you would need to create condition objects - please see detailed instructions below.
Time Conditions
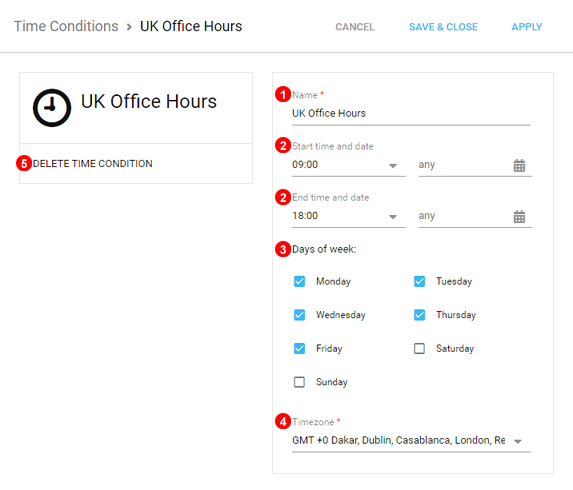
In order for routing rules to be triggered only during specified time window Time Conditions need to be defined as described below:
- Enter unique name.
- Select when time window should start and end from the drop down list or click to introduce an specific value. Date part is optional.
- Select which days of the week rule will be active.
- Time`s specified will be in accordance to selected Timezone.
- Click Delete to remove the Time Condition.
Caller IDs
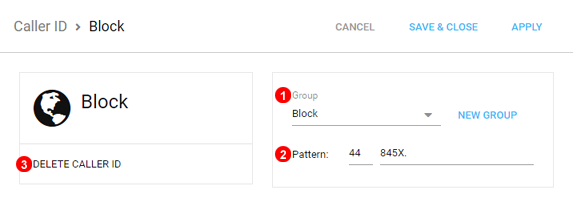
In order to match inbound routing rules based on the Caller ID (number where incoming calls are coming from) follow steps below:
- Optionally select or create a group.
- Enter Caller ID number or pattern that will match Caller ID number. Characters listed below are interpreted as a pattern rather than a literal:
X- any digit from 0-9Z- any digit from 1-9N- any digit from 2-9[1235-9]- any digit in the brackets (in this example, 1,2,3,5,6,7,8,9)X.- (dot) one or more of X - for example +442X. will match any number starting with 442
- Click Delete to remove the Caller ID condition.
Destinations
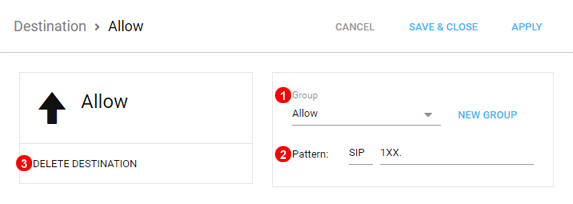
In order to match outbound routing rules based on number dialed follow steps below:
- Optionally select or create a group.
- Enter destination number or pattern that will match dialed number. Characters listed below are interpreted as a pattern rather than a literal:
X- any digit from 0-9Z- any digit from 1-9N- any digit from 2-9[1235-9]- any digit in the brackets (in this example, 1,2,3,5,6,7,8,9)X.- (dot) one or more of X - for example +442X. will match any number starting with 442
- Click Delete to remove the Destination Condition.
PIN Codes
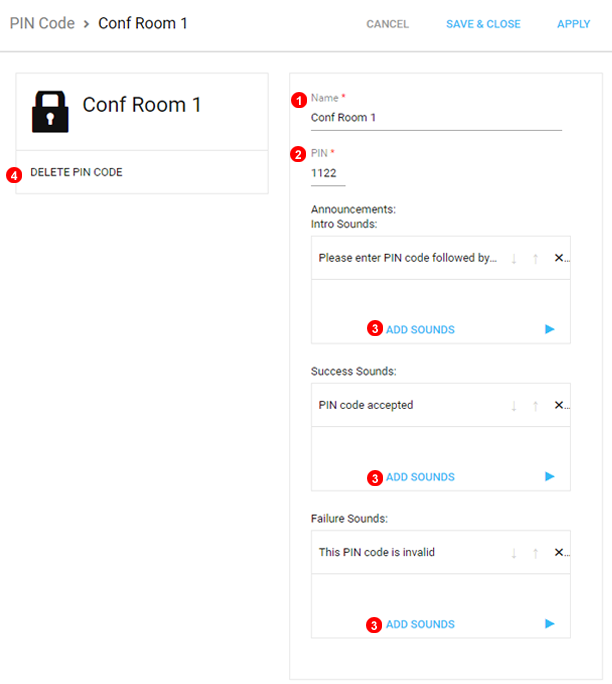
In order to protect inbound call route with a PIN Code follow steps below:
- Enter unique name.
- Enter 4 digit long PIN code.
- Pin Code Groups can be created to assign several pin codes together.
- Configure the destination if Pin is entered correctly.
- Change the caller ID of the caller to Anonymous so agents are unable to identify the caller.
- Set the Pin to Single use, after a successfull call a second attempt will fail even if the correct pin is used.
- Set an expiry date and time for the pin allowing an access window.
- Custom intro sounds can be added providing the caller with Directions.
- Add a custom sound informing the caller if pin entered was correct.
- Notify the caller if the pin entered was invalid with the default sound or a custom one.
Once a PIN Code is created it can be selected in drop down show as (5) in Figure 23.7 below.
Inbound
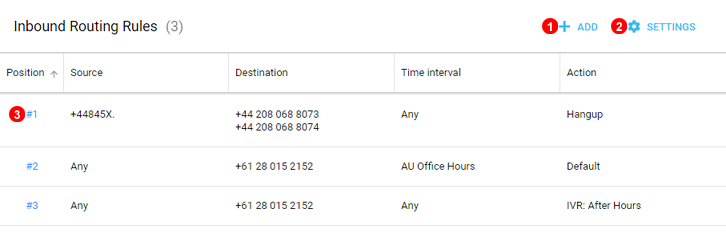
Inbound Routing Rules can be used to overwrite default settings for inbound call routing based on pre-defined conditions.
Add
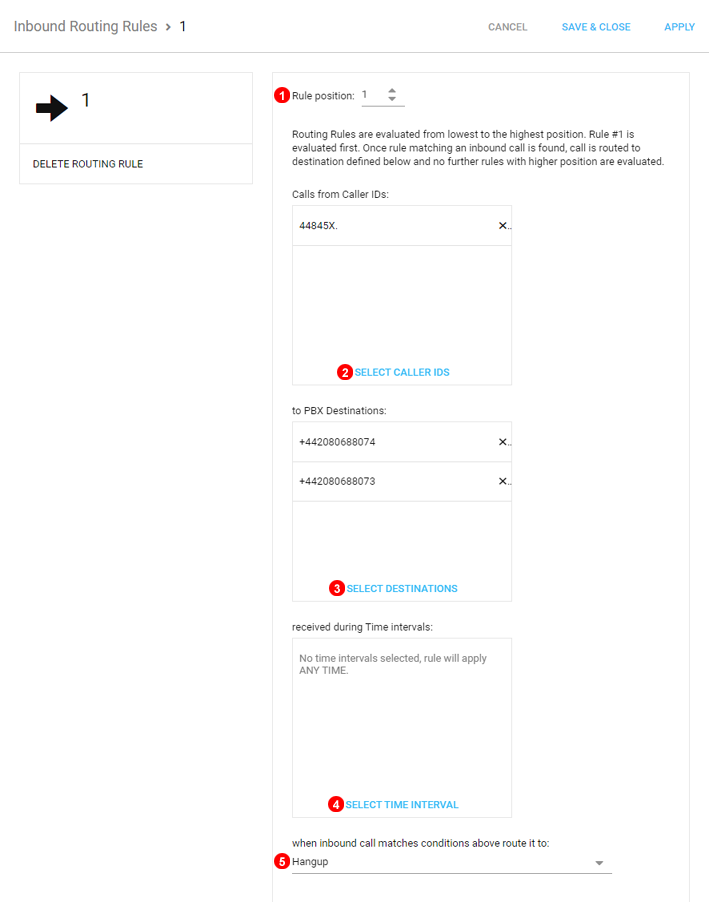
To create Inbound Routing rule click Add Rule button shown as (1) in Figure 23.6 above and follow steps below:
- Set rule position. Rules are evaluated from lowest to highest position.
- Select Caller IDs which should trigger this rule.
- Select PBX destination which this rule should apply to.
- Select time interval during which this rule should be active.
- Select destination for inbound calls matching rule criteria.
Edit
To edit Inbound Routing rule click icon shown as (3) in Figure 23.6 above.
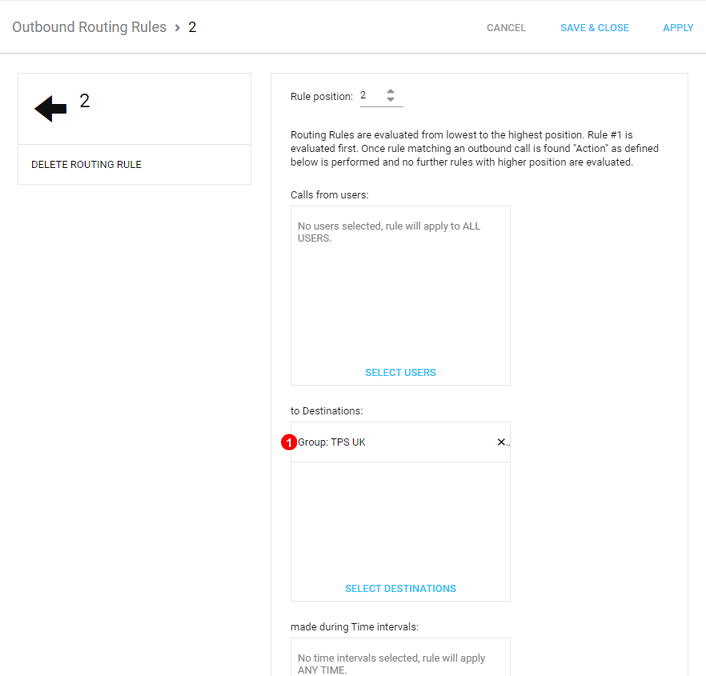
Outbound
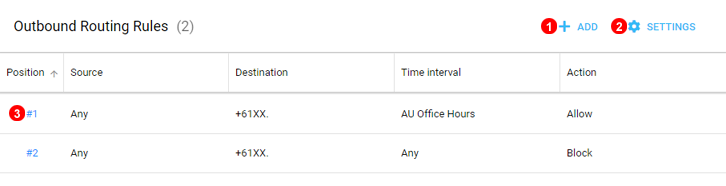
Outbound Routing Rules can be used to define permission for outbound call routing on pre-defined conditions.
Add
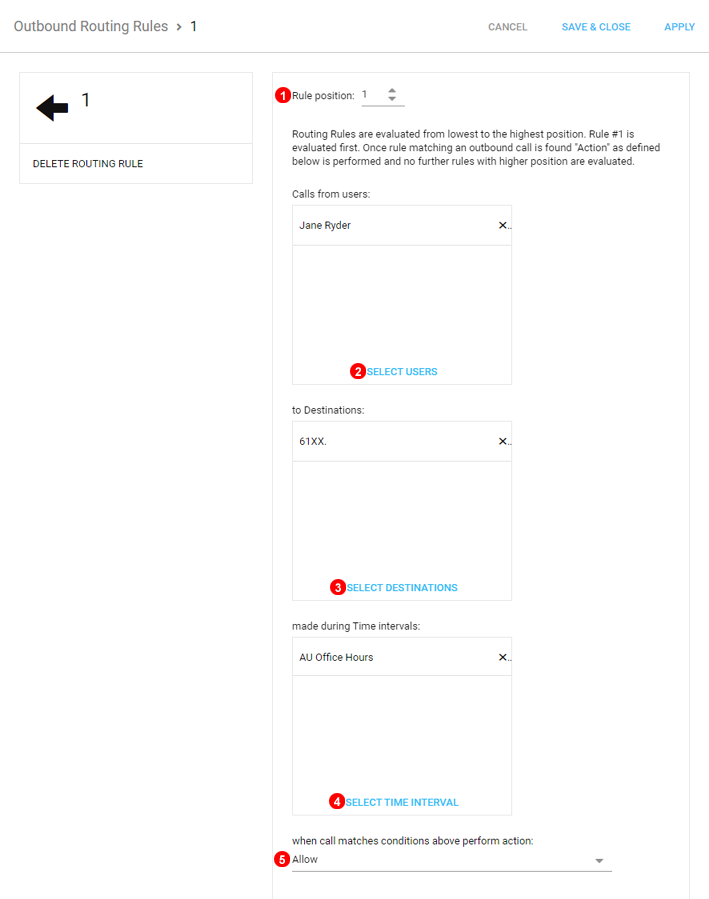
Follow steps below to create outbound routing rule:
- Set rule position. Rules are evaluated from lowest to highest position.
- Select Users who this rule should apply to.
- Select destination numbers which this rule should apply to.
- Select time interval during which this rule should be active.
- Select action for outbound calls matching rule criteria: Allow or Block.
Edit
To edit Outbound Routing rule click icon shown as (3) in Figure 23.8 above.
TPS UK
The TPS or Telephone Preference Service is a database where owners of numbers have specified they do not wish to be contacted with any Marketing or indirect Sales calls - see https://www.tpsonline.org.uk/ website for further details.
This is part of an Ofcom regulation that has severe penalties if not adhered to.
VoIPstudio platform is updated daily with over 2+ MLN numbers present in TPS database. This allow to create a simple Outbound Routing Rule that will automatically block any attempts to call to numbers on this list.
Example of this setup can be seen here: