Integrations - Zoho
In this chapter you will learn how to integrate Zoho Products - Zoho CRM, Zoho One, Zoho Recruit, Zoho Mail, Zoho Desk, Zoho Bigin and more - with VoIPstudio.
Configuration
- If you do not have an account with Zoho, first create one at https://www.zoho.com/signup.html
-
Login into your Zoho account and follow steps below to activate PhoneBridge
-
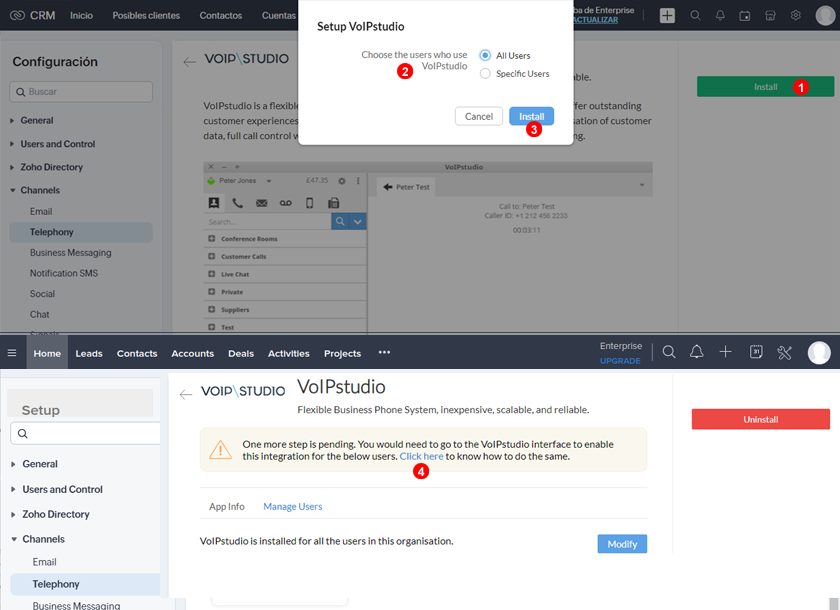
(1) Click "Setup" icon in the main navigation
- (2) Click "Telephony" in "CHANNELS" section
- (3) Under search area look for "VoIPstudio"
- (4) click to Install

- Confirm installation by pressing 1.
- Select to install Phone integration globally or for specific user.
- Confirm installation.
- There is no further configuration of PhoneBridge from Zoho side. Please proceed now to VoIPstudio steps bellow.
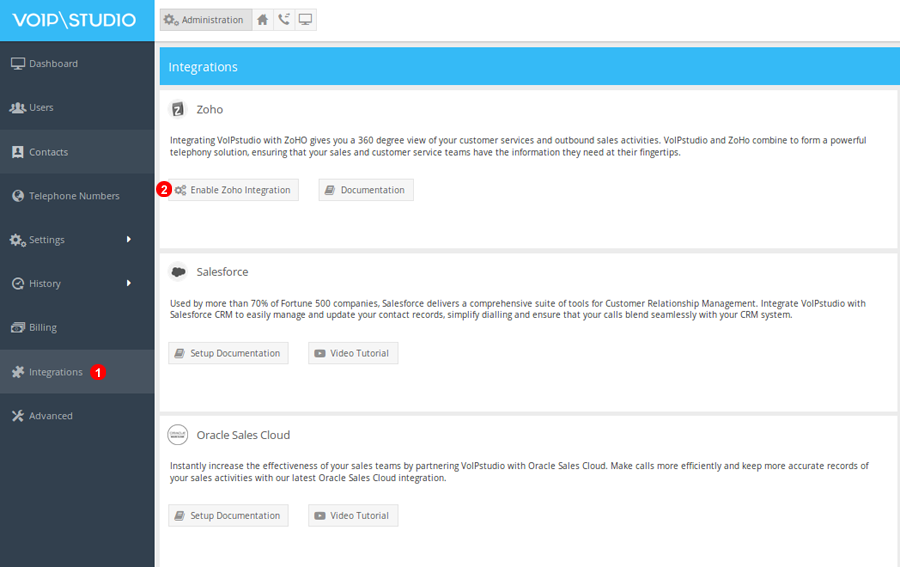
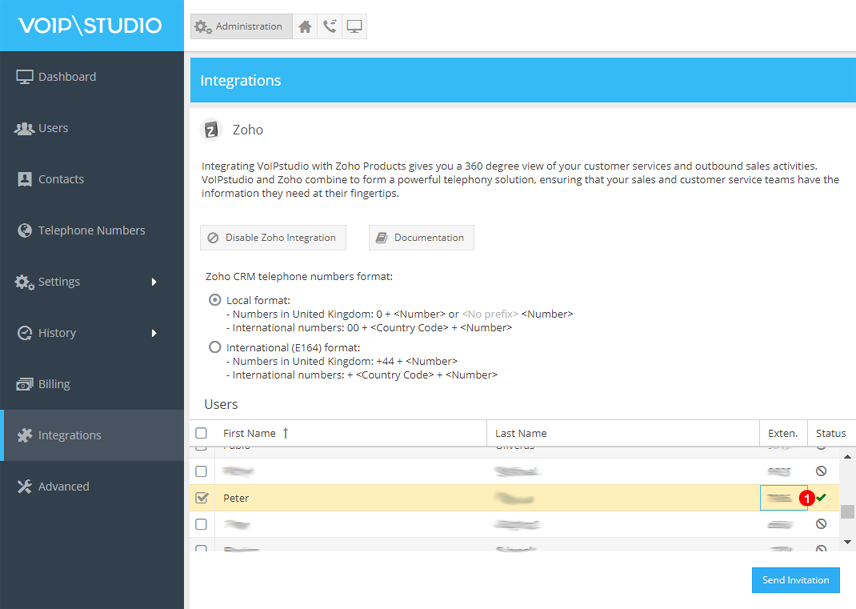
- After enabling Zoho PhoneBridge with VoIPstudio app, log in to your VoIPstudio account and from the Administration Dashboard, navigate to Integrations (see point 1 in Figure 75.3 below) and click the Enable Zoho Integration button as per point 2 of picture 75.3 below.
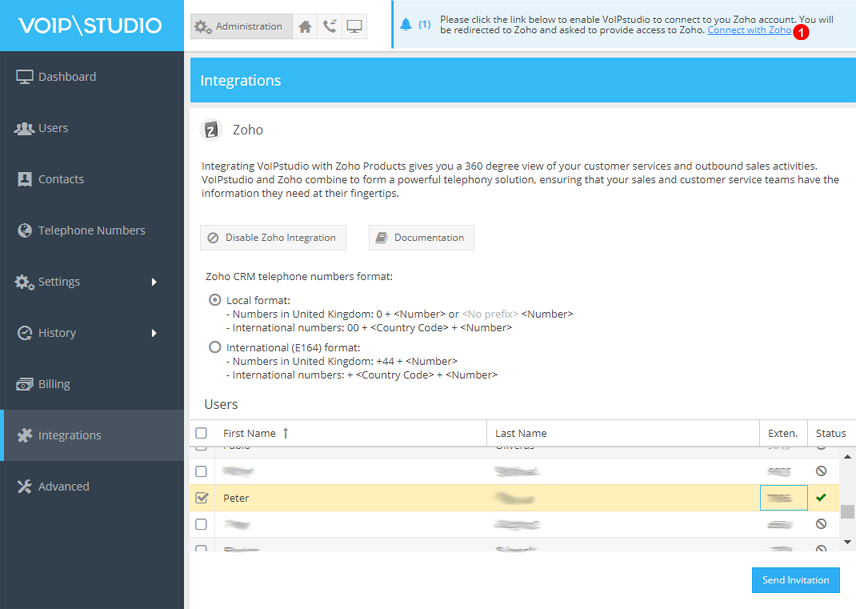
- First select the number format used when saving contacts in Zoho. This can be National or International as shown by point 1 in the picture. Select the users you want to invite to connect Zoho as per point 2 and click
Send Invitationas per point 3. You will also see the current status of the invitation in the Zoho invitations grid.

- You should receive an email with an invitation link. Alternatively, click Connect with Zoho from the Notifications Bar on the top of VoIPstudio as per point 1 of picture below.
- When you click the link from the email or from Notifications Bar you will be redirected to the Zoho login page.
- Log in to Zoho with your credentials.
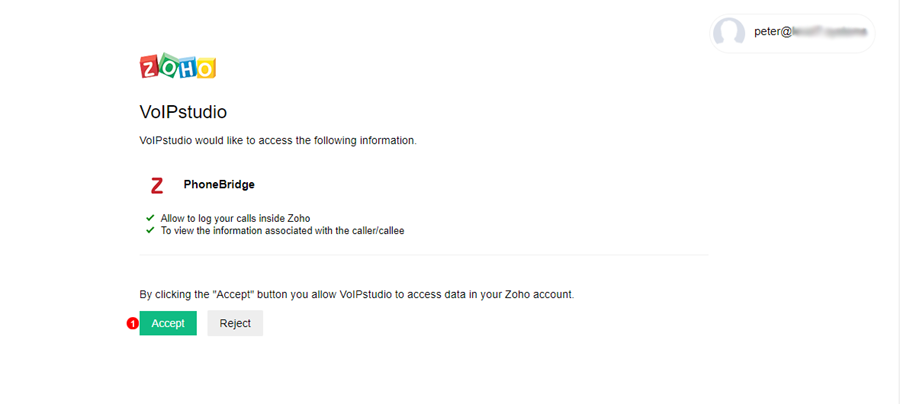
- Click accept to enable PhoneBridge as in the picture below.
- You will be redirected to your VoIPstudio account and after successful authorization you should see the pop up as below.
- The Authorization Status for the user should change to confirmed as on the screen shot below
Supported features
NOTE: For Click to call to work a Software or Hardware Phone will be required along with the Integration.
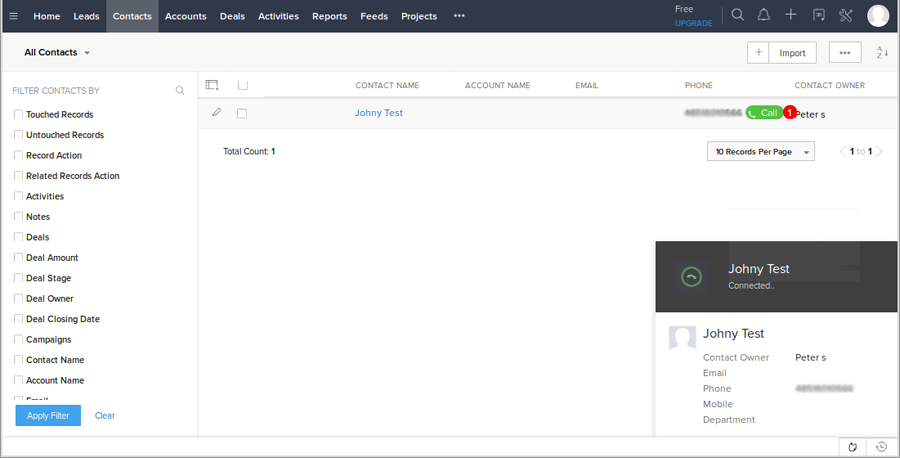
- Click to call - within the ZoHo interface, just click the number as shown in point 1 of the screenshot below and our softphone will start ringing with a Click2Call invite. When you answer the call on our soft-phone, it will begin ringing the number you have selected from Zoho.
Troubleshooting: If the message agent is offline is displayed then it would mean the User does not have a Phone online this could be our Desktop application or a hardware Phone.
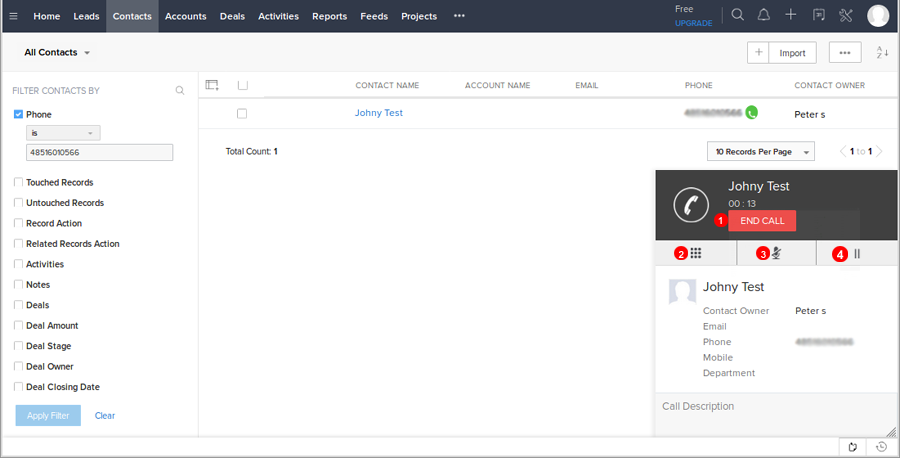
- Full call control is supported within the ZoHo interface - Calls can be terminated(1), DTMF tones (for IVR menus etc.) can be sent (2), calls can be placed on-hold(3) and muted (4) without leaving the ZoHo interface.
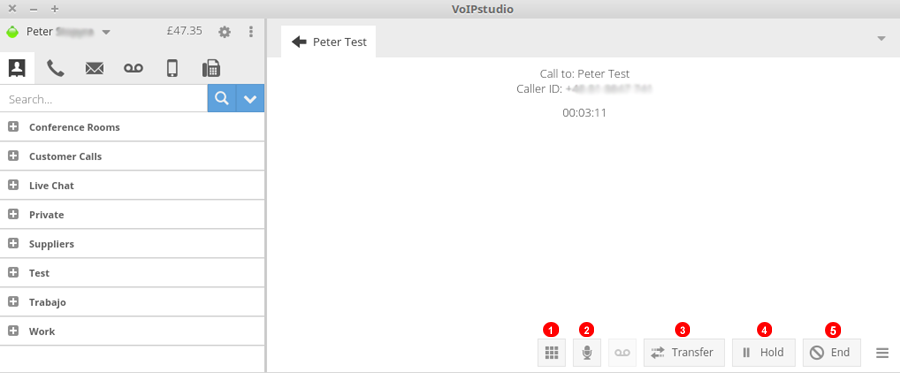
- Alternatively call control is supported as usual with the VoIPstudio Desktop Softphone. AThe screenshot below illustrates how to send DTMF(1), mute the call (2), transfer to another agent (3), put the call on hold(4) and terminate the call.(5)
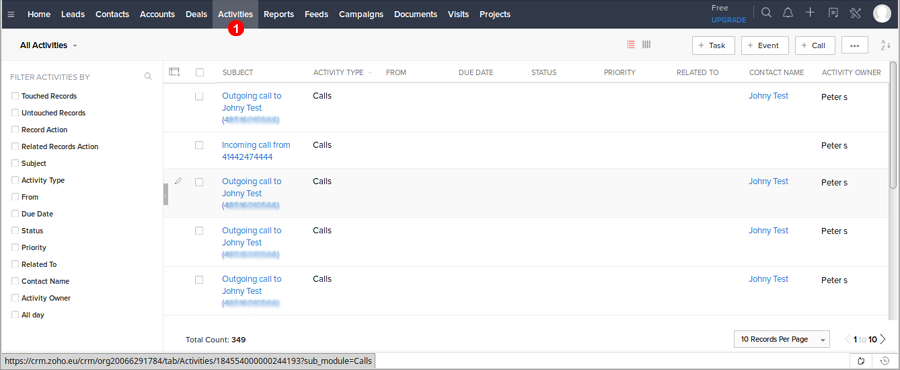
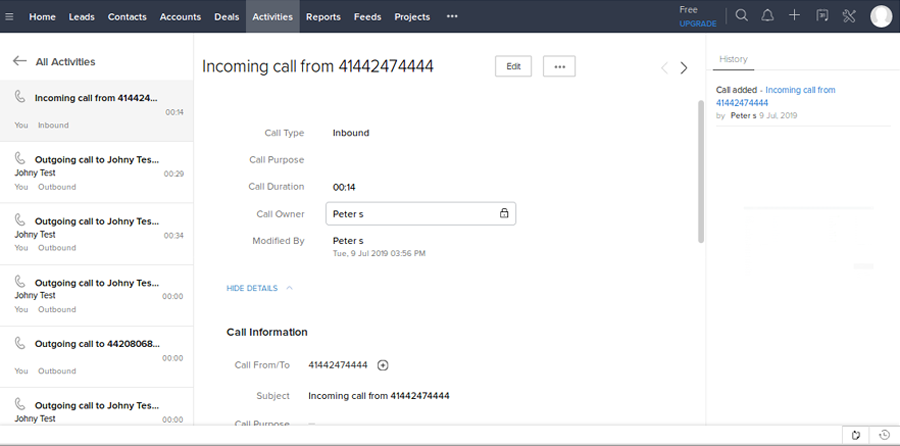
- Call history. All incoming/outgoing calls are visible and logged in Zoho. Simply navigate to the 'Activities' section of the ZoHo interface where you will find various call view options. If 'call recording' is enabled the VoIPstudio app, you will be able to listen to recordings of your calls.
- Adding and editing contacts from incoming calls
Zoho Allowed IPs
As an additional security mechanism Zoho allows for the restriction of IPs from which services are accessible.
In order for the telephony integration to work customers using this Zoho security mechanism will need to add VoIPstudio server IPs to Zoho trusted IP list.
See VoIPstudio IP address that need to be allowed:
- 134.19.166.144
- 134.19.166.145
- 134.19.166.149
- 134.19.166.161
- 23.105.180.104
- 23.105.180.105
- 23.105.180.109
To edit allowed IPs on Zoho:
- Login to Zoho CRM with admin privilege.
- Go to Setup > Users and Control > Security Control.
- Go to Allowed IPs, then click Add IP address.
- Enter the required IPs.
- Click Add.
For further details please check Zoho article on this link