Contacts
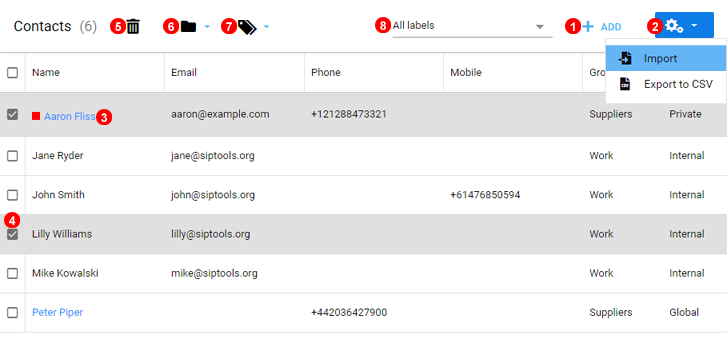
Figure 4.1 Contacts panel.
Here you can add contacts or view and edit their settings:
- Click
Add Contactbutton to create new contact record. - Click
Import ContactsorExport Contactto bulk create contacts from and to .csv file. - To edit existing contact click icon shown as
(3)in Figure 4.1 above. - Click to select all contacts or select single or more contacts.
- Click to delete selected contacts.
- Click to open available groups and move selected contacts to that group.
- Click to open the Labels menu to quick assign and manage Labels.
- Contacts can be filtered using specific labels.
Supported Formats:
- Microsoft Outlook O365/2016
- Google contacts
- CSV simple format with following fields
- First name
- Last name
- Phone
- Mobile
- Group
- Labels
- Company
Note: Example contact CSV template is offered. Please submit support ticket to inquiry additional details.
Add
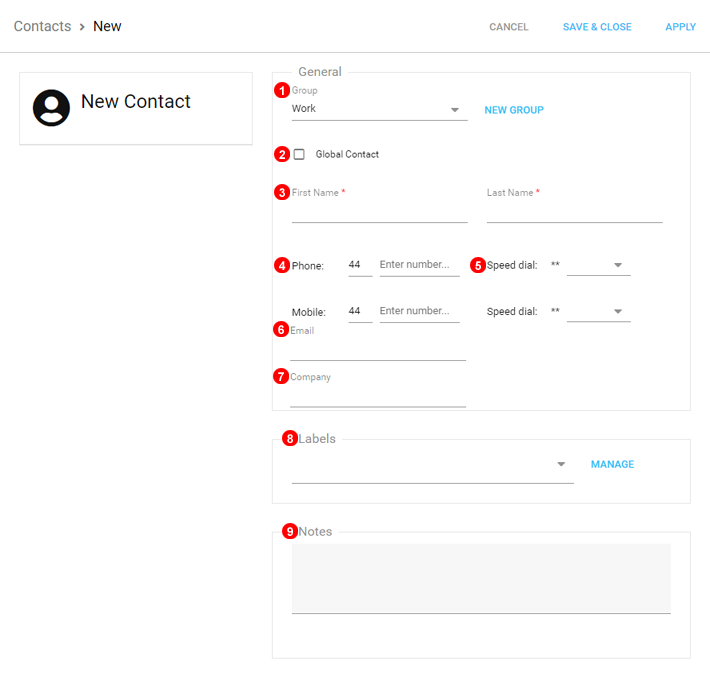
Figure 4.2 Contacts add.
To add new contact click button shown as (1) in Figure 4.1 above and follow steps below:
- Select contact Group from drop down list or click
New group. - Contact will be added as Private by default and only viewable by the User that added it, selecting Global Contact makes it available to all Users on the account.
- Enter contacts name.
- Enter phone number.
- Optionally assign Speed dial. Everyone within your organization will be able to call this contact by dialing
**NNwhereNNis speed dial number1 - 99 - Optionally enter email address.
- Assign Company Name to Contact if Applicable.
- Allows for managing and assigning labels to a Contact.
- Enter any additional notes if required.
Edit
To edit exiting contact click icon shown as (3) in Figure 4.1 above.
Labels
Labels allow for quick and simple filter and management of Internal(Users) and External(Clients) Contacts.
To start simply select Manage labels from the dropdown shown with Number 7 in Figure 4.1 Above.
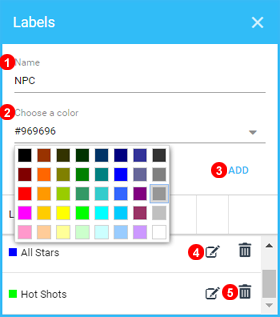
Figure 4.3 Contacts Manage Labels.
- Select a name for the new Label.
- Choose a Colour associated with this Label from the dropdown list, Once selected it will display using the HTML Hex code for that colour.
- Click add to Finalize the new Label.
- Click to Edit any existing Label.
- To Delete a Label simply click the Delete button.
Import
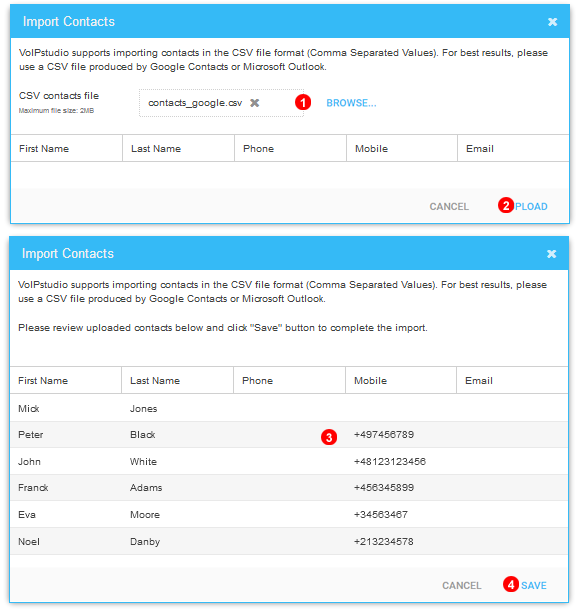
Figure 4.4 Contacts import.
To import contacts from .csv file click icon shown as (2) in Figure 4.1 above and follow steps below:
- Select file to import.
- Click
Uploadbutton. - Review imported contacts if all data has been parsed correctly.
- Click
Savebutton to complete the process.